Category Archives: Recipes

Journey continues, onto all grain

Yesterday I finally did my first all grain brew. It’s been a long time coming and Chas has already done a couple all grain brews. I’ve been putting it off for a while. That’s partly because I was trying to knock out a few batches I’ve been thinking about. The other part was because I didn’t have a pot big enough to do a proper batch. Now that’s all sorted it was time to go all grain.

American Brown Ale done

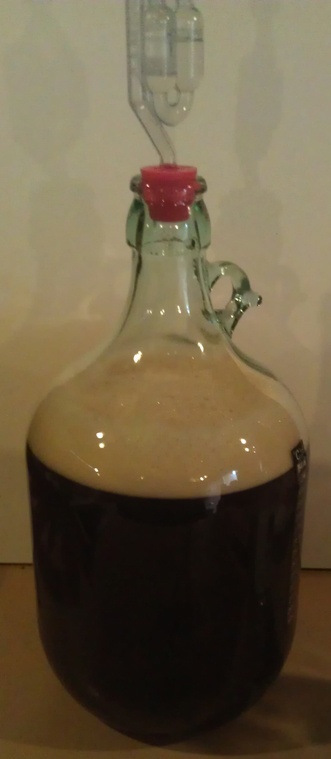
American Brown Ale done in the carboy

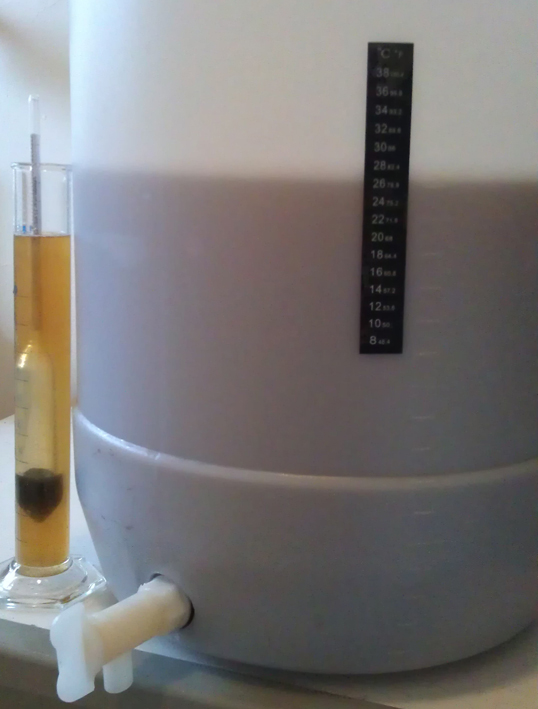
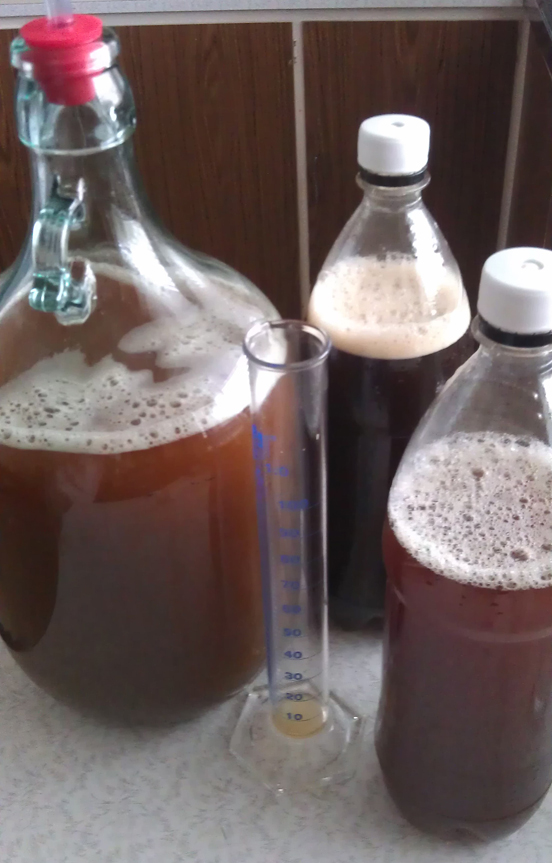
Before I get into that, we also bottled the American Brown Ale. Didn’t bother with bulk priming due to the small batch size. Carbonation drops into bottles liquid in an capped. The final gravity came in at 1.022 which was a bit higher than the 1.014 expected. Final alcohol will be 4.6% and I’m happy with that.

So, my first all grain brew was a brew-in-a-bag (BIAB) style. The recipe is part of a Research and Development brew, an American Pale Ale, with a few home brewers from work. The idea is that we all brew with the same grain ratios and IBU target but with different hops. Due to my ‘small’ 19 litre pot I did an eight litre batch, rather than the 16 litre version the others did. Given my fascination in Vic Secret hops, that was the hop selection for me. The recipe is below.

  • 1.8 kg Joe White Traditional Ale grina
  • 0.15 kg Joe White Cara grain
  • 4 g Victoria’s Secret hops (for 60 min)
  • 11 g Victoria’s Secret hops (for 20 min)
  • 13 g Victoria’s Secret hops (for 5 mins)
  • 1/2 pack of Safale US-05 yeast
  • 14 g Victoria’s Secret hops (for dry hopping at day 7)
R+D Vic Secret mash

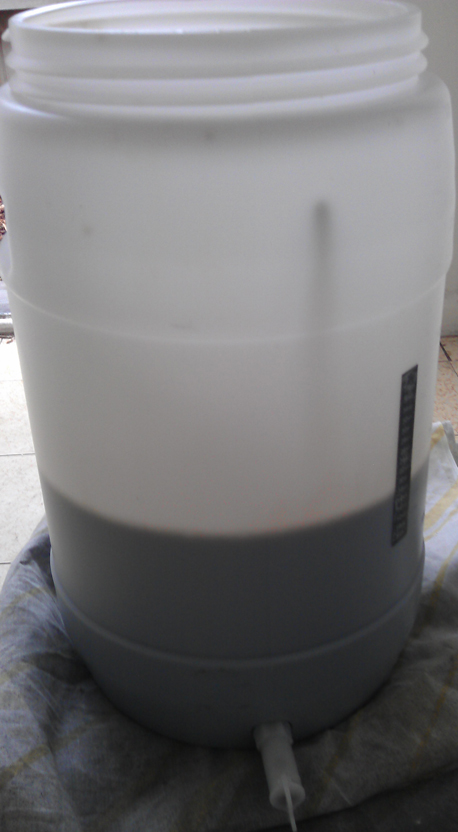
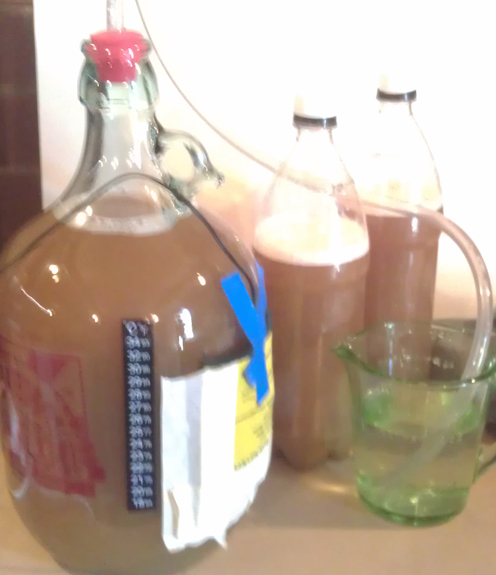
Home Brewers R+D Vic Secret mash in the pot

The brew was a very long one. Longer than I expected. Main reason is it took an hour to get the 14.4 litres of water for the mash. Reason for that was I want to filter all my water before I use it and I didn’t get any prepared before hand. Once water was ready we brought it up to about 69-70 degrees Celsius. Grain bag went over the pot and grain in. This sat in the pot for about 60-65 mins at 67 degrees Celsius. It was meant to be at that for 75 mins but there was too much head added and the last 10-15 mins it got up to about 72+ Celsius. Mash out was meant to be 75 Celsius, so we called it done at that point.

There was a lot of liquid that was at the start of the boil. The recipe said it should be about 13 litres. After the boil it was meant to be 10 litres, then batch size of 8 litres. Not sure where the last two litres were meant to go. If anyone has some info on this please post below.

Due to the excess water we let the boil go for about 30 or so minuets before first hops. This was to try and reduce liquid, which was a good idea. The hop additions went pretty smoothly. My alarm wasn’t loud and missed a couple additions by a couple minuets here and there. Shouldn’t make much difference. Also used some Brewbrite to clear it out. Added a teaspoon to a cup of water and dissolved it. Then into the boil with about 5 mins to go.

Chilled the wort down by putting the pot in an ice bath. This was pretty good. Also added some big blocks of ice to the wort directly which worked a treat. It was only later that I realised this was a problem. Once down in temperature the wort was poured into the fermenter and I realised that I had way too much liquid. It came in at 13 litres! No surprise that the gravity reading came in a lot lower than expected. It was 1.033 and should have been 1.049. That’s a big difference.

The re-hydrated yeast went in along with the yeast nutrient. I’m expecting, or rather hoping for, a good conversion from the yeast. If things go well it should reduce down to 1.008 and that means after bottle conditioning It should be about 3.5% alcohol. Will wait and see.

-Mikey


Tagged , , , , , , , ,

Long time coming, long time to wait

Since very early on home brewing I’ve wanted to make a good lager. After a bit of looking about, reading up on it and asking a few other brewers I decided to dive in.

The first attempt was as part of basic home brew kit. It was more of a very pale ale rather than a lager. The yeast was from a kit can and then it was fermented with out any temperature control. It turned out a bit rough and didn’t get much better with age.

Since that brew I wasn’t  in a rush to do another lager. Reading up on the process others use, strict temperature control and long term storage, really tuned me off. Then a fellow home brewer, Carnie Brewing, posted on his blog about his attempt and quick turn around. That got me interested again.

Pseudo Lager boil

Pseudo Lager boiling away on the stove

Yeast was the main sticking point. I didn’t want to do a big batch in case I stuffed it. So, I decided to do a trial run with US-05 at a low temperature. Due to using ale yeast, instead of lager yeast, I’ve decided to call this Pseudo Lager. If it turns out well I’ll look at doing a bigger batch with proper lager yeast.

  • Amber Dry Malt – 600 grams (60 mins)
  • Light Dry Malt – 300 grams (10 mins)
  • White Sugar – 1.1 kilograms (10 mins)
  • Victoria’s Secret hops – 5 grams (60 mins)
  • Crystal hops – 10 grams (flame out)
  • US-05 yeast – about 3-4 grams

This was a pretty basic brew. For a quite some time I played around with the idea of splitting out the hop additions into three, but stuck with two as I wanted to highlight the Crystal hops at the end. The 5 litre boil was for 60 minutes so was able to get enough bitterness (IBUs) from the little Victoria Secret hops at the start. All the amber malt went in at the start. The malt selection was based on what was in the house. Originally I thought there was more light malt, but that wasn’t to be. Light malt was added at the end with the sugar, which was there to keep the finish dry and alcohol up.

Pseudo Lager fermenter

Pseudo Lager done and in the fermenter

Before the boil started I re-hydrated the yeast. I added in a little bit of light malt to try and get some yeast starter going. As this was only for about one and a half hours I’m not expecting much.

Cooling went very well. The process I’ve got to dump a lot of ice directly into the wort seams to work well. Got a bit excited and poured the whole wort in without sieving out the hops. Whoops. Then I realised as I was filling up the fermenter that I forgot the Crystal hops! Uh Oh! So, I just dumped the hops into the fermenter and continued filling it up to 16 litres. I suppose it will be something like flame out/dry hopping. Hopefully.

The gravity reading came in at 1.049 which is exactly what the recipe said it would be. Due to all the sugar in there it should ferment out to finish with a gravity of 1.005. That would be about 6% alcohol after bottling. That’s exciting for a lager.

I deliberately left this in the shed with no heating. The temperature out there drops down a fair bit. Down to maybe 10 degrees Celsius, or less, overnight. Then during the day up to a maximum of 18 degrees Celsius. I’ve left this on purpose to help keep the yeast working at a larger-like temperatures. Not sure if this will do anything other than drag out the fermentation.

After two days the beer is bubbling away. It’s very slowly doing that, but it is happening.

-Mikey

Tagged , , , , , , , , ,

Something easy for winter, brown ale

A few days ago I made a mistake with bottling the Super Stout. There’s a chance that it won’t taste good. I want to have something darkish to enjoy over the rest of winter. So it was time to do a back up brew, something a bit basic and small. Enter the idea of doing a brown ale.

I spent a while playing around with a recipe ideas. In the end I decided to go with a really quick 30 minute boil and only two hop additions. Plus to keep the length of time down I wanted to do just four litres. Another factor keeping it simple and quick is to only use malt extract, in this case it was dry malt extract (DME).

American Brown Ale

American Brown Ale in the carboy

With the ingredients I had at home I couldn’t do an English style brown ale. Therefore I went with creating an American Brown Ale. Ingredients listed below.

  • 600 grams of Dark DME
  • 3 grams Warrior hops (30 mins in boil)
  • 2 grams Crystal hops (flame out)
  • 1 teaspoon of kit yeast
  • 1 teaspoon of yeast nutrient

Some people really don’t like using kit yeast. For me it was easy because (1) I had some at home and (2) it’s a very basic darker beer. The darkness of the malt will help hide some of the less desirable flavours of the yeast, I hope.

This was a three litre boil. First in went 400 grams of the DME. After the hot break went in the Warrior hops. Twenty minutes later the rest of the DME went in. Ten minutes after that flame out. Crystal hops went in. The pot was moved to sink to chill in cold water. About three trays of ice dropped directly into the wort. Only had to replace the water once for chilling. I was happy that it got down to about 22 degrees Celsius quite quickly. Then poured the wort through a sieve into the glass carboy which was then topped up to four litres.

While all that was happening the yeast and nutrient was re-hydrated in some water on the side. Before pitching in the yeast took a hydrometer reading which came in at 1.054. This should come in around 5.8% after bottling. That’s going to be stronger than the Super Stout!

This was a very quick brew and only took about two hours to do. Was done by myself and I like that it was so quick. The wort tasted basic as expected. There’s not a lot of hops in there and plan was to keep bitterness down. Fingers crossed that this one turns out well. Will know in about a month.

Keep an eye out as I’m going to be doing a lager style ale in the next few days.

-Mikey

Tagged , , , , ,

Back to black, brewing Super Stout

Back from holidays. Back to brewing. Back to black.

Yep, Saturday was the first weekend back from a two week holiday overseas. It seamed like a perfect idea to get Chas over and brew again. Plus we were able to do another dark brew. Super Stout was the brew for the day, and is was very dark brew indeed.

Super Stout 1

Super Stout 1 in the fermenter waiting to be topped up with water

Last dark brew I did was the Baltic Porter #2. That was back in November, nearly six months ago. That’s running very low and will likely be all gone by the time the Super Stout is ready to drink. The weather is getting right for stouts and porters, it has already gotten pretty cold here in Melbourne. But that might have more to do with the temperature difference between the holiday overseas verse back home.

The brew day was a simple and easy one. Did a kit from Brewcraft / Liquorcraft / Australian Home Brewing… I’m always getting confused by their name. I’m just going to continue to refer to that company by their official company name, Australian Home Brewing Pty Ltd. Anyway, the kit was their Super Stout. Got this one as a gift for Christmas. Didn’t want to wait much longer before using the ingredients. Apparently liquid malt can go a bit funny if it’s been in a can too long. Yeast was fine as I kept in the fridge since December.

The kit comes with everything you need.

  • 1.7kg can of Black Rock Miners Stout
  • 1.5kg can of Black Rock Dark Liquid Malt Extract
  • 500g Corn Sugar
  • 10ml liquorice extract
  • Safale S-04 (whole 11g pack)

A fairly simple kit and very easy to make. The liquorice was unexpected. I’ve seen it as an ingredient in home brew shops before but wasn’t game to try myself. Given that it’s included in a lot of stout recipes I’m sure it’ll be fine. We’ll wait for the tasting review.

Process for this brew is very simple. Boil 2-3 litres of water. Heat off. Add both cans of liquid malt. Add corn sugar. Stir until dissolved. Add to fermentation vessel. Top up to 18 litres. Add licorice. Stir up really well. Gravity reading. Pitch yeast. Done.

The whole brew was all done in about an hour. Topping up the water was nearly the longest process. There was plenty of ice and ice cold water ready to chill. The delay was getting the rest of the water filtered. The water quality isn’t the best here due to the pipes. There is only one filtering jug and it takes time. Might need to prepare that better next time.

Gravity came in at 1.064. That’s pretty good. The instructions pack said final gravity would come in around 1.025 – 1.030. If that’s the case I’m looking at a beer that will be around 5.0% to 5.6% after bottling. That’s okay, but was hoping for something a bit higher for a stout. I drank some of the gravity sample and it tasted great. Dark and sweet, exactly what you’d expect.

There was some beer tastings as well. Cracked open a bottle of Chas’s basic pale ale. Also tried my Australian IPA. Both reviews should make their way up over the next week or so.

Overall it was a relaxed brew day. Nothing complex. Nothing boring. Nothing special. Two guys making a beer and taking it easy. Nice.

-Mikey

Tagged , , , , , ,

Back to Basics – Basic Pale Ale (take 1)

Oh the humble pale ale!

While it is in fact lager that is the most widely made and consumed beers, it’s probably the pale ale that has the most variants and allows itself the most experimentation – at least according to me.

Because of this, the pale ale is great place for experimentation and a great way to learn more about the craft of beer making.  While Mikey and I have done quite a few brews, of course we still have quite a bit to learn.  So it’s been decided to make the most basic of basic pale ales and work our way up from there.

Keep in mind, yes, Mikey has been been experimenting with “basic” pale ales.  His is an exercise in playing with different hops, seeing how they go as a single hop, and seeing how they interact.  This is an exercise in making a very basic recipe, and building on that very same recipe.

Yes, this is a basic one – just some traditional pale ale malt and some hops.  What hops to use was an educated guess.  We’ll see how it tastes and develop from there.

The Basic Pale Ale

The following is for a four litre batch.

  • 1 kg traditional ale malt

    20140329_130047

    Mashing some grains!

  • 4 grams Chinook (bittering – 60 minutes)
  • 4 grams Cascade (taste – 20 minutes)
  • 4 grams Citra (aroma – 2 minutes)
  • US05 Ale Yeast

The malt was mashed at 65 degrees in five litres of water for 90 minutes.  We felt this was a pretty good rule of thumb to start with.  As mentioned, this recipe will be the skeleton for what will be developed into a unique recipe.

After the initial mashing, we sparged with another 1.5 litres of water.

This left us with 6.5 litres at the start of the boil, noting that this is a recipe for 4 litres!  Unsurprisingly we lost a fair bit of water in the boil and ended up with about 3.5 litres when it was added to the carboy.

We were aiming for an American Pale Ale style of hopping.  According to our calculations, the IBUs came in on the top end of the style, which is fine, especially as there will be some other great fruity, tropical, and pine flavours coming through with the hops.

I’m really keen to see how this turns out. I’m sure there will be some more flavours that we’ll want to add in there, but we’ll let the first batch tell us what those are and go from there.

20140402_192724

Tucked up and ready to go

-Chas

Tagged , , , , ,

Shopping, bottling, brewing, and not-beers

Was very keen to get this write up done early. And now it’s Thursday. Oh well.

Saturday was a funny sort of brew day. Had the Australia Pale Ale #4 to bottle and another 4 litre batch to produce. Then there were the not-beers, I’ll get to that later. Unfortunately there was no Chas. My good mate Ian stepped in again to help. That’s two brew days in a row, after not getting him over for the whole of last year!

Before any brewing or bottling a supply run was required. I headed around to Ian’s place. Then, after a coffee and breakfast, we headed off to Grain and Grape in Yarraville. I’ve been wanting to go to Grain and Grape for a while. For home brewers in Melbourne it’s a sort of institution, party because they’ve been around for ages, partly because they’re dirt cheap, and partly because it’s a bit odd. The place is small. Really small. And packed to the brim with stuff. Lots of equipment. And quite a few odd characters both in front and behind the counter. My only piece of advice, don’t go on Saturday unless you absolutely have to. It’s packed on Saturdays.

After leaving Grain and Grape we dropped some stuff at Ian’s place. Then I realised I didn’t pick up any speciality grains. So we went to Cellar Plus. It’s just north of the Vic Market. A lot more laid back place than Grain and Grape. Staff don’t know much about home brewing and the range isn’t the best. But you can pick up essential supplied, like the Crystal grain I was after.

Once done with supplies it was back to my place. First order of business was working out what to brew. Yep, left this one a bit late. Brew for the day was going to be one of three options; the next pale ale, an amber ale or an IPA. Ian was a last minute ‘yes’ to help out. If he was coming it would be something a bit more complex. If he wasn’t it was going to be something very basic. So, as Ian was there to help I decided on doing an IPA with Crystal grains. Had a look in the freezer and knew I had a lot of different hops. After playing around Kit & Extract Beer Designer spreadsheet I came up with an IPA recipe. Decided on a mixture with Warrior for bitterness then Aramilo, Citra and Simco. I’ve never used the last three and looking forward to tasting these. So, here we have the Australian IPA #1.

The steeping grains was the first order of business. Into a grain bag. Then Ian crushed them by rolling them with a rolling pin. Brought two litres of water to a bit over 70°C and chucked in the grain bag. Then we left it to go bottle.


Australian Pale Ale #4

Australian Pale Ale #4 all bottled.

Bottling the pale ale was straight forward. Another bulk priming job from carboy to the small fermenter with sugar then using the tap to bottle. Nearly got this process down pat.

The gravity for the Australia Pale Ale #4 came in at 1.011. I was expecting a low reading if the original reading was right. But it came in a bit too high. I’m even more convinced that the original reading was wrong. Anyway, from the readings I have this should be 4.0% after bottling. It had a very pronounced grapefruit bitterness and dryness. Going to be interesting to see how this one turns out.

Once bottling was done it was back to the brew kitchen. The grains had sat for more than the thirty minutes, but that didn’t matter. An extra litre if water went in and we brought it up to a boil. About a third of the dry malt went in. After the hot break the fist hops. Next hops 15 mins later. Rest of malt went in with 5 mins to go. Then final hops at flame out. Not trying the “no flavour hops” method, yet.

  • 3 litre boil, topped up to 4 litre batch
  • 700 grams Light Dry Malt Extract (275g at the start, 425g with 3 mins to go)
  • 4 grams Warrior hops @ 30 mins
  • 3 grams Amarillo hops @ 15 mins
  • 3 grams Citra hops @ 15 mins
  • 2 grams Amarillo hops @ 0 mins
  • 2 grams Citra hops @ 0 mins
  • 3 grams Simcoe hops @ o mins
  • 1 Teaspoon of re-hydrated US-05 yeast
  • 1 Teaspoon of yeast nutrients

Dry hopping

  • 4 grams Amarillo hops @ 3 days
  • 3 grams Citra hops @ 3 day
Australian IPA #1 & not-beers

Australian IPA #1 and the two not-beers ready to ferment

Chilling went very well. The two litres of half frozen ice and just over half a tray of ice cubes went straight into the pot. The pot also sat in the ice bath to help further. When it came to getting the wort into the carboy I tried something extra. Used a muslin bag for extra filtering. Put this at the bottom of the funnel. So, pot into sieve on funnel in muslin bag in carboy. Should have got a photo.

Shook up the carboy before taking a gravity reading. Was a respectable 1.058, just shy of target. Yeast was pitched, yeast nutrient put in, carboy given another shake, and airlock put on. First brew done.

Onto the non-beers! Let me give you some context. My wife loves malty beers and doesn’t like hoppy beers. The question was raised “could you make a beer without hops?” Well, you could technically make a brew without hops. Not sure if you would still call it a beer. Not sure if it would taste any good. Anyway, I decided to make two very small batches of no hop beer.

Australian IPA #1 with hop bag

Australian IPA #1 after three days with the hop bag

The first batch was with dry amber malt extract. Very easy. Boil water. Chuck in malt. Bring it to a hot break. Heat off. Cool in an ice bath. Put in fermentation vessel. Pitch yeast. Add yeast nutrient. Shake. Seal with airlock. Done.

Second batch was done with dry dark malt extract. Both were about 1.2 litres. Both went into soft drink bottles with Pat Mack’s Home Brewing Caps. Perfect set up for these super small experiments. After fermentation I’ll put these in glass bottles to condition.

After three days I went back to the Australian IPA. Time to dry hop. Was planning a 4 grams addition of Amarillo and Citra with a 50/50 split . Worked out a lot closer to 4 grams Amarillo and 3 grams Citra. Whoops. Hope that’s not too much. Ah well, I can just leave it a month to settle before drinking a bottle.

Was quite a good day. Great to have Ian around again. Glad to do a brew with some grains again. And happy to get the not-beers fermenting, even if I’m dreading what they’ll taste like. Talking of taste, the wort for the IPA was very hoppy and undrinkable. Good a sign. Will let you know how that one develops.

-Mikey

Tagged , , , , , , , , , ,

Back with more everything, and the Secret

Enough feeling sorry for myself, time to brew. Back on Saturday 9th we had a brew day at my place. It was a huge fun day, even if the brew we made was only four litres.

I finally managed to get my good mate Ian around for a brew day. Chas made it and my friend Michael was able to join us as well, which made four on the day. More than needed to bottle the cider and the new brew. So, plenty of mucking around was had.

First order of business was bottling the Sneaky Cider. Was another bulk priming job, I don’t think I’ll go back to individual bottle priming. Cider from carboy into the small fermenter with the sugar. Then bottled straight from there. I decided to continue my experiments with soft drink bottles. We filled two 1.25L bottles and the rest filled six stubbies.

Gravity came in at 1.004 which I’m really happy about. Was trying to keep the sweetness low on this. Bulk priming was done with possibly a bit too much sugar, will see. End result should be a cider of 7.8-7.9%. That’s a big kick for such little effort. Nice.

Onto the beer. Due to the mess that is Melbourne weather, I wanted to make sure this brew could be kept cool like the cider. That meant another small batch in the carboy. So, picking up from where I left off it was time for another Australian Pale Ale experiment.

A bit of a side note, I’ve been a little obsessed the last six months or longer with a new Australian hop variety. It’s called Vic Secret (or Victoria Secret, depending on who you ask) and first time I had it in a beer I was blown away. This popped up back in 2012 in a collaboration beer simple called Victoria’s Secret by Beer Here and Northdown (now Edge). A single hop beer. I only had one bottle and really liked it. The beer has just been re-released under the Edge name, with a slight tweak to the recipe. Since then there have been a few other breweries bring out beers with this new hop type. Anyway, I have been trying to get my hands on this stuff so I can make a single hop beer. It’s been very hard to find with a lot of home brew shops not even aware it exists. Then finally a friend found a place that has some. And now I have some.

Australian Pale Ale 4

Australian Pale Ale 4 in the carboy (with ice packs) after 3 days

Australian Pale Ale #4 is a single hop beer. That hop is Vic Secret. The hop is quite high on alpha acid, the bitterness. I was using the same base, light dry malt extract, as I did for the last two Australian Pale Ales. Hop additions were done at 30 mins, 15 mins and 1 min. Nice and simple.

  • 3 litre boil, topped up to 4 litre batch
  • 500 grams Light Dry Malt Extract
  • 3 grams Victoria’s Secret hops @ 30 mins
  • 2 grams Victoria’s Secret hops @ 15 mins
  • 2 grams Victoria’s Secret hops @ 1 mins
  • 1 Teaspoon of re-hydrated US-05 yeast

Michael suggested that the middle hop addition isn’t needed. He’s been doing a fair bit of research into brewing, does a bit of home brewing and has been helping out at some breweries. The idea behind not doing the mid point hop addition is that you’re not really adding any flavour. You can get this from the last hop addition. And you get more bitterness from the first addition. Or that’s the theory. Might give it a go. Expect a post dedicated to this, at some point in the next few months.

Chilling was a quick one. Having these small batches makes it a lot easier. This time there was a lot going on. Two trays of ice and an ice cream container of half frozen water went straight in. The pot sat in it’s bath to chill with ice packs.

Gravity came out at 1.038. Was originally disappointed. There’s a good chance that the sample taken for the reading wasn’t the best. After pouring the wort liquid into the carboy I top it off with water. You’re suppose to shake it before taking a sample so you get something mixed. This wasn’t done. Comparing it to both Australian Pale Ale #2 (1.044) and #3 (1.046), this was low. To put that in a bit if context, the difference of 0.008 in gravity is approximately equal to 1% alcohol. That alcohol helps give the beer a better body. Hope #4 turns out fine.

Like the last few brews the yeast was rehydrated. Somewhere around 1-2 cups of boiled water was put in a glass jug, covered and left to cool. Not sure what it got down to, maybe as low as 25°C. Then a teaspoon of yeast was put in. And to speed things up a teaspoon of the dry malt was also put in. That’s a very small yeast starter. By the time it went into the carboy there was already a bit of a krausen, yeast head.

Yeast in, airlock on, carboy into the big pot of water. Done.

This was a really fun day. Great company, lots of drinks (review of the Iron Curtain Imperial Red Ale within the week), BBQ chicken for lunch, some really dodgy music, and not a tricky brew. Hoping there’s a lot more days like this in the future.

And I’ll be bottling tomorrow. Exciting.

-Mikey

Tagged , , , , , , ,

Malted Cider 2 – let’s try this again

I’m baaaaaaaack!

Yeah, yeah, I know, it’s been awhile.  Mikey hasn’t stopped reminding me.  It’s mostly Mikey’s fault I haven’t been around in awhile.  As Mikey mentioned, brewing slowed down a bit over the summer, so there wasn’t much to write up.  Although I pushed through the heat and still did a couple a brews, giving Mikey an opportunity to write reviews for things like the Red Dog Pale Ale 2, since Mikey was slack, I had nothing to review.  Unfortunately I just got out of the habit… because of Mikey.

Anyway, nearly a year ago I mixed some apple juice with some liquid malt; I called it a malted cider, some call it a graft.  Either way it’s pretty tasty.

20140208_113144The recipe was about the same as last time, just with different apples this time.  Last time I got some organic apples, this time it was just a whole bunch of Pink Lady apples, they worked out pretty well.

I also changed up the method somewhat…

  • First, all the apples were chopped and let to sit for a few hours.  This just softened them up a tiny bit and I’ve been told this gives a slightly sweeter cider (otherwise it’s way too dry).
  • Next, we juiced all the apples, as would be expected!  In the pot and since there is a bit of froth (and eventual evaporation), it’s hard to tell how much juice there is.  So we didn’t add the malt right away.
  • We gave the juice a 10-15 minute boil to kill any nasties.
  • This went into the fermenter.
  • Golden light liquid malt was then added at a ratio of half a cup per litre of juice.
  • We then topped the fermtenter up with cold water at a ratio of one litre of water to one litre of juice.
  • Pitch some wine yeast and done!

It’s a pretty simple recipe!  All the chopping and juicing of the apples took a fair while.  It also made one hell of a mess but it was a bit of fun.

In the end we got a OSG of 1.053, which we were pretty happy about!  Considering we’ll probably get a pretty low final gravity, since the fructose in the apples will ferment almost completely, this cider should have some kick!

Let’s see what happens…

-Chas

Tagged , , , ,

Sneaky cider, keeping it cool

Exactly two weeks ago I made another cider. Yeah, I know I’ve been complaining that I haven’t done a beer for a while and then I go make a cider! This was a little experiment in keeping something cool enough over summer months. While it hasn’t really been that hot, or even warm, things have gone well.

The cider itself is a real basic one. One litre of apple juice and 1.4 litres of apple & pear juice. Added in sugar, yeast and yeast nutrient. Whole thing done in about 10-15 mins. To speed up the process I used the blender to mix sugar into juice, one litre at a time. As there’s no boil everything has to be sanitised, including the blender.

What’s in Sneaky Cider #1?

  • 2.4-2.5 litres of apple and pear juice (Berri)
  • 1-1.1 litres of apple juice (Golden Circle)
  • 180 grams of white table sugar
  • 1 teaspoon of Premium Brewer’s Yeast (Pat Mack’s)
  • 1 teaspoon of yeast nutrient

Learning from the mistakes of the last cider attempt, I kept sugar levels low. Worked out being only 20 grams per litre rather than the 120 grams per litre or 200 grams per litre of the last attempts. This should help in two ways. First it will keep the alcohol levels down to something considered normal. Second there shouldn’t be anywhere near as much left over sugar which will keep the sweetness down. It’s the second if theses that I’m really interested in. Last time it was undrinkable when first sampled. Then only just drinkable when it was done, but not for everyone.

Sneaky Cider #1

Sneaky Cider #1, in the carboy, in the water, in the pot

The really exciting part of the cider isn’t the recipe or how it might turn out. No, the real thing is the makeshift cooling set up. I’ve got my new big pot with water then put the carboy into it. The water goes up to about the same hight as the liquid in the carboy which means it works as insulation. That’s pretty sweet. But the best part is that I can drop ice packs into the water to chill the water back down, like during the day. And that’s what I did. For about a week and a bit I dropped 2-4 ice packs into the water every day. Well, nearly every day. The result was that the temperature ranged from about 17 degrees Celsius up to about 19 degrees Celsius. Not great control but, still good.

Now just gone two weeks I’m leaving the whole thing to do it’s thing before bottling this weekend. I’m half hoping as it gets warmer it encourages the last of the yeast to kick in or drop out. Not really sure how that stuff works, even after over a year of mucking around with the stuff. Then I’ll give it two weeks before we try and let you know how it turns out.

-Mikey

Tagged , , , , , , ,

Wait, what hops was that?

Last Sunday was a brew day. Yay! Fun times with Chas. Let’s plan this, and then make lots of mistakes. Um, that’s not so great.

This brew day was a continuation from Australian Pale Ale 2 and my search for an easy to brew tasty Pale Ale. After bottling on Friday, and having a sample taste, I knew that the next attempt needed to be a multi hop brew. And that meant different hops at the same times.

As well as trying a new recipe, I wanted to use the brewing caps again. That meant upping the volume of the brew. That caused some issues I didn’t realise until Chas pointed out. I’ll get to that later.

Australian Pale Ale 3

Australian Pale Ale 3 in Carboy and bottles with brewing caps

The brew was based on the Australian Pale Ale 2 and was a 30 min boil with light dry malt extract. Given the bigger volume of water there was more ingredients. Measured out 800 grams of the dry malt for the base. As most of my Galaxy hops went in the last brew I picked up some new hops. Warrior hops for bittering. Crystal hops for flavour and aroma, to be topped up with the last of the Galaxy. All three hop additions were measured out and ready to go.

First up get water to a boil and add the malt. Then after the hot break in went the first hops. Then… Um, what hops was that? A quick review of the bowls with the hops… Yep, that was the aroma hops. Crap. Okay, now what?

After a bit of running around like a crazy person I did some recalculations. New schedule with a new set of aroma hops, being just Crystal. Back to the brew. Added the original bittering hops. Flavour hops went in. Then at flameout in went the aroma hops.

Moved the pot to the ice bath for chilling. Have got a lot better with the chilling of theses small batches. Four trays of ice cubes and about one litre of near-frozen water. Works pretty well.

Then realised the volume issue(s). Given this was a three hop brew I wanted to make just a little more. So, four litres fot the carboy, then 2.5 split into two 1.25 litres plastic soft drink bottles. And that’s where the problem started, there was too much for the carboy. Solution was to use the 30 litres fermenter. Poured all in and topped up with cold water to required 6.5 litres. Oops, forgot to strain the hops out. Poured back into pot. Added yeast. Oh no, forgot to take gravity reading. Do that.

Finally ready to transfer into the bottles. Filled both, not quite to the top. Then filled carboy, and there was too much! Because the bottles weren’t filled to the full 1.25 litres there was well over 4 litres for the carboy. In the end we filled up the carboy to a few centimetres from the top and only threw out a tiny amount of the wort. Thank goodness for blow off tubes.

  • 4 litre boil
  • 800 grams Light Dry Malt Extract
  • 1 gram Galalxy & 2 grams Crystal hops @ 30 mins
  • 4 grams Warrior hops @ 25 mins
  • 2 grams Galaxy hops & 6 grams Crystal @ 5 mins
  • 2 grams Crystal @ flame out
  • Teaspoon of re-hydrated US-05 yeast

The Australian Pale Ale #3 ended up tasting quite grassy with some really well rounded spice. A fair amount of hops left after even after filtering. I’m happy with this. The gravity came in at 1.046 which is exactly what was calculated. Mind you, that did include the yeast, so we’ll wait and see.

-Mikey

Tagged , , , , , , , , , ,