Tag Archives: American Pale Ale

Home Brewers R&D Vic Secret – Review

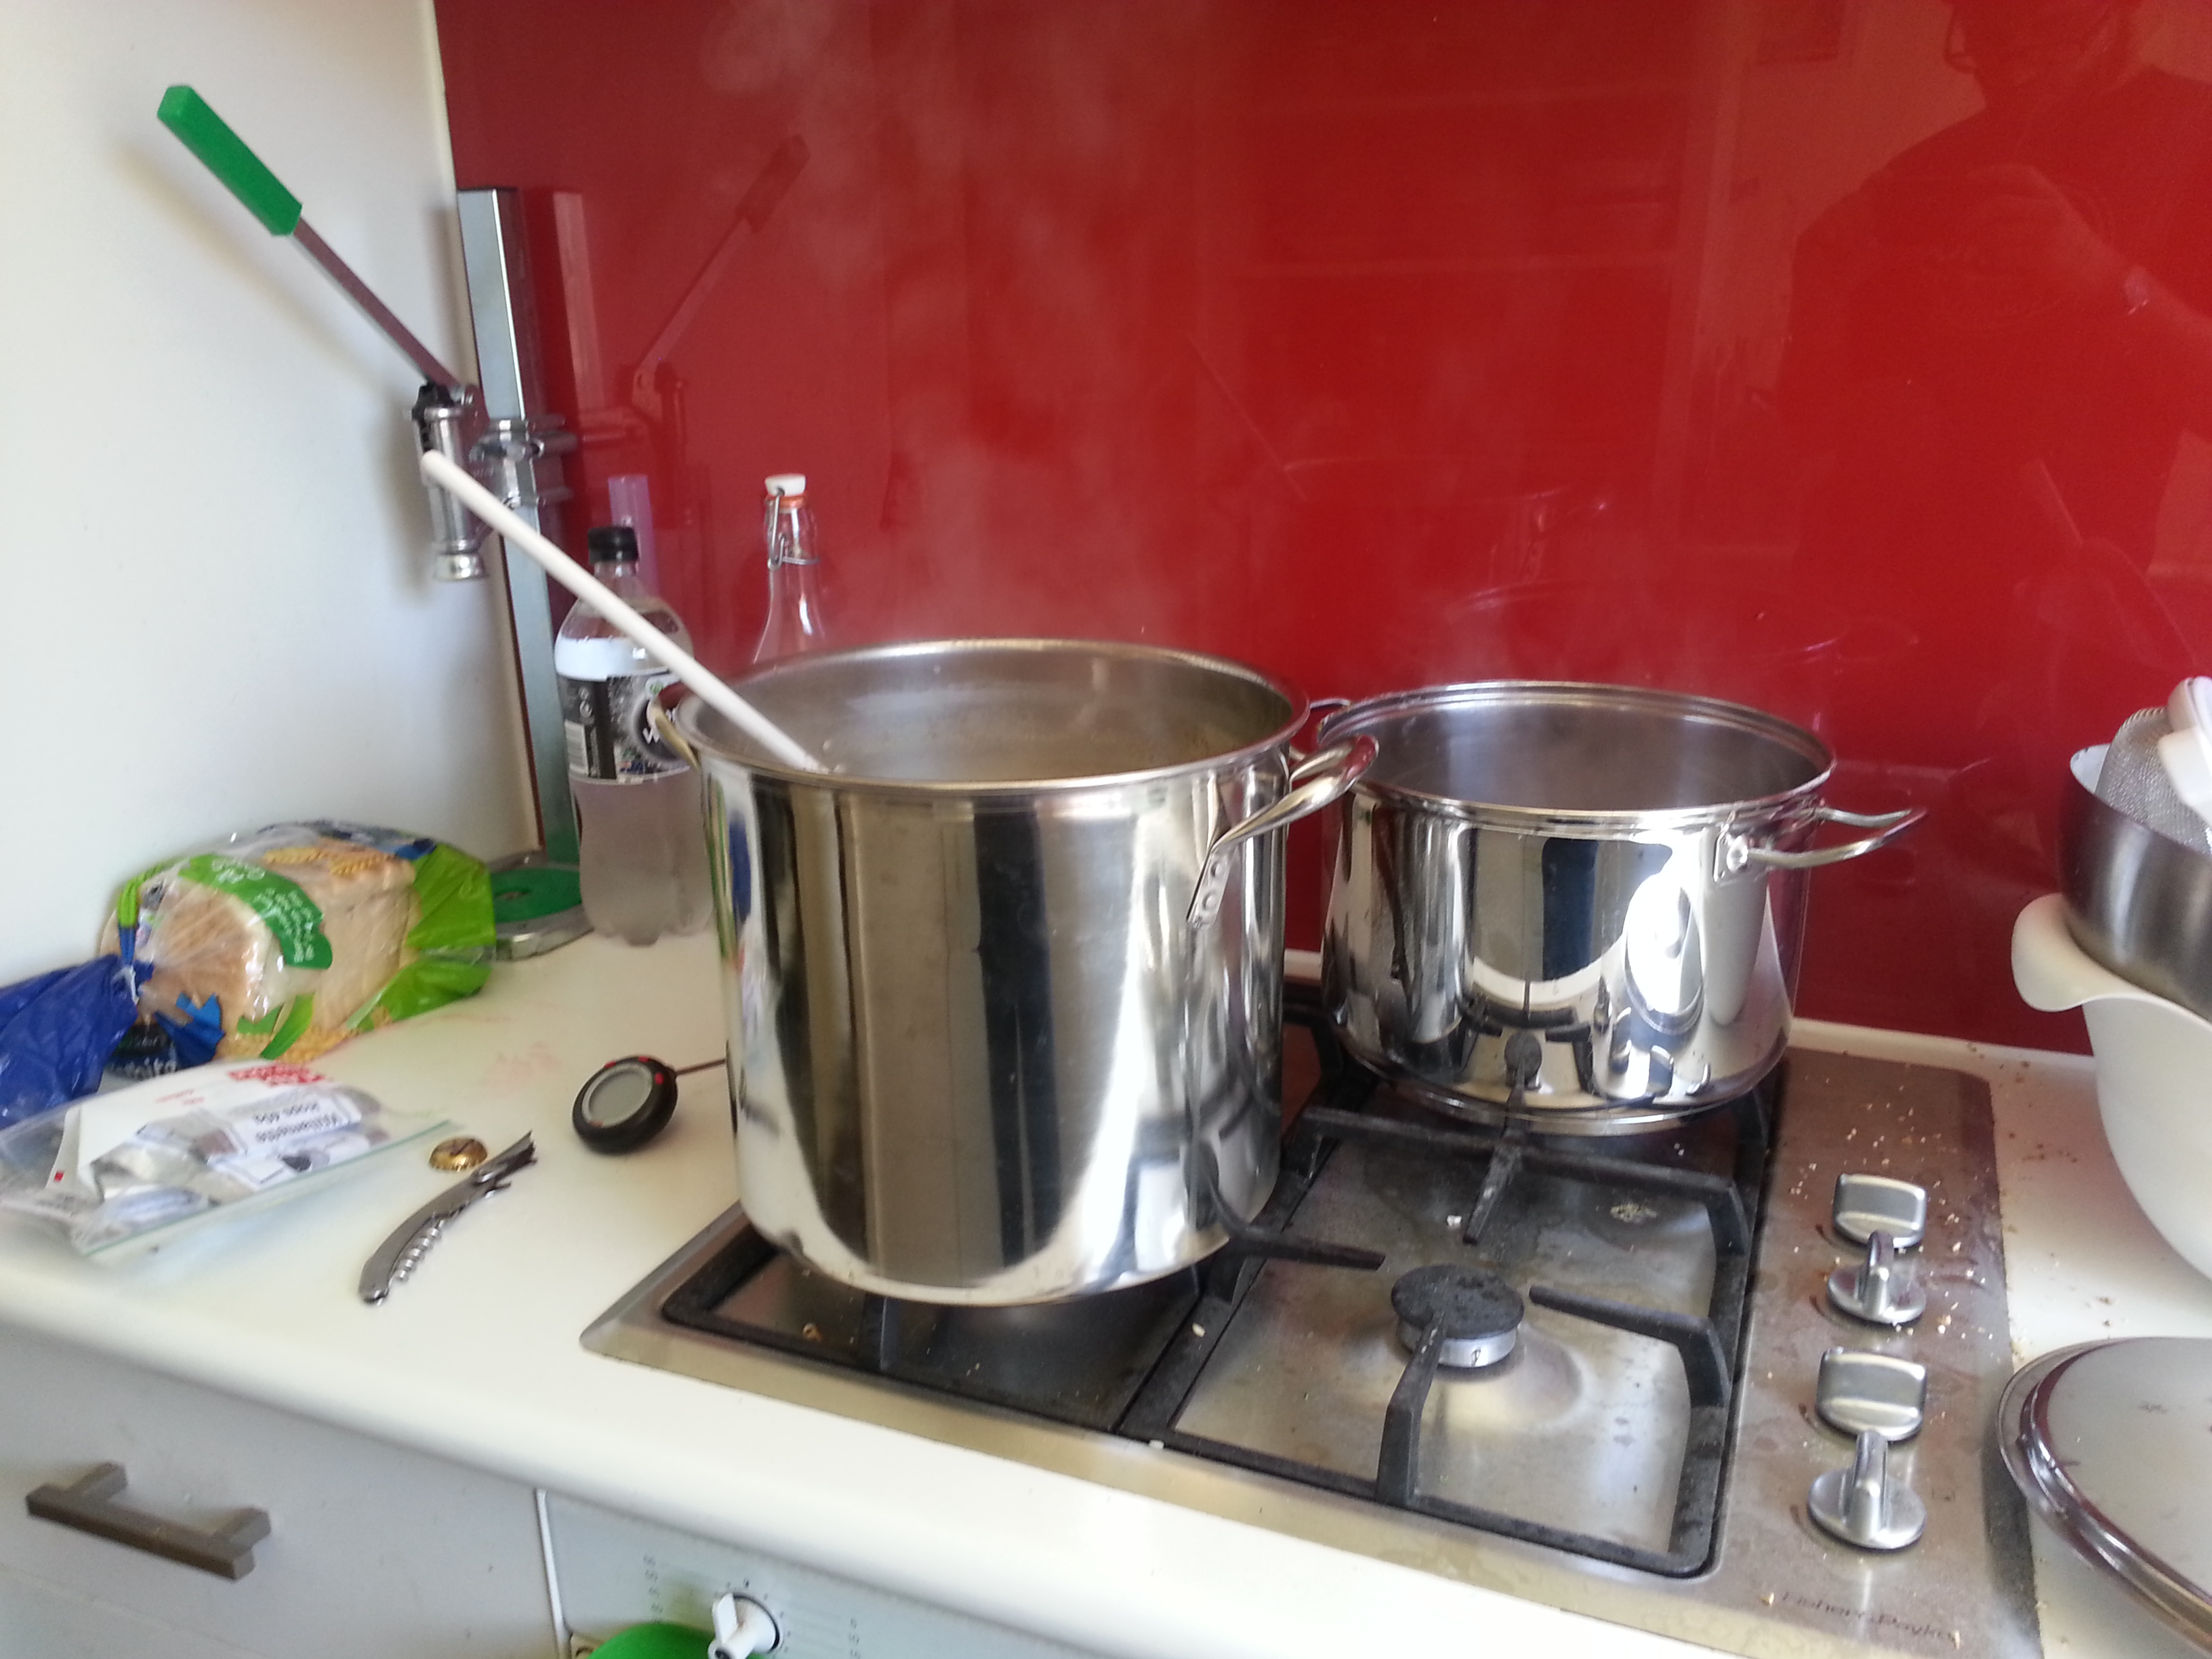
Quite a few moons ago I finally did my first all grain brew, Home Brewers R&D Vic Secret. It was an interesting process and at the end I had some beer. I’ve tried it and shared it with a few people. This review will try to do capture all that feedback, not just my take.

Firstly let me be clear, something went wrong with this beer. Not sure exactly what and most likely it was a number if things. Process is probably the main culprit, maybe water too.

R&D Vic Secret

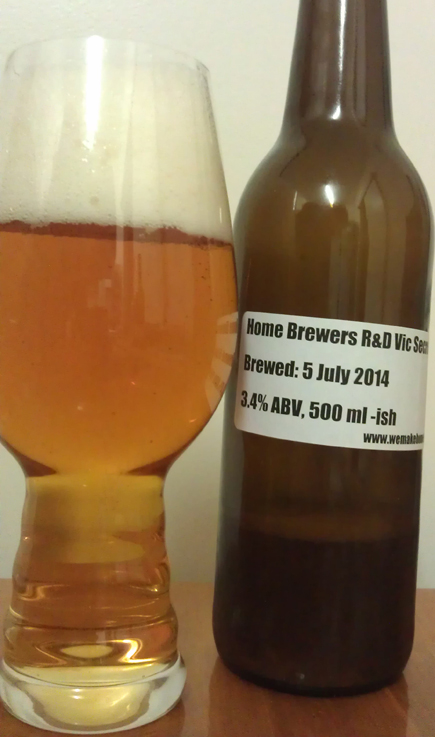
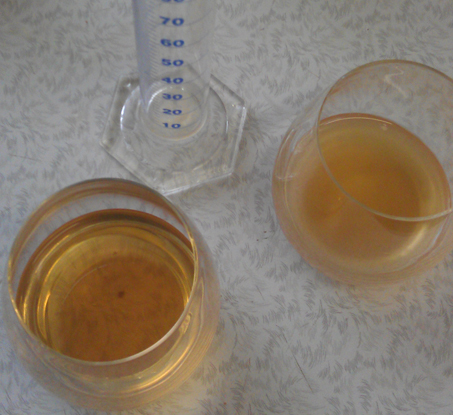
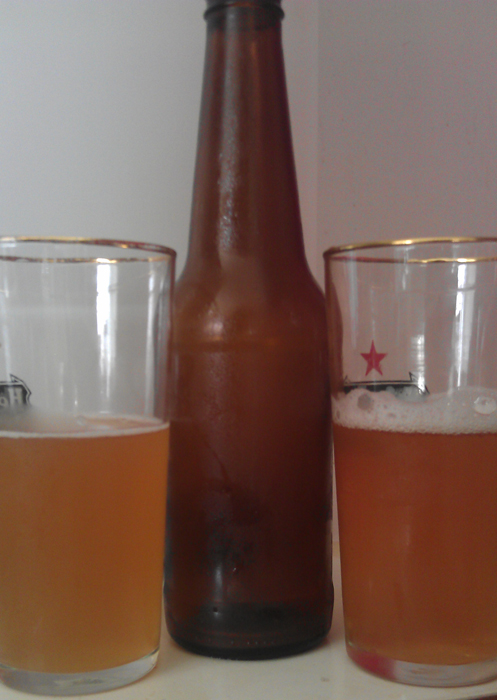
R&D Vic Secret ready for tasting

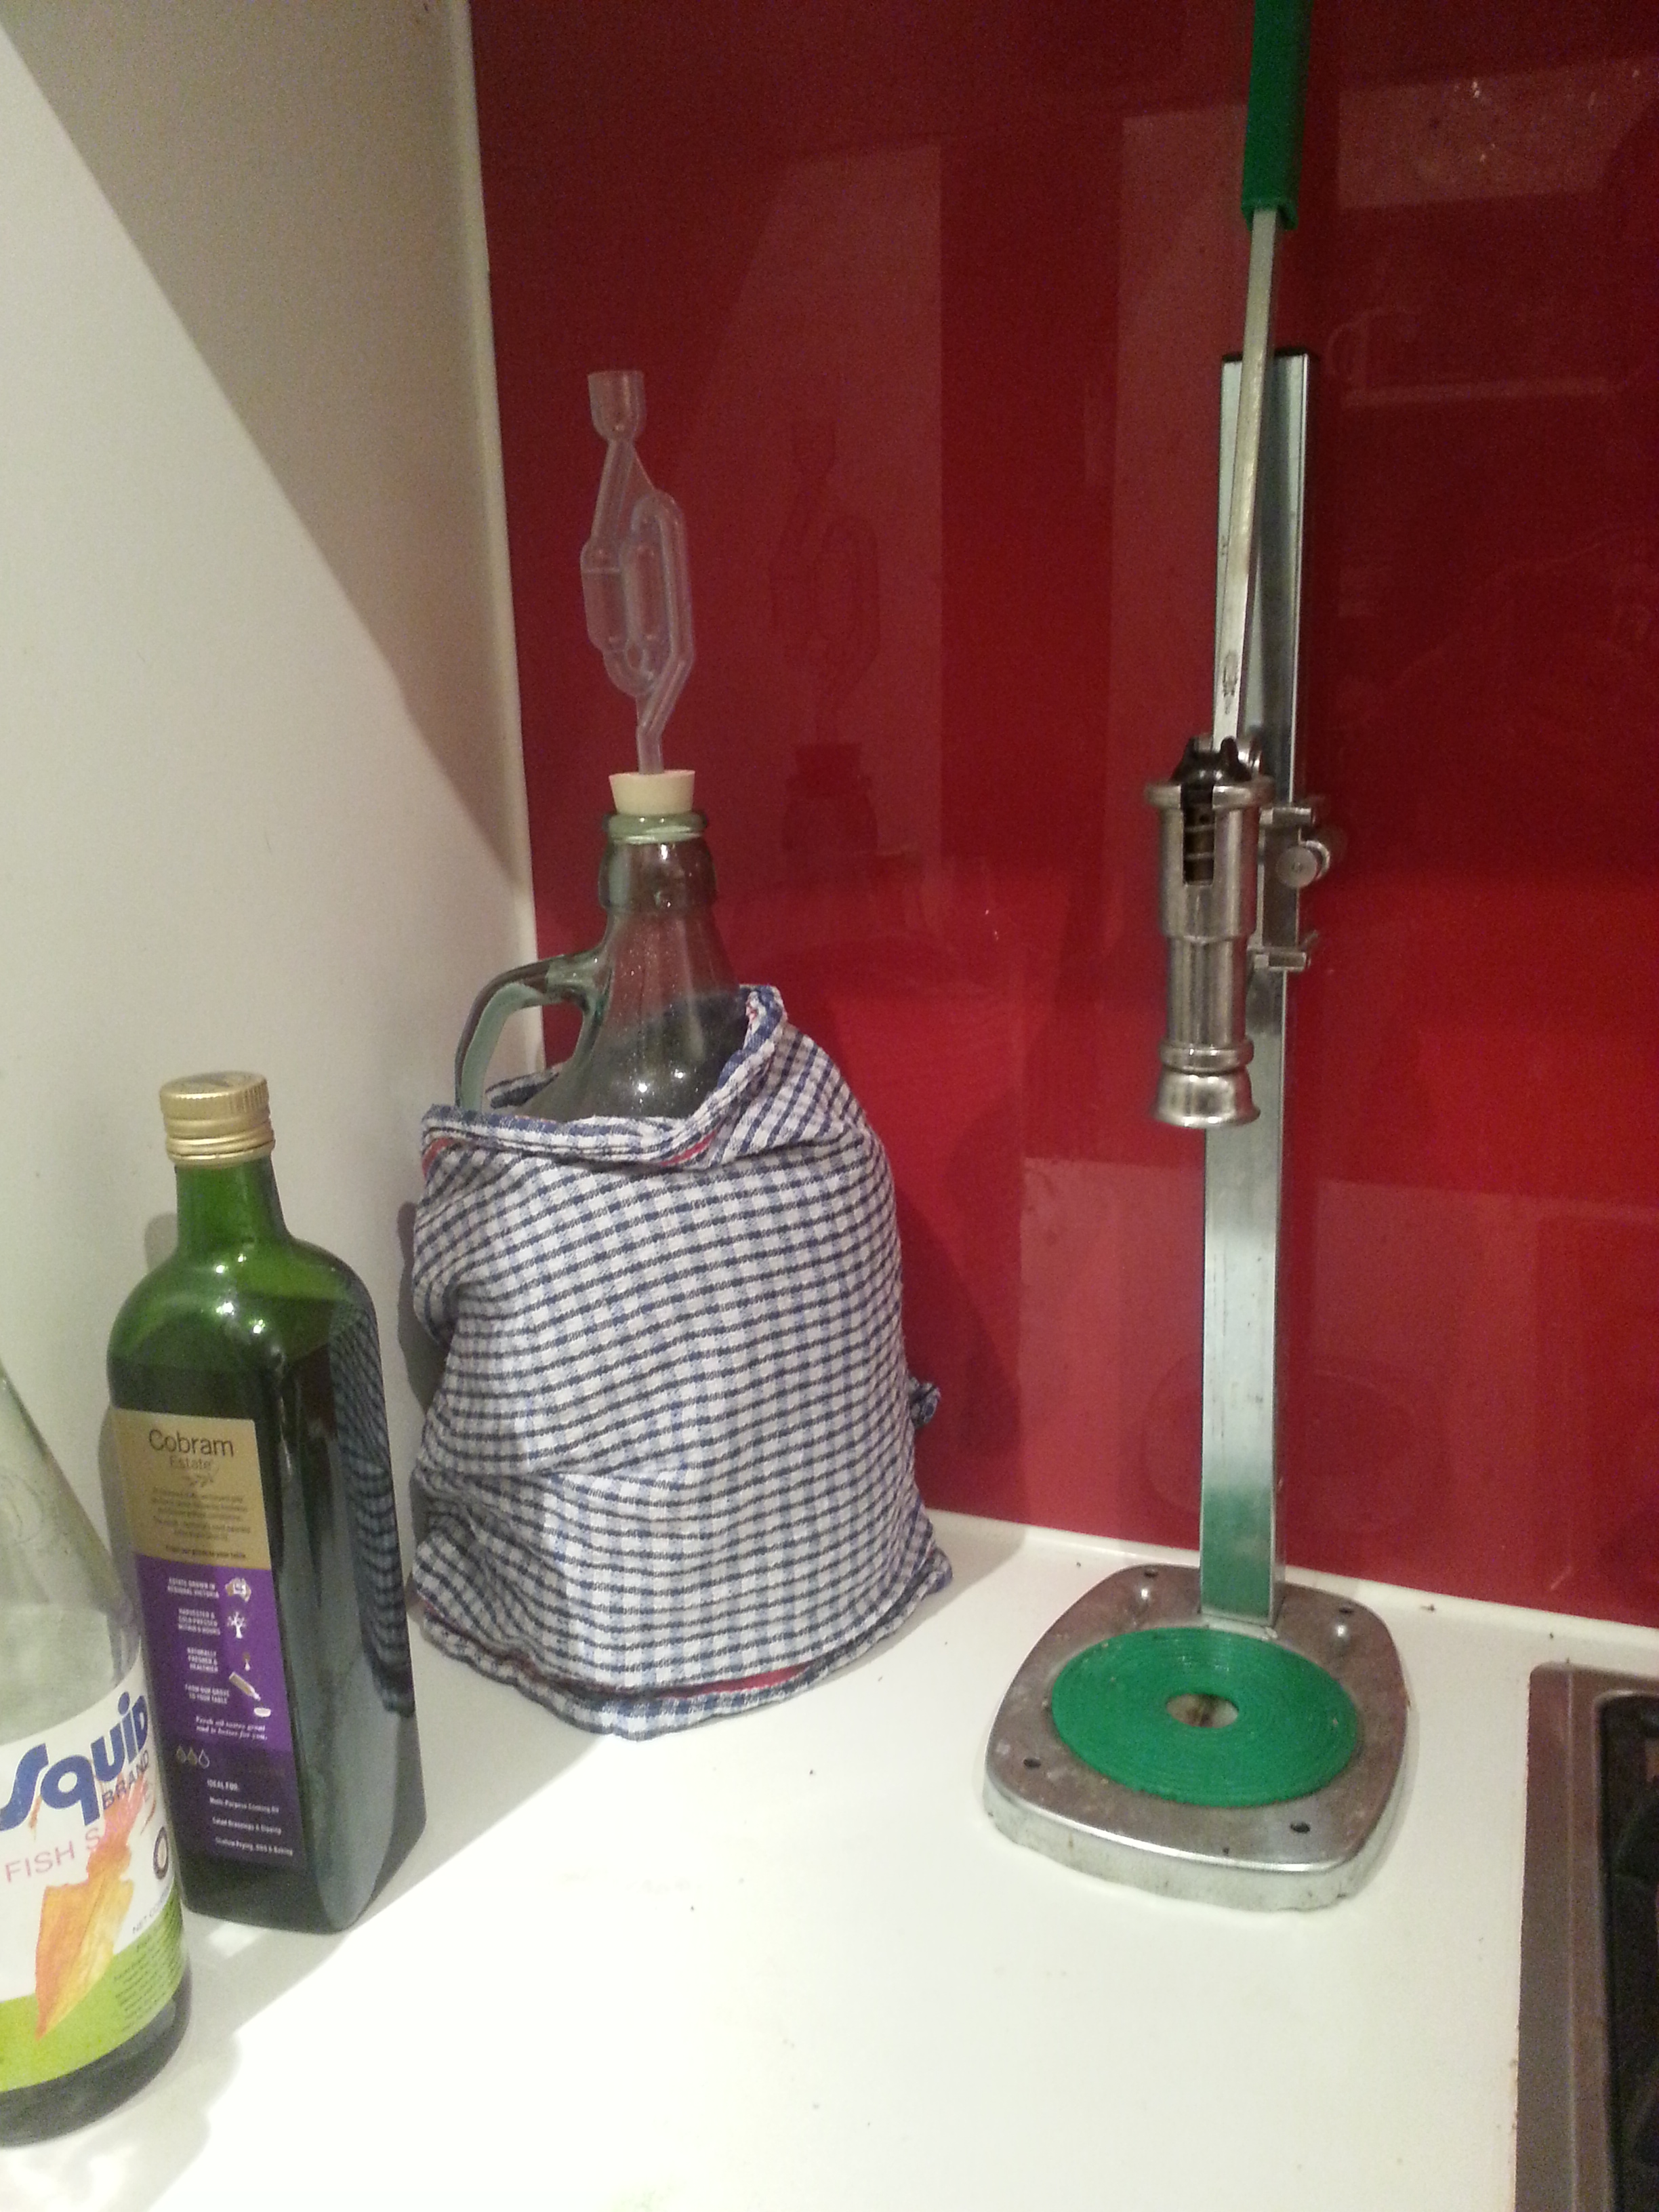
This beer was part of a group of beers. An attempt with some other home brewers to all make the same beer but with different hops. The other two guys have been making all grain beers for a while and their beers turned out good. What is important is that the recipe was fine. My brew was a smaller batch due to equipment. Keeping ratios right wasn’t an issue as calculations weren’t left up to me. All I needed to do was get the grain, hops, yeast and follow the instructions.

I got a bitter and dry beer. When I say bitter, I mean chemical and tart. Not good. The aroma is nice. You can smell the passionfruit and pineapple, a nice sort of fruit hint. That sort of comes out when you taste it. Then the bitterness kicks in and takes over.

This is a quite clear beer as brewbrite was added. It’s a lot clearer than every other beer I’ve made. Will be using this for a lot more brews in the future.

The body here is nice enough. Clearly being an all grain makes this better than quite a few of my extract beers. It has a nice mouth filling element as well. Alcohol is lower than it should have been, coming in at only 3.4%. That’s because there wasn’t enough maltose converted from the grain.

Overall this is a hard beer to enjoy. The bitterness is too much. If it was half as bitter it would be about right. As a result I’ve been mixing this with the Super Stout (which was also a bit stuffed). Next time there will be a lot more care in making an all grain.

-Mikey

Tagged , , , , , ,

Bottling day, plus surprise bottling

Saturday was a bottling day at my place. No brewing, just bottling. Was meant to be a quick one so we could get onto other things for the day.

Home Brewers R+D Vic Secret bottled

Home Brewers R+D Victoria Secret bottled and ready for conditioning

Chas came over and, unlike the last few days at my place, there wasn’t anything major getting in the way of starting. So we quickly got stuck into bottling the 13 odd litres of the Home Brewers R&D Vic Secret. Sannitising bottles is pretty easy with the tub and bottling tree. Went  with a mix of a few bigger 500 ml bottles and a fair few 330 ml bottles.

Bulk primed the beer was a simple affair. Did it in the big stock pot just like the Super Stout. But unlike the Super Stout we didn’t pour the thing into something else to bottle. We simply siphoned the beer into bottles. Done.

Pseudo Lager 1 bottled

Pseudo Lager 1 bottled and ready for conditioning

Before priming and bottling we did a gravity sample. Final gravity came in at 1.010 which means after conditioning it will be 3.4% alcohol. Not surprised as there was such a low original gravity. From tasting the gravity sample it was very hoppy and very bitter. Not sure how it will finish. I’m hoping this becomes a session beer and, if I can keep myself from drinking it all, something for the warmer months later in the year.

Before calling it a day I decided to take a gravity sample of the Pseudo Lager. Was very surprised to see it down to 1.006! I’ve been hoping it would get down to 1.005 but expected it to finish around 1.020-1.010. That’s a good result and means the beer will be 6.0% after bottling. It tasted pretty alright as well, quite dry and not a lot of hops. Should be good once it is carbonated.

Home Brewers R+D Vic Secret and Pseudo Lager 1

Home Brewers R+D Vic Secret and Pseudo Lager 1 samples ready for tasting

Chas wasn’t that excited about bottling another 16 litres of beer. But after a bit of negotiation, and a break for a bit, we got into it. Rather than bulk prime into the pot, we used the recently emptied fermentation vessel with the tap and a brew wand. Saved a lot of time and finished quickly.

A day of bottling. Normally nothing special, but a pleasant surprise with the Pseudo Lager. Looking forward to tasting and letting you know how it all worked out.

-Mikey

Tagged , , , , ,

Journey continues, onto all grain

Yesterday I finally did my first all grain brew. It’s been a long time coming and Chas has already done a couple all grain brews. I’ve been putting it off for a while. That’s partly because I was trying to knock out a few batches I’ve been thinking about. The other part was because I didn’t have a pot big enough to do a proper batch. Now that’s all sorted it was time to go all grain.

American Brown Ale done

American Brown Ale done in the carboy

Before I get into that, we also bottled the American Brown Ale. Didn’t bother with bulk priming due to the small batch size. Carbonation drops into bottles liquid in an capped. The final gravity came in at 1.022 which was a bit higher than the 1.014 expected. Final alcohol will be 4.6% and I’m happy with that.

So, my first all grain brew was a brew-in-a-bag (BIAB) style. The recipe is part of a Research and Development brew, an American Pale Ale, with a few home brewers from work. The idea is that we all brew with the same grain ratios and IBU target but with different hops. Due to my ‘small’ 19 litre pot I did an eight litre batch, rather than the 16 litre version the others did. Given my fascination in Vic Secret hops, that was the hop selection for me. The recipe is below.

  • 1.8 kg Joe White Traditional Ale grina
  • 0.15 kg Joe White Cara grain
  • 4 g Victoria’s Secret hops (for 60 min)
  • 11 g Victoria’s Secret hops (for 20 min)
  • 13 g Victoria’s Secret hops (for 5 mins)
  • 1/2 pack of Safale US-05 yeast
  • 14 g Victoria’s Secret hops (for dry hopping at day 7)
R+D Vic Secret mash

Home Brewers R+D Vic Secret mash in the pot

The brew was a very long one. Longer than I expected. Main reason is it took an hour to get the 14.4 litres of water for the mash. Reason for that was I want to filter all my water before I use it and I didn’t get any prepared before hand. Once water was ready we brought it up to about 69-70 degrees Celsius. Grain bag went over the pot and grain in. This sat in the pot for about 60-65 mins at 67 degrees Celsius. It was meant to be at that for 75 mins but there was too much head added and the last 10-15 mins it got up to about 72+ Celsius. Mash out was meant to be 75 Celsius, so we called it done at that point.

There was a lot of liquid that was at the start of the boil. The recipe said it should be about 13 litres. After the boil it was meant to be 10 litres, then batch size of 8 litres. Not sure where the last two litres were meant to go. If anyone has some info on this please post below.

Due to the excess water we let the boil go for about 30 or so minuets before first hops. This was to try and reduce liquid, which was a good idea. The hop additions went pretty smoothly. My alarm wasn’t loud and missed a couple additions by a couple minuets here and there. Shouldn’t make much difference. Also used some Brewbrite to clear it out. Added a teaspoon to a cup of water and dissolved it. Then into the boil with about 5 mins to go.

Chilled the wort down by putting the pot in an ice bath. This was pretty good. Also added some big blocks of ice to the wort directly which worked a treat. It was only later that I realised this was a problem. Once down in temperature the wort was poured into the fermenter and I realised that I had way too much liquid. It came in at 13 litres! No surprise that the gravity reading came in a lot lower than expected. It was 1.033 and should have been 1.049. That’s a big difference.

The re-hydrated yeast went in along with the yeast nutrient. I’m expecting, or rather hoping for, a good conversion from the yeast. If things go well it should reduce down to 1.008 and that means after bottle conditioning It should be about 3.5% alcohol. Will wait and see.

-Mikey


Tagged , , , , , , , ,

Back to Basics – Basic Pale Ale (take 1)

Oh the humble pale ale!

While it is in fact lager that is the most widely made and consumed beers, it’s probably the pale ale that has the most variants and allows itself the most experimentation – at least according to me.

Because of this, the pale ale is great place for experimentation and a great way to learn more about the craft of beer making.  While Mikey and I have done quite a few brews, of course we still have quite a bit to learn.  So it’s been decided to make the most basic of basic pale ales and work our way up from there.

Keep in mind, yes, Mikey has been been experimenting with “basic” pale ales.  His is an exercise in playing with different hops, seeing how they go as a single hop, and seeing how they interact.  This is an exercise in making a very basic recipe, and building on that very same recipe.

Yes, this is a basic one – just some traditional pale ale malt and some hops.  What hops to use was an educated guess.  We’ll see how it tastes and develop from there.

The Basic Pale Ale

The following is for a four litre batch.

  • 1 kg traditional ale malt

    20140329_130047

    Mashing some grains!

  • 4 grams Chinook (bittering – 60 minutes)
  • 4 grams Cascade (taste – 20 minutes)
  • 4 grams Citra (aroma – 2 minutes)
  • US05 Ale Yeast

The malt was mashed at 65 degrees in five litres of water for 90 minutes.  We felt this was a pretty good rule of thumb to start with.  As mentioned, this recipe will be the skeleton for what will be developed into a unique recipe.

After the initial mashing, we sparged with another 1.5 litres of water.

This left us with 6.5 litres at the start of the boil, noting that this is a recipe for 4 litres!  Unsurprisingly we lost a fair bit of water in the boil and ended up with about 3.5 litres when it was added to the carboy.

We were aiming for an American Pale Ale style of hopping.  According to our calculations, the IBUs came in on the top end of the style, which is fine, especially as there will be some other great fruity, tropical, and pine flavours coming through with the hops.

I’m really keen to see how this turns out. I’m sure there will be some more flavours that we’ll want to add in there, but we’ll let the first batch tell us what those are and go from there.

20140402_192724

Tucked up and ready to go

-Chas

Tagged , , , , ,

Red Dog Pale Ale 2 – review

It seams like only yesterday in put up the review for the Red Dog Pale Ale 1. And now here a we are with the second version.

Red Dog Pale Ale 2

Red Dog Pale Ale 2 ready for drinking

As Chas mentioned in the write up of the brew day, not everything went to plan. The main issue being that there wasn’t as much conversion of the grain to sugar as expected. The result was an original gravity lower than planned. I expected this to result in a beer that was thinner than first version, and also dryer. I was right about about one.

There’s a nice passionfruit aroma. Has hints of grapefruit and light malt as well. But that Doesn’t stay with you long. Taste wise it’s light and fruity at the front. Both grapefruit and passionfruit comes out across the length of the beer and lingers for a bit. Both drop away a bit too early. Next there the light body sitting  behind this all which helps give a slight creaminess at the back. The problem I have is that the body doesn’t hold up. As it drops out so does the flavour.

The bite and bitterness of the grapefruit is the main character here. Overall this is a really nice beer. It’s just the light body that drops off which lets the beer down. This is probably due to the issues with the grain.

For matching with food there’s a lot of options. As there isn’t a big profile here so the beer can work with a lot of foods that don’t have a really strong flavour. Chicken, fish & chips, Mexican food, most pub meals, salads and veggies, you get the idea. The beer would get overpowered quiet easily by any rich or dark food.

Despite the issues with the brew, this turned out well. Not a complex beer. This is one you can enjoy any day of the week, or have a few in a row.

– Mikey

Update: Corrected some spelling and gramma. Whoops.

Tagged , , , ,

Return of the Red Dog Pale Ale

Back in October we made a small batch of the Red Dog Pale Ale and enjoyed it so much thought we might up it to 12 litres.  It was a good brew day and a great way to get back into it for the new year, but I think we bit off a bit more than we could chew.  The main lesson: we need bigger pots if we’re going to try an all grain above about six litres…

The recipe we did is the same as what was posted the first time, so I’m not going to both to re-post the recipe.  The first time we did it we only did four litres, this time it was twelve litres, so we just did three times as much of everything…

This resulted in a total grain bill of about 2.4 kilos, so we wanted plenty of water to mash in.  Unfortunately the biggest pot I have is about nine litres so we were only able to mash with 7.8 litres of water without filling the pot too much.  As with the previous recipe we mashed for 90 minutes at 65 degrees, which seemed to work well last time.

After an hour long boil with hop additions, we were left with an OSG of only 1.034, which was much lower than last time’s 1.042 (which had been watered down by mistake!).  I think that due to the pot size we were unable to get adequate water to all the grain; we were still attempting the brew in a bag technique which was probably inappropriate for this sized grain bill.

Red Dog IIShould we try this again I think we’ll need two things: at least one bigger pot to do the boil in and probably a proper mash tun.  This would really make things a whole lot easier and we’ll be able to use much more water for mashing.

The other problem we ran into was during the cold break.  By the end of everything we had about eight litres of boiling water, and we wanted to get it cold fast.  Our usual method of giving it a bath in the sink – even with some ice added – failed to get the temperature down in a reasonable amount of time.  We’ve had trouble with this before, even with smaller batches.  I think I have an excuse to buy a wort chiller now though!

All in all it was a great brew day, and as mentioned a great one to get back into it for the year – with no bottling, a long mash, and a bit of time between hop additions, there was plenty of down time!

We’ll report back in a couple weeks to see how the beer turned out, but I’m not too optimistic!

– Chas


Tagged , , , , ,

Let’s do this! Red Dog Pale Ale

Well, another weekend another brew day.

We decided to step it up a notch this weekend and go for an all grain batch.  It was a relatively small notch though.  While the batch was an all grain, it was kept to only four litres and the mashing was done in a bag using the brew in a bag (BIAB) technique.  No malt extract was used though, so it wasn’t a mini-mash.

Anyway, the recipe we used was courtesy of jyo on the Aussie Home Brewer Forums and can be found here.  You’ll note that the original recipe was for a 23 litre batch, however we modified the quantities to only make four litres.

The modified recipe was:

Brewing in a bag!

Brewing in a bag!

  • 782 grams Joe White Traditional Ale Malt
  • 7 grams Crystal
  • 5 grams Weyermann Carapils
  • 7 grams Cascade hops (bittering) – 60 minutes total boil
  • 5 grams Cascade hops (taste) – 15 minutes total boil
  • 5 grams Chinook hops (aroma) – 1 minute total boil
  • DCL US 05 American Ale Yeast
  • 4 grams Cascade hops (dry hopping) – after 2 days

Mashing temperature was called for 65 degrees C.

The recipe called for a 90 minute mash, which is what we did.  The BIAB technique is pretty simple.  First we calculated the strike temperature which was pretty simple and got three litres of water up to this temperature in a pot.

This technique is called brew in a bag because the grains were kept in a bag while submerged in water.  While this was easy, keeping the temperature at exactly 65 degrees was fairly difficult.  The pot seemed to keep heat fairly well, but there were large discrepancies in different areas when we took temperature readings.  If anything we probably should have used more water.

For those more interested in the procedure, Craig from Craigtube does a great demonstration here.

While we waited for the grain to mash, Mikey and went ahead and bottled the Honey Bomb Wheat Beer we made a couple weeks ago.  There was a fair bit of time to kill during the mashing process, so between checking it and adjusting the temperature we bottled and knocked back a couple home brews on the Home Brew Couch.

About to get the hot break

About to get the hot break

With the mash done, it was sparged with another couple of litres of water and we started the boil.  During the sparge we could really tell that the sugar had come out of the grain.  We were left with a great, thick liquid that was a beautiful brown colour.  And it smelled amazing.

From there it was pretty much the same as any other brew.  The hops were added for bittering, taste, and aroma.  Two days later I added some more hops as a dry hopping.

When we were all done, we got a OSG of 1.042.  Unfortunately the recipe stated an OSG 1.053, so we were a bit off…  I attribute this not only to our temperature difficulties with the mash, but also because we ended up topping the carboy up to four and a half litres rather than four; so it was watered down a little more than it should be.

I’m expecting quite a bit from this brew.  I think it should turn out to be a fairly decent American Pale Ale.  The wort tasted great and full of grain, but it should be fairly well combated by the hop additions.  We’ll see how it is in a couple weeks!

– ChasRed Dog1

Tagged , , , , , , , , , , ,