Tag Archives: temperature

Tiny magic things, yeast adventures

I’ve talked to a fair few home brewers over the last two years. Pretty much all aspects of brewing have been discussed. One thing that comes up every now and then is the use, growth and reuse of yeast. Something I’ve mostly avoided, until now.

Since day one of homebrewing I’ve used dry yeast. And, up to only earlier this year I’ve pitched it into the wort dry. Since then I’ve done some rehydration of yeast. And even a couple basic yeast starters. Nothing serious.

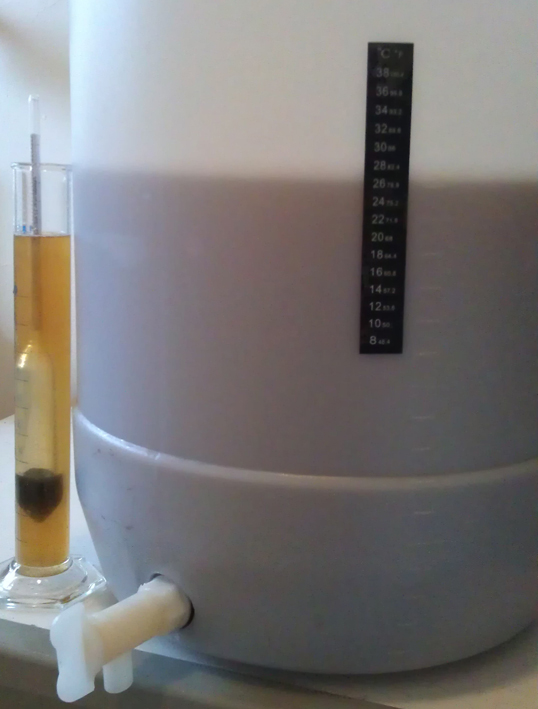
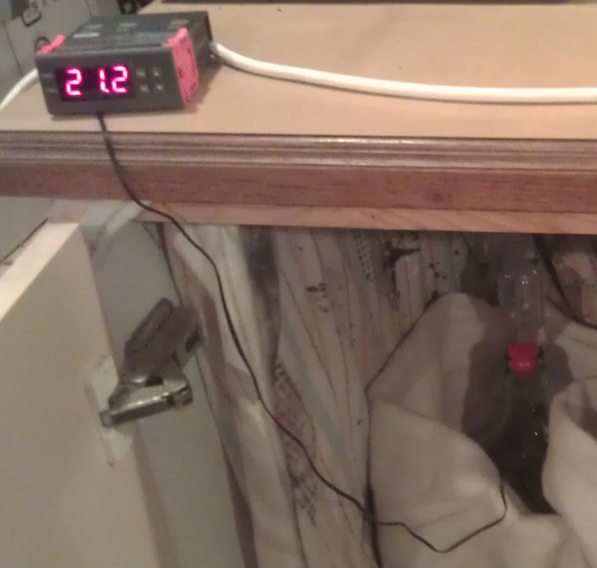
Off the back of the Pseudo Lager I wanted to capture that yeast. It was a basic US-05 yeast that did what it shouldn’t have been able to do. It took a strong pale ale extract brew and brought it down to a low 1.006. That’s around the lowest I’ve ever got a final gravity. But what was exceptional was that it did it over a period of a month. All the while temperatures ranged from as high as 14°C down to 0°C, maybe lower. I remember one professional brewer saying that the beer was probably stuffed. Yeast being “turned on and off” is not a good thing, by all accounts.

So, these magical tiny organisms had not only survived, but produced some pretty good beer. Could I get them to make more?

I looked up how to reuse yeast. And there are a few ways. The simplest is to pour new wort directly onto the yeast cake, once bottling of the last beer is done. This is a crude method as you’ve got all the dead yeast and left over hops as well. That not-good stuff is called trube. I say not-good because I haven’t come across anything yet that says it’s specifically bad for the beer.

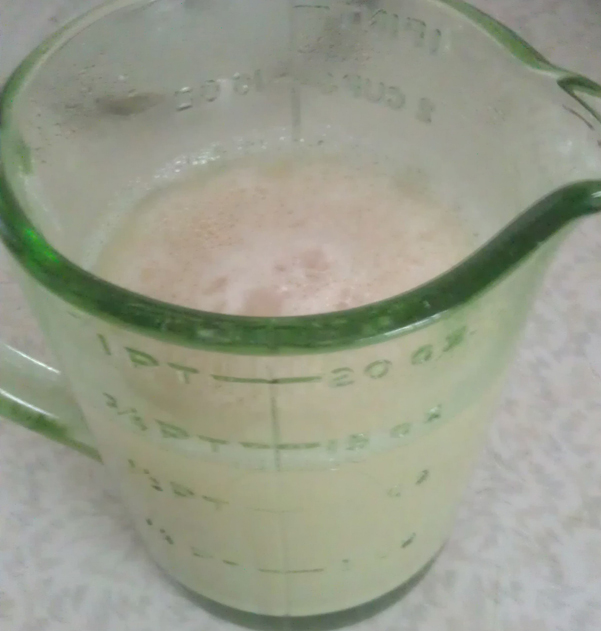
The next method is referred to as washing. Again, you need to get the yeast after bottling. But this time you don’t have to, and can’t, use it straight away. You’re suppose to pour in some pre-boiled then chilled to room temperature water into your fermentation vessel. Boiling is important because you want water without oxygen, or as little as possible, and the heat should kill anything bad. Then you want to chill because heat kills yeast. Once at temperature dissolve the whole lot in the water and pour into sanitised vessels. These should have some kind of air seal as you don’t want any more oxygen. Put in fridge and wait for the cloudy stuff to settle. At the end there should be clear-ish water/beer at the top, a thin white layer if yeast, then a thick bottom layer of tan/brown coloured trube.

There’s a bit more to it, as I came to realise when I did that with the yeast from the Pseudo Lager. Long story short, I had to throw it all out.

Pale Trial Zwei - empty carboys

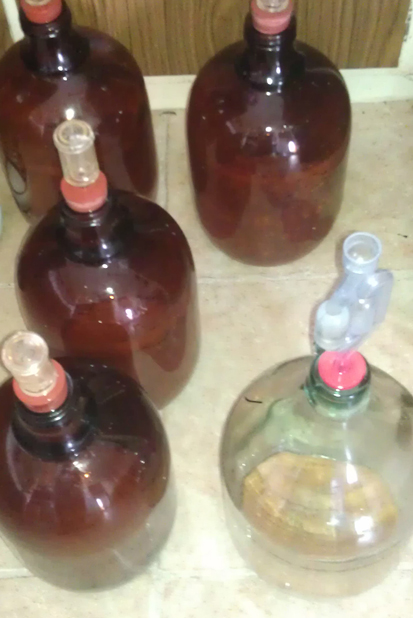
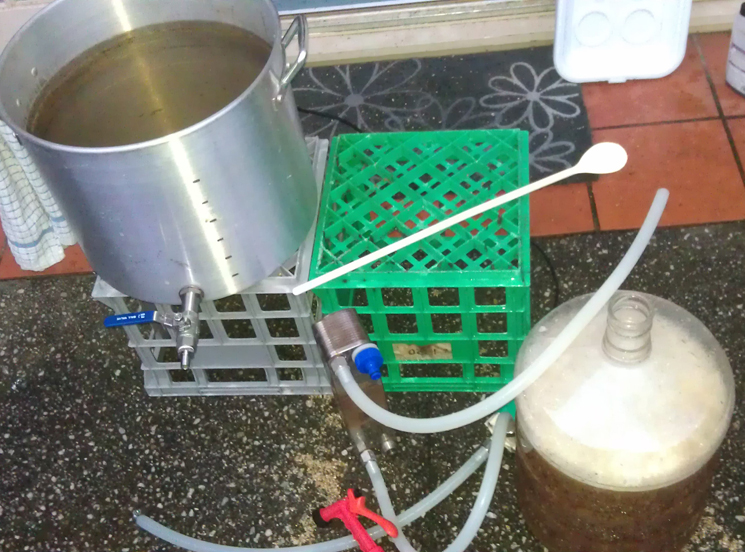
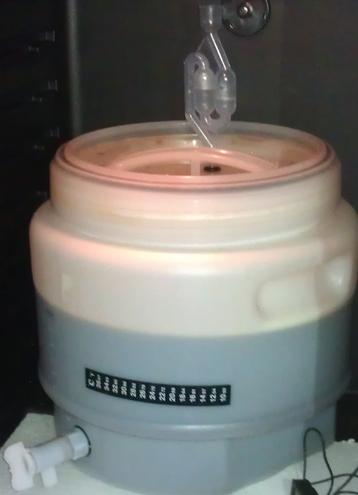
Pale Trial Zwei to fill these empty carboys

And that brings me to the last brew a couple Sundays ago (31 August). The Pale Trial Zwei was almost the exact same as Pale Ale Ein, but with Galaxy hops replacing the Victoria Secret hops.

  • 14 litre boil
  • 1.5kg Golden LME @ 40 mins
  • 15 grams Galaxy hops @ 30 mins
  • 11 grams Galaxy hops @ 15 mins
  • 1.5kg Golden LME @ 5 mins
  • 12 grams Galaxy hops @ 0 mins

Gravity came in at 1.047, less than Pale Trial Ein. That’s somewhat expected a there was more water in this by the end to dilute the malt.

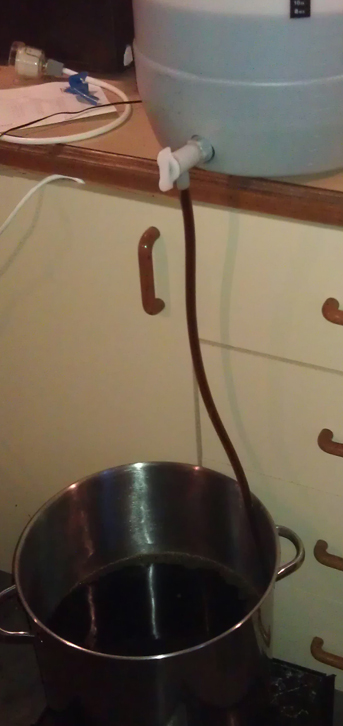
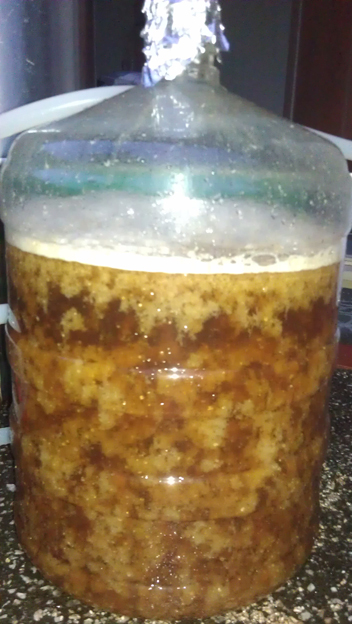
And then pitched the wort onto the yeast cakes of Pale Trail Ein.

So, this experiment is to see if this can work as a successful way to reuse yeast. Plus want to see if yeast characteristics from one brew can carry over to the next. This second part is going to be the most interesting as the five Pale Trial Ein beers are different in colour and flavour.

Bottling will be next weekend. Look forward to letting you know how it turned out.

-Mikey

Tagged , , , , , ,

Long time coming, long time to wait

Since very early on home brewing I’ve wanted to make a good lager. After a bit of looking about, reading up on it and asking a few other brewers I decided to dive in.

The first attempt was as part of basic home brew kit. It was more of a very pale ale rather than a lager. The yeast was from a kit can and then it was fermented with out any temperature control. It turned out a bit rough and didn’t get much better with age.

Since that brew I wasn’t  in a rush to do another lager. Reading up on the process others use, strict temperature control and long term storage, really tuned me off. Then a fellow home brewer, Carnie Brewing, posted on his blog about his attempt and quick turn around. That got me interested again.

Pseudo Lager boil

Pseudo Lager boiling away on the stove

Yeast was the main sticking point. I didn’t want to do a big batch in case I stuffed it. So, I decided to do a trial run with US-05 at a low temperature. Due to using ale yeast, instead of lager yeast, I’ve decided to call this Pseudo Lager. If it turns out well I’ll look at doing a bigger batch with proper lager yeast.

  • Amber Dry Malt – 600 grams (60 mins)
  • Light Dry Malt – 300 grams (10 mins)
  • White Sugar – 1.1 kilograms (10 mins)
  • Victoria’s Secret hops – 5 grams (60 mins)
  • Crystal hops – 10 grams (flame out)
  • US-05 yeast – about 3-4 grams

This was a pretty basic brew. For a quite some time I played around with the idea of splitting out the hop additions into three, but stuck with two as I wanted to highlight the Crystal hops at the end. The 5 litre boil was for 60 minutes so was able to get enough bitterness (IBUs) from the little Victoria Secret hops at the start. All the amber malt went in at the start. The malt selection was based on what was in the house. Originally I thought there was more light malt, but that wasn’t to be. Light malt was added at the end with the sugar, which was there to keep the finish dry and alcohol up.

Pseudo Lager fermenter

Pseudo Lager done and in the fermenter

Before the boil started I re-hydrated the yeast. I added in a little bit of light malt to try and get some yeast starter going. As this was only for about one and a half hours I’m not expecting much.

Cooling went very well. The process I’ve got to dump a lot of ice directly into the wort seams to work well. Got a bit excited and poured the whole wort in without sieving out the hops. Whoops. Then I realised as I was filling up the fermenter that I forgot the Crystal hops! Uh Oh! So, I just dumped the hops into the fermenter and continued filling it up to 16 litres. I suppose it will be something like flame out/dry hopping. Hopefully.

The gravity reading came in at 1.049 which is exactly what the recipe said it would be. Due to all the sugar in there it should ferment out to finish with a gravity of 1.005. That would be about 6% alcohol after bottling. That’s exciting for a lager.

I deliberately left this in the shed with no heating. The temperature out there drops down a fair bit. Down to maybe 10 degrees Celsius, or less, overnight. Then during the day up to a maximum of 18 degrees Celsius. I’ve left this on purpose to help keep the yeast working at a larger-like temperatures. Not sure if this will do anything other than drag out the fermentation.

After two days the beer is bubbling away. It’s very slowly doing that, but it is happening.

-Mikey

Tagged , , , , , , , , ,

Bottling Super Stout, with a mistake

I finally got around to bottling the Super Stout. I’ve been waiting for some extra fermentation which hasn’t really happened. I was by myself and made a mistake. I knew at the time that maybe it wasn’t a great idea and did it anyway.

Super Stout bulk prime

Bulk priming the Super Stout from fermenter to pot

The gravity reading on the stout hadn’t really dropped from the reading I took three weeks ago. Back then it was 1.031 and it finally ended at 1.028. That’s not a lot of movement over three weeks. The extra temperature may have helped ferment a bit more, but not sure if it was really worth the extra wait.

Bottling 18 litres of beer by myself was never going to be fun. That’s one of the reasons I had put it off for so long. I wanted to put most of the beer in 330 ml bottles as well which was going to drag it out longer. My bottles are washed and clean before I put them in storage. All I needed to do was sanitise them and put them on the bottling tree to dry a bit. Pretty straight forward once I put the rest of the bottling tree together.

I’m use to bulk priming I didn’t want to go back to individual priming. That meant I needed to measure the take sugar and dissolve it in a little bit of water. That was simple. I had the dissolved sugar in my new(ish) 19 L pot and racked off the beer from the fermenter to the pot. That went really well.

Now I had all my beer primed and ready to bottle. And in a huge pot. How to bottle from here? I could syphon it out one bottle at a time. That would take forever and I didn’t have the time. I could transfer to one of the fermenters with a tap and use a bottling wand. Not the big one as I don’t have time to clean. Little one is good to go, but a bit small. Split it into two lots would work. What’s the easiest way to move it from the pot to the small fermenter? A siphon us a smart choice. But what did I choose? Pour it in. What was I thinking?!

Super Stout bad idea

Pouring the pot to fermenter? That’s a bad idea

There was a but of a mess when I poured the beer out if the pot. Most went into the fermenter. Lost about 500 ml to the floor and side of the fermenter. Second lot was less messy. The real problem is that by pouring the beer it got aerated. And according to John Palmer’s book How To Brew that it’s likely going to produce diacetyl flavours. Not good.

The rest of the bottling went pretty well. I did under estimate how many bottles I would need. Total count was 35 stubbies and eleven 500 ml bottles, a total of just over 17 litres.

After bottle conditioning the alcohol should be 5.2% which is below what I would like for something called a Super Stout. Would expect something close to 8%, but I knew from the original gravity that want going to be possible.

I didn’t taste the beer when bottling. I had tried it a few times with the gravity samples over the past few weeks. Quite dark and the liquorice flavour changed enough for me to notice between sample one and the last one. There was a good hint of apple aroma from the beer once primed and in the open pot. I really hope that doesn’t come through in the beer.

I’ve included what temperature settings were used. You can see that I raised the heat a fair bit in a futile attempt to ferment more sugar. I’m fearful that it might have caused a negatively effected the beer.

  • OG 1.064 (3/5/14)
  • ferment at @ 16 C = 1.031 (to 28/5/14)
  • then @20 C = 1.030 (to 1/6/14)
  • then @ 24 C = 1.029 (to 9/6/14)
  • still @ 24 C = 10.28 (to 14/6/14)

If you’ve got any feedback on the above is love to hear it. Both the temperature changes and the pouring/aeration of the beer.

-Mikey

Tagged , , , , , , , , ,

When you don’t brew, go brew

Chas is still overseas having fun and tasting beers. I’m still naively waiting on the Super Stout. So… what to do when not brewing? Help a mate with his brew!

Strong Belgian Golden Ale sparge

Strong Belgian Golden Ale sparging away with hot liqueur pot, mash tun, pump and boiling pot

Last weekend here in Melbourne was a long weekend thanks to Queen’s Birthday public holiday. No, it’s not her Birthday, the holiday is about something else. Anyway.

On Saturday I went around to my mate Michael‘s place. He’s been doing all grain for a while. Last time I was there I had to leave early and missed a few things. This time I was there from start to (nearly) the very end. This was a very long day. Started at 10:30 am and at 5:15 pm both the airing of the wort and pitching of the yeast were still left to do. That’s one very long brew day for a home brew.

Like last time Michael was doing a Belgian quad, which didn’t work out that well. This time a Strong Belgian Golden Ale, which hopefully turns out well. The process was mainly the same. Fist heat the water for the mash and then put that in the mash tun. Grain goes in, stir and wait. Recirculate the liquid to settle the grain bed. Next was a bit different. Fly sparge rather than batch sparge. What you do is slowly drip water over the top while letting the liquid drain out the bottom. Apparently, if done right you get a better conversion (getting sugars from the grains) than batch sparing.

Hop leaf

Hop leaf in a hop bag

Boil was next. A long boil as Michael needed to reduce volume. After that was done a hop bag with loose leaf hop flowers went in. I’ve never seen loose leaf hops before. Most people I know use pellets. Had a taste and wasn’t sure what to think about them. Interesting, but not sure if it’s for me.

The chilling was very cool (pun fully intended). Michael has a counter flow plate chiller. Brew goes in one end and out the other, while cold tap water goes in the reverse direction in a different channel. Long story short, lots of liquid moves really quickly and your brew gets chilled a lot.

Strong Belgian Golden Ale chilled

Strong Belgian Golden Ale chilled with pot and plate chiller

Like I said, had to leave before the brew was aerated or the yeast pitched. But, you can get an idea from the photos how much goes on. Lots of steps and lots of equipment. I have to say, I’m slightly jealous of all the equipment. But that’s offset by the idea of having to (a) take so long to make a beer and (b) that thought of cleaning all that equipment.

Then Monday went around to my good mate Ian‘s place. He wanted to do An American Brown Ale. Something nice to have over the cooler months. And, to be completely different to the all grain brew, it was an all extract brew.

Strong Belgian Golden Ale done

Strong Belgian Golden Ale done, except aeration and yeast

For this brew I was there from the very start to the very end. Plus it was a lot quicker. Dry malt extract and hop pellets measured out. Boil the water, first addition of dry malt, hot break, add hops 1, add hops 2, add hops 3 and the last of the dry malt. Then onto chilling, which went a lot quicker than expected. We chilled it so well that it was almost too cool to pitch the yeats. But before the yeast went in I made Ian take a gravity reading. Hopefully this means we’ll known the alcohol percentage on his beer.

An American Brown done

An American Brown done and ready to start fermenting

Thinking back on the long weekend, I’m not sure which brew day I enjoyed more. They were both laid back in their own way. Ian’s was pretty easy, but a fair few things on one after the other. And once it was all done we hung out for a while which was fun. The brew day at Michael’s was a lot longer. And as a lot of steps took a chunk of time there was plenty of down time. That said it was also a lot more complex and a few things were nearly missed. One thing I know for sure, brew days are fun.

-Mikey

Tagged , , , , , , , , ,

Really dark, and still not ready

Super Stout gravity reading

Super Stout gravity reading at 1.031

It’s been three and a half weeks since the brew day for the Super Stout. I deliberately left this to ferment at a lower temperature, 16 degrees Celsius. There were two reasons for that. First, Good Beer Week was on last week and there was no time over the weekends to bottle. Second, wanted a really clean yeast finish to the beer.

Fast forward to now. Went out and took a sample of the beer. Gravity reading came in at 1.031! What? I’m pretty sure that’s no where near where I thought it would finish. Yeah, there’s all sorts of stuff in there like lots of super dark malt and liquorice. But I really thought this would drop more. And I still do.

Rather than wait another 2-3 weeks I’ve set the temperature to rise to 20 degrees Celsius. I’m hoping the yeast will wake up and have another crack at eating some of that remaining sugar. If that doesn’t work, I might need to pitch some more yeast in. Which is something I’m not took keen on.

The sample tastes quite sweet still. And that should mean there’s still more sugars for the yeast to eat up. There’s also a really strong molasses taste which ends with liquorice taste. Now I know what the liquorice does. The sample is also super dark, just as the name suggests.

So, temperature up and give it another week and a half. Hope it’s ready by then. If not… well, we’ll cross that bridge if we come to it.

-Mikey

Tagged , , , , , , ,

Wired for fun, and heat

First up; wow, sorry, um… and ta-da! This post has been sitting as a draft for months! I’ve finally sat down tidied it up, added in the photos and sent it out to the wide world. So with that, onto the post…

Temp Control - unit on

Working Temperature Control unit turned on

Back in April last year I bit the bullet and bought a temperature controller. I picked it up on eBay for around $10 and a few weeks later it came in the post. It’s quite a small unit with a simple interface. The instructions are basic and just a single A4 sheet covers everything. And that’s where things stop being fun.

Temp control unit back top

The top back end of the Temperature Control unit

The wiring diagram is only a slight step up from incomprehensible with everything in Chinese as well as on the unit itself. Google searches for wiring diagrams on the exact same unit name/number were no use. Trying to find similar units was the first real starting point. Comparing what others had done with similar-ish units gave me an overview if what the wiring structure should be. Then it was a mater of throwing in words like “positive”, “negative”, “current”, “live” and the like into Google translate to work out the right way to wire the unit. Ended up Googling terms like “Chinese character for Positive” to confirm. After all that the unit finally got wired.

Temp control unit wire up

Back of the Temperature Control unit all wired up and ready to work.

Plugged it on and turned on the mains. Let’s just say that it wasn’t wired right the first time, and move on. An not one word about who wire it… A bit more time on Google and everything was sussed. Turned on and worked fine. There is a sensor on a wire which measures the temperature. My original idea was that this would be dropped directly into the wort. Then after a few discussions with fellow home brewers I decided to take their advice and put it on the side.

One noble, and rarely used, stubby holder gave up its life to be used. The ex-stubby holder was placed on the side of a fermenter and stuck down with a whole lot of masking tape. Then the sensor was placed between the fermenter and ex-stubby holder . Overall effect is that the sensor can read the temperature and insulated from everything else. Plus, its nice padding to prevent it from being damaged.

Temp control unit in action

Temperature Control unit set up with carboy and heating blanket.

The unit works by having a set temperature. Then there is a range, or threshold, above and below. Once the actual temperature is beyond that temperature range it turns on the power to the “thing”. This can be for heating or cooling depending on what device is attached. If you plug in a heater and have the unit set to heat then once it’s below the set temperature the heater turns on. Neat. This can be done for cooling as well. The temperature control has a minimum plus/minus range of one degrees Celsius. What that means is when I set the temperature at 21°C it can drop as low as 20.1°C before the heating kicks in. And in theory it could get up to 21.9°C before turning off, but in reality it doesn’t go that high. So, the unit has a bit of flux which isn’t ideal but also isn’t too bad.

This unit only has one switch it means it can heat or cool. It can’t do both at the same time. There are a few units out there that do both and you can find them pretty easily. I was just a bit lazy, and cheap. Plus I’m not sure when I’de need both working. But if I ever do then I might just pick up another unit.

Temp Control sensor on carboy

Temperature Control unit sensor on carboy. It’s under the sliced up stubby holder, which is tapped to the carboy.

Am I happy with the unit? Yes. Was it easy to get set up? No, but proper units with English instructions exits. And for those of you who are not, can’t not find, and still need to find a certified electrician… there’s units out there that don’t require wiring which do the job well and safe.

I recommend any and all home brewers who are after good flavour beer to get some kind of temperature control. It doesn’t need to be a unit like above, it might just be a cool and stable room in the house/shed. Big changes in temperature and high temperatures makes a (negative) difference to the taste of your beer.

-Mikey

Tagged , ,

Sneaky cider, keeping it cool

Exactly two weeks ago I made another cider. Yeah, I know I’ve been complaining that I haven’t done a beer for a while and then I go make a cider! This was a little experiment in keeping something cool enough over summer months. While it hasn’t really been that hot, or even warm, things have gone well.

The cider itself is a real basic one. One litre of apple juice and 1.4 litres of apple & pear juice. Added in sugar, yeast and yeast nutrient. Whole thing done in about 10-15 mins. To speed up the process I used the blender to mix sugar into juice, one litre at a time. As there’s no boil everything has to be sanitised, including the blender.

What’s in Sneaky Cider #1?

  • 2.4-2.5 litres of apple and pear juice (Berri)
  • 1-1.1 litres of apple juice (Golden Circle)
  • 180 grams of white table sugar
  • 1 teaspoon of Premium Brewer’s Yeast (Pat Mack’s)
  • 1 teaspoon of yeast nutrient

Learning from the mistakes of the last cider attempt, I kept sugar levels low. Worked out being only 20 grams per litre rather than the 120 grams per litre or 200 grams per litre of the last attempts. This should help in two ways. First it will keep the alcohol levels down to something considered normal. Second there shouldn’t be anywhere near as much left over sugar which will keep the sweetness down. It’s the second if theses that I’m really interested in. Last time it was undrinkable when first sampled. Then only just drinkable when it was done, but not for everyone.

Sneaky Cider #1

Sneaky Cider #1, in the carboy, in the water, in the pot

The really exciting part of the cider isn’t the recipe or how it might turn out. No, the real thing is the makeshift cooling set up. I’ve got my new big pot with water then put the carboy into it. The water goes up to about the same hight as the liquid in the carboy which means it works as insulation. That’s pretty sweet. But the best part is that I can drop ice packs into the water to chill the water back down, like during the day. And that’s what I did. For about a week and a bit I dropped 2-4 ice packs into the water every day. Well, nearly every day. The result was that the temperature ranged from about 17 degrees Celsius up to about 19 degrees Celsius. Not great control but, still good.

Now just gone two weeks I’m leaving the whole thing to do it’s thing before bottling this weekend. I’m half hoping as it gets warmer it encourages the last of the yeast to kick in or drop out. Not really sure how that stuff works, even after over a year of mucking around with the stuff. Then I’ll give it two weeks before we try and let you know how it turns out.

-Mikey

Tagged , , , , , , ,

Alive and brewing, just

Hi. You’re probably wondering why there hasn’t been a post for over two weeks. No, we’re not dead. No, we haven’t stopped brewing. But things have totally slowed down. It’s the heat.

Summer in Melbourne has been a real stinker the last 8 weeks or so. Plenty of days above 32°C. Chas had a little trouble controlling temperature with the second Red Dog Pale Ale. Beer turned out good, review up soon. Chas keeps everything inside and that means when he cools his place the beer stays cool. At my pace I’ve got the brew shed, AKA the garage. No air-con, no fan, not even an ice pack. No cooling means no brewing. I’m not going to leave another brew ferment at high temperatures, or worse kill the yeast.

I’ve been thinking about some work around solutions. Might try something if it’s going to look like we’ll have a whole week under 25°C. Good news is we’re going to have four days in a row under 25°C. Bad news is it might be another month before we’re consistently under that. I’m also looking at a long term solution. I need to get my act into gear and get rid of some stuff first.

Michael's mash tun

Michael’s mash tun with recirculation draining out the wort

As I’m not brewing I’ve gone to visit some others who are. Three weeks ago, on Australia Day, I went and visited my friend Michael. He’s a super keen brewer and looking to make it pro. He has gone all grain brewing and has plenty of equipment. You can read about his brewing journey on his blog twistnstout. The day I visited he was brewing his Triple. Was great introduction to what all grain brewing is like. I wasn’t able to stay the whole day but did get to check out a lot of the gear. Man, he has heaps of cool stuff. Things like counter-flow chillier, pump for his mash tun and a brew fridge for fermenting & conditioning beer! We haven’t talked about all grain brewing much, so a few of those things probably look like made up words. Might update some of the sections here so we can talk about that stuff more. Anyway, good day.

Michael's pump for recirculation

Michael’s electric pump to do the recirculation. Next to the mash tun.

Just over a week ago I went and visited Justin, Carnie Brew, and his mates for a brew day. They had four sets of equipment and were doing four brew-in-a-bag all grain brews when I got there! Then they did a fifth! Four big, and I mean really big, pot/kettles/urns all heating the grain made for a very hot room. It was a long day as they started at 9am and the last brew wasn’t done until about 5pm. Very interesting that they all did no-chill. It’s where you put the hot wort in a vessel, squeeze out the air and leave to chill over a few days before starting fermentation. Was a lot of fun hanging out. Was a bit of a contrast to the all grain brewing at Michael’s place only two weeks before. And, good comparison to the brew-in-a-bag all grain brews with Chas.

Michael's boil pot

Big pot for boiling the wort. Note that there’s a tap for easy draining.

When will I brew again? Hopefully soon. Have a few things I’m keen to try. Some more pale ale trials, a super stout and my first all grain brew are on the cards. Until then there’s a few write ups to be done, including one that’s well overdue.

-Mikey


Tagged , , ,

New and old, recipe and brewer mix up

Saturday brew day was a long one, nearly 5 hours. I wanted to have another crack at the Baltic Porter. Chas wasn’t available so my mate Kilan came over to give me a hand.

Kilan has done a bit of home brewing over the last few years. Most of his equipment is in storage. He’s still been able to make some cider and brought over a bottle to share. Will talk about that later.

Was fun to have Kilan over for the arvo. We worked on a few things that neither of us had done before. Had a couple near misses and a whole heap of improvisation. By the end of the day we had bottled the Hoppy Heart IPA and brewed what we felt would be a really good beer.

The last time I did the Baltic Porter it was a 10 litre batch. The beer came out nice enough but lacked some body. The beer had a little too much sweetness. There was room to adds more complexity. In short, there was a lot that could be tweaked.

Baltic Porter #2 Mash

Baltic Porter #2
Grains in bag, in pot and mashing

Given the relative ease of the full grain mash at Chas’s last week I thought of trying a mini mash. The recipe was upping to a 17 litre batch and ingredients to match. That meant a lot more grain. Last time the recipe only had Crystal grains, which can’t mass by themselves. With advice from Chas I decided to include some Chocolate malt, which I believe can mash. So all 2kg of the grain went in to mash.

Kilian was a champ and crushed the chocolate malt grain. The only thing I had was a mortar and pestal which meant some grain got crushed. Hope that doesn’t make much difference.

The Crystal grain went into a grain bag and into the pot. The Chocolate grain got thrown into the bag then all was stirred in. Mash was done at 68°C and had 5 litres of water. Wow, that grain soaked it all up and expanded like a balloon! Mash went for a full sixty mins.

While waiting for the mash to finish we bottled the Hoppy Heart IPA. The final gravity came in at 1.019. With the carbonation drops it will be 6.4% alcohol. And before you ask, yes I will move to bulk priming soon.

We opened the apple cider that Kilan brought. That was an interesting drink, and I mean that in all ways. We chilled it right down and was cold most of the time. First up it tasted like alcoholic orange juice, not like apple. Sort of super sweet and slightly tart. The smell was pretty bad, almost like something off. As it warmed up the cider became more like apple and more dry. Much better cold. I think something might have gone wrong with the yeast and / or fermentation. Let’s see euchre same thing happens to my cider.

Back to the brew, and mash was done. Only problem now was how to sparge the grain. And there was a huge amount. Was fortunate that the kettle we have at home has different temperature settings with the lowest being 75°C. So we used that and poured the water over the bag of grains. Each time we tried to press out as much liquid as possible, but we didn’t really have the right set up. After a few kettle’s worth of water at said temperature there was a lot of volume for the boil. I would have liked to do more sparging, but the boil pot just wouldn’t hold it all.

Baltic Porter #2 Grains

Baltic Porter #2
Grains ready for more sparging

So onto the boil. Earlier I realised that I didn’t have the exact amount of hops to do what I wanted. There wasn’t as much Warrior and that was suppose to be the bittering. As a compromise I moved some of the Fuggles from aroma stage to taste. By moving them earlier it should add a bit more bitterness, and hopefully balance. Will have to wait and see.

Once the boil started we re-hydrated the yeast. It’s the first time I’ve done this. It was pretty easy. The only problem is the water that was boiled so early on it cooled down too much. A quick zap in the microwave brought it back up to temperature. The yeast sat in the water while we dissolved the tea spoon of dry malt in half a glass of boiled water. Then waited half an hour before adding that in and gave it a mix.

I held off on adding the dry malt for a bit. Have been getting advice not to add all malt at the start of boils and wanted to try it out. As a result we didn’t get a hot break, it just came to a boil. Bittering hops went in at start, then taste hops at thirty minutes with the first 800 grams of dry malt a five minutes later. Another fifteen minutes later added in the last 400 grams of dry malt. Five mins after that the aroma hops. Then only five more mins before flame out.

Pot was transferred to an ice bath. Some ice cubes went directly into the wort, water previously boiled before frozen. A second bath for the pot. Then into the fermenter. Added a little more sparged grain liquid, that might not have been the best idea as I’m not sure if that could have lead to contamination. Too late now! The liquid malt only went in at this stage, note that it wasn’t part of the boil. Not sure if that will make much difference. Let me know what you think with a comment below.

The wort was still quite hot. That was even after adding about four litres of very cold water. Will need more ice if I’m going to do something this large and this method again. After a couple hours the temperature was down to something close to what I wanted. Yeast was pitched at about 25°C. I forgot to put the yeast nutrient in at the same time. So, went back an hour later and put in four heaped teaspoons and sealed back up.


Baltic Porter #2 Yeast

Baltic Porter #2
Re-hydrated Yeast in the jug

60 min mash at 68°C

– 1.5 kg of Crystal 120
– 500 grams of Chocolate Malt 600

Boil wort from mash
60 min
add 8 grams of Warrior hops
30 min
add 14 grams of Fuggels hops
25 min
add 800 grams of light malt extract
10 min
add 400 grams of light malt extract
5 mins
add 5 grams of Fuggels hops

Into ferment:
– wort
– 1.7 kg of Amber liquid malt extract (Black Rock)
– water & ice to bring to 17 litres

Once at 25°C
add 7 grams of yeast, 5g Windsor & 2g kit yeast (previously re-hydrated)
add 4 heaped teaspoons of yeast nutrient

A bit of a strange brew. Some new techniques and processes. Some corrections from previous brews. Some ingredients just thrown together, like hops and yeast. The final gravity came in at 1.071 which is pretty good given the calculated was only 0.002 higher than that. If fermentation can take it down to 1.025 that will mean about 6.5% alcohol before bottling. And this one will be bulk primed.

-Mikey

Tagged , , , , , , , , , , , , , , ,

Return of an old kit, now colder

Sunday was brew day at my place again. Yay! I’m enjoying the small batches and this was another one.

First up was bottling the Australian Wattle Pale Ale. Got pretty carried away and nearly forgot to take a sample for the final gravity. Was happy with the final reading of 1.014 which means it will be 4.2% ABV after conditioning in the bottles. The sample for gravity was also our sample. Have to say it was very rough and bitter. Might need more than the regular two weeks conditioning.

Worth nothing that this was the first beer that I’ve had proper temperature control. The sensor was attached and set at 22°C. There is one degree buffer range on the sensor. This meant brewing temperature was kept between 21.0°C and 22.5°C. That top range estimate as I wasn’t constantly checking. I wasn’t even checking that often. Anyway, point is that there was some control on this fermentation.

After all the bottling was done it was time for the next brew. This time it was a return to the BrewSmith Hoppy Heart IPA. I quite liked the last batch and wanted another lighter flavoured beer before trying the Baltic Porter again.

Hoppy Heart and Aussie Wattle

Hoppy Heart IPA in carboy in blanket and Aussie Wattle Pale Ale in bottles.

Had fun with this brew. Read the instructions before starting, after the mess that was the Pale Ale. The kit was straight forward and everything went to plan.

Did a couple extra things. For the steeped grains did a sparge to rinse out more flavour, colour and sugars. Thus gave a slightly darker beer but should be more flavour.

Also played around with the cold break. Used two 1.25L bottles with frozen water as ice blocks to cool the original water. This worked well. Also added about a litre of chilled water direct to the wort. After ten minutes changed over the water. As part of this I poured the near-frozen water into the sink for the bath, and topping up the bottles with tap water to continue the chilling effect. The wort wasn’t chilled enough enough after another 10 minutes. So a third bath was required. It was only now that I realised there were two trays if ice specifically prepared. They were thrown in. As a result the temperature dropped too much and there was too much wort.

The wort only just fit into the carboy. A lot of shaking later, for oxygenation, we took a sample for gravity. It came in at 1.064 which is quite alright. Yeast was pitched and put away with temperature set at 21°C. So, should ferment at 20° to 21.5°.

The day went well. Bottling and brewing on the smaller scale if things is nice. Plus return to a nice beer that was chilled, and will be fermented, cooler than before.

– Mikey

Tagged , , , , , , , , , ,