Tag Archives: brewing

Making the Friedlieb all grain

DSC_0410Back in October 2013, we made a second version of a coffee porter called the Friedlieb. It used malt extract and some specialty grain. Now we figured we’d try to make it an all grain.

We basically had to start again to try to adapt what was about 1.5 kilograms of liquid malt and 250 grams of dry malt (for 12 litres). The liquid malt was a golden light and the dry was a dark malt, so we decided to replace this with 2 kilograms of traditional pale malt and up some of the other darker grains as well (for 8 litres).

The beer might not turn out “portery” enough, but this is just the start of things, so if we need to up the dark malts a little more, we will. All that being said, this has always been a fairly light porter, so we’ll see.

We also upped the peated malt to try and bring out even more smoke in the brew. Some would say we’re pushing it too much, but it’s hard to get the peat to come out above the large amount of coffee we’re putting in there, so…

The ingredients were (for an 8 litre batch):

  • 2 kilograms of traditional pale malt
  • 180 grams dark crystal
  • 100 grams chocolate malt
  • 150 grams peated malt
  • 100 grams melanoidin
  • 120 grams rye malt
  • 6 grams Willamette (bittering) – 30 minutes
  • 6 grams Fuggles (taste) – 15 minutes
  • 6 grams Fuggles (aroma) – 0 minutes
  • 16 shots espresso
  • 2 cups brown sugar
  • Windsor style ale yeast

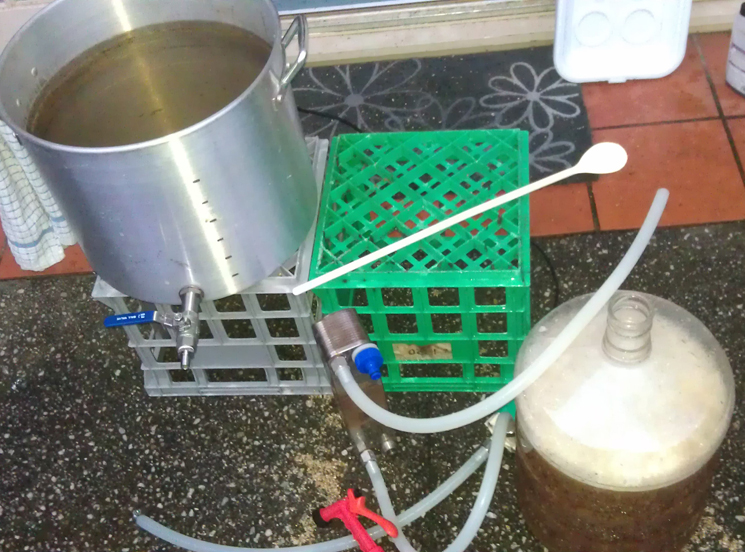
All the grains were mashed for an hour in eight litres of water at 65 degrees. We were able to keep the temperature pretty constant, and this seemed like a good amount of water for the grains.

DSC_0413
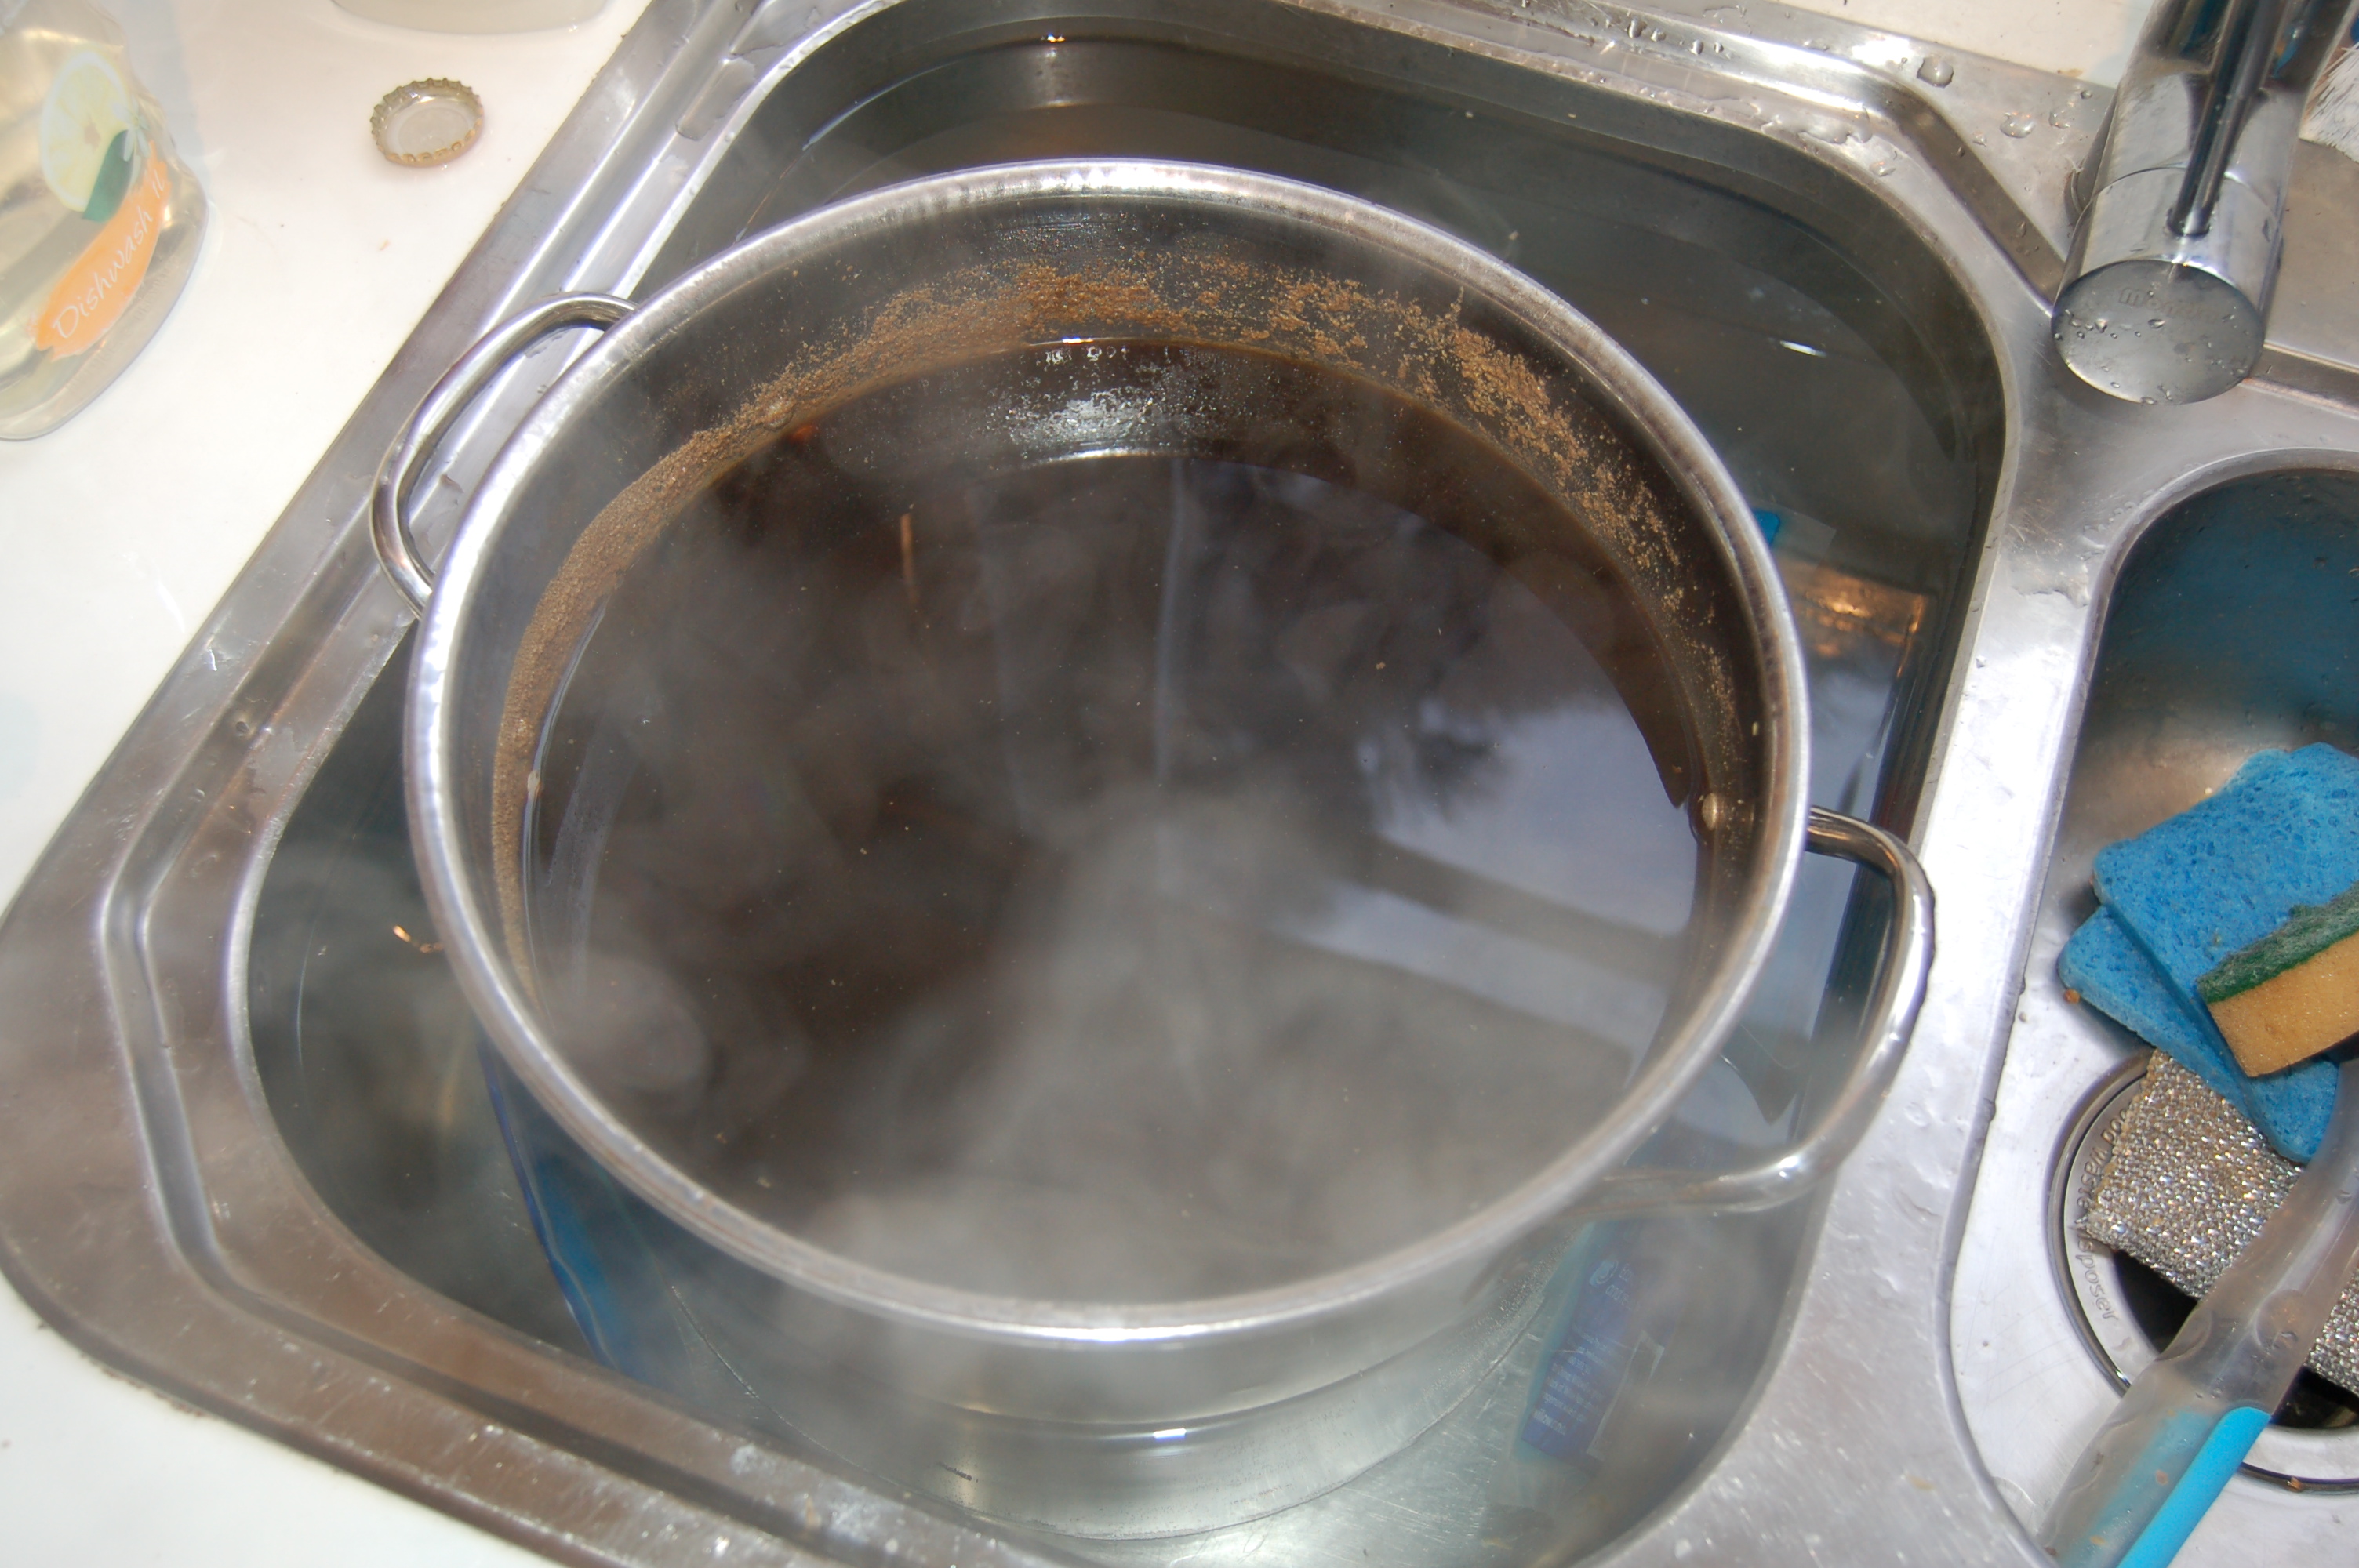
We played around with the pots a bit to do everything right. Basically, we just let the grains mash in the biggest pot we could get (about 12 litres) without a bag or anything like that. After the mashing process, we strained all this (through a few bags) in a couple smaller pots. With the grain now in a couple grain bags, we transferred all the wort back to the big pot and sparged. It worked pretty well! But we still need a bigger pot…

From there, it was pretty standard.

The brown sugar and coffee went in with 5 minutes left to the boil.

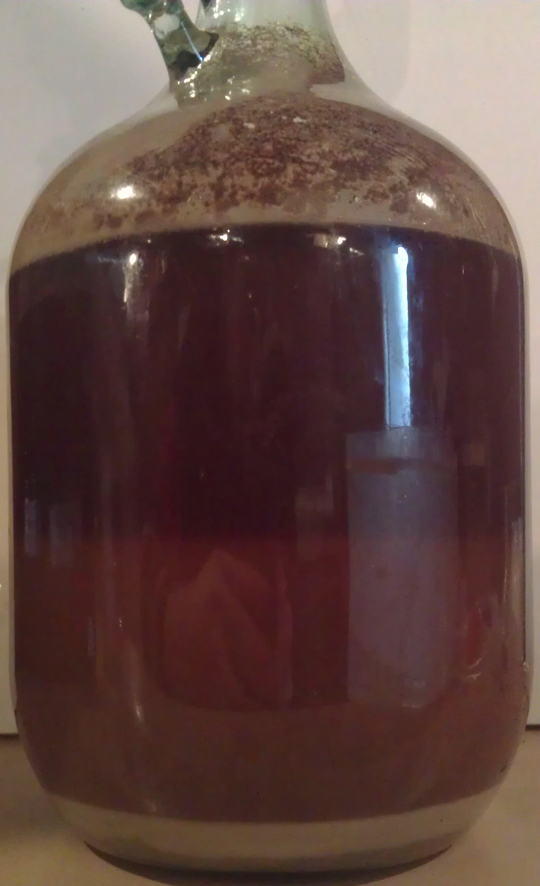
Cooling was pretty easy and we were left with about 7 litres of liquid, so there wasn’t a whole lot of topping up to do to get it up to 8 litres.

The original gravity was 1.063 which isn’t bad considering we were approximating the grain from a previous extract brew with an OG of 1.073. Depending on how things turn out, we may up the malt a bit and/or mash the grains for a bit longer to bring that original gravity up a little bit.

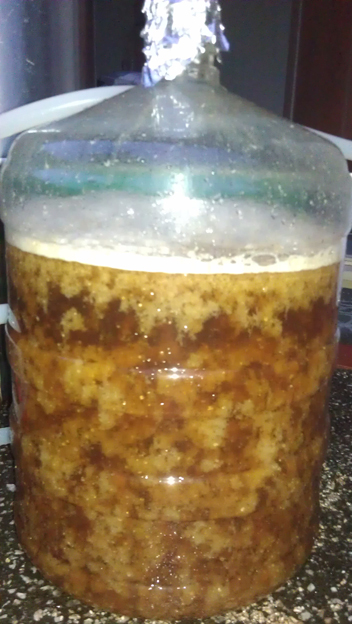
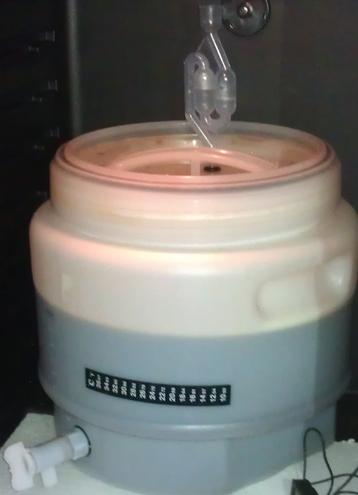
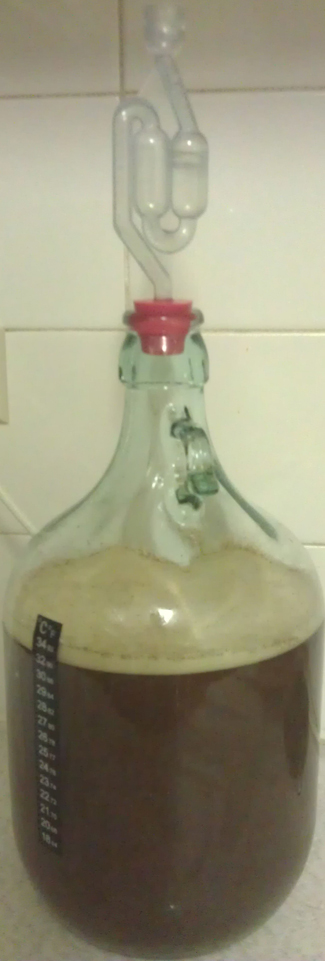
Anyway, the beer is currently bubbling away and should be ready to bottle pretty quick. I’m eager to see how it turns out and modify further!

-Chas

Tagged , , , , ,

When you don’t brew, go brew

Chas is still overseas having fun and tasting beers. I’m still naively waiting on the Super Stout. So… what to do when not brewing? Help a mate with his brew!

Strong Belgian Golden Ale sparge

Strong Belgian Golden Ale sparging away with hot liqueur pot, mash tun, pump and boiling pot

Last weekend here in Melbourne was a long weekend thanks to Queen’s Birthday public holiday. No, it’s not her Birthday, the holiday is about something else. Anyway.

On Saturday I went around to my mate Michael‘s place. He’s been doing all grain for a while. Last time I was there I had to leave early and missed a few things. This time I was there from start to (nearly) the very end. This was a very long day. Started at 10:30 am and at 5:15 pm both the airing of the wort and pitching of the yeast were still left to do. That’s one very long brew day for a home brew.

Like last time Michael was doing a Belgian quad, which didn’t work out that well. This time a Strong Belgian Golden Ale, which hopefully turns out well. The process was mainly the same. Fist heat the water for the mash and then put that in the mash tun. Grain goes in, stir and wait. Recirculate the liquid to settle the grain bed. Next was a bit different. Fly sparge rather than batch sparge. What you do is slowly drip water over the top while letting the liquid drain out the bottom. Apparently, if done right you get a better conversion (getting sugars from the grains) than batch sparing.

Hop leaf

Hop leaf in a hop bag

Boil was next. A long boil as Michael needed to reduce volume. After that was done a hop bag with loose leaf hop flowers went in. I’ve never seen loose leaf hops before. Most people I know use pellets. Had a taste and wasn’t sure what to think about them. Interesting, but not sure if it’s for me.

The chilling was very cool (pun fully intended). Michael has a counter flow plate chiller. Brew goes in one end and out the other, while cold tap water goes in the reverse direction in a different channel. Long story short, lots of liquid moves really quickly and your brew gets chilled a lot.

Strong Belgian Golden Ale chilled

Strong Belgian Golden Ale chilled with pot and plate chiller

Like I said, had to leave before the brew was aerated or the yeast pitched. But, you can get an idea from the photos how much goes on. Lots of steps and lots of equipment. I have to say, I’m slightly jealous of all the equipment. But that’s offset by the idea of having to (a) take so long to make a beer and (b) that thought of cleaning all that equipment.

Then Monday went around to my good mate Ian‘s place. He wanted to do An American Brown Ale. Something nice to have over the cooler months. And, to be completely different to the all grain brew, it was an all extract brew.

Strong Belgian Golden Ale done

Strong Belgian Golden Ale done, except aeration and yeast

For this brew I was there from the very start to the very end. Plus it was a lot quicker. Dry malt extract and hop pellets measured out. Boil the water, first addition of dry malt, hot break, add hops 1, add hops 2, add hops 3 and the last of the dry malt. Then onto chilling, which went a lot quicker than expected. We chilled it so well that it was almost too cool to pitch the yeats. But before the yeast went in I made Ian take a gravity reading. Hopefully this means we’ll known the alcohol percentage on his beer.

An American Brown done

An American Brown done and ready to start fermenting

Thinking back on the long weekend, I’m not sure which brew day I enjoyed more. They were both laid back in their own way. Ian’s was pretty easy, but a fair few things on one after the other. And once it was all done we hung out for a while which was fun. The brew day at Michael’s was a lot longer. And as a lot of steps took a chunk of time there was plenty of down time. That said it was also a lot more complex and a few things were nearly missed. One thing I know for sure, brew days are fun.

-Mikey

Tagged , , , , , , , , ,

Alive and brewing, just

Hi. You’re probably wondering why there hasn’t been a post for over two weeks. No, we’re not dead. No, we haven’t stopped brewing. But things have totally slowed down. It’s the heat.

Summer in Melbourne has been a real stinker the last 8 weeks or so. Plenty of days above 32°C. Chas had a little trouble controlling temperature with the second Red Dog Pale Ale. Beer turned out good, review up soon. Chas keeps everything inside and that means when he cools his place the beer stays cool. At my pace I’ve got the brew shed, AKA the garage. No air-con, no fan, not even an ice pack. No cooling means no brewing. I’m not going to leave another brew ferment at high temperatures, or worse kill the yeast.

I’ve been thinking about some work around solutions. Might try something if it’s going to look like we’ll have a whole week under 25°C. Good news is we’re going to have four days in a row under 25°C. Bad news is it might be another month before we’re consistently under that. I’m also looking at a long term solution. I need to get my act into gear and get rid of some stuff first.

Michael's mash tun

Michael’s mash tun with recirculation draining out the wort

As I’m not brewing I’ve gone to visit some others who are. Three weeks ago, on Australia Day, I went and visited my friend Michael. He’s a super keen brewer and looking to make it pro. He has gone all grain brewing and has plenty of equipment. You can read about his brewing journey on his blog twistnstout. The day I visited he was brewing his Triple. Was great introduction to what all grain brewing is like. I wasn’t able to stay the whole day but did get to check out a lot of the gear. Man, he has heaps of cool stuff. Things like counter-flow chillier, pump for his mash tun and a brew fridge for fermenting & conditioning beer! We haven’t talked about all grain brewing much, so a few of those things probably look like made up words. Might update some of the sections here so we can talk about that stuff more. Anyway, good day.

Michael's pump for recirculation

Michael’s electric pump to do the recirculation. Next to the mash tun.

Just over a week ago I went and visited Justin, Carnie Brew, and his mates for a brew day. They had four sets of equipment and were doing four brew-in-a-bag all grain brews when I got there! Then they did a fifth! Four big, and I mean really big, pot/kettles/urns all heating the grain made for a very hot room. It was a long day as they started at 9am and the last brew wasn’t done until about 5pm. Very interesting that they all did no-chill. It’s where you put the hot wort in a vessel, squeeze out the air and leave to chill over a few days before starting fermentation. Was a lot of fun hanging out. Was a bit of a contrast to the all grain brewing at Michael’s place only two weeks before. And, good comparison to the brew-in-a-bag all grain brews with Chas.

Michael's boil pot

Big pot for boiling the wort. Note that there’s a tap for easy draining.

When will I brew again? Hopefully soon. Have a few things I’m keen to try. Some more pale ale trials, a super stout and my first all grain brew are on the cards. Until then there’s a few write ups to be done, including one that’s well overdue.

-Mikey


Tagged , , ,

When is it cheating?

Hi all!

Yes, I haven’t written anything in awhile.  Since the fifth of November to be precise.  Don’t worry, Mikey has had stern words to me.  I haven’t done a brew in a few weeks either!  Once again, Mikey has had stern words to me.

Since I haven’t brewed in awhile, I figured I’d share some thoughts.  This comes from a conversation Mikey and I had a few weeks ago.

With a variety of brewing methods available: extract, steeped grains, mini-mash, all grain, and combinations there of; when is it cheating?  At what point can you no longer say “I made this beer”?

Purists will probably say all grain is the only way to go.  If you’re not mashing the grains yourself, and therefore not making your own malt, you’re not actually making your own beer.  I’m sure there are even those who say one must even mill their own grain!  But then you should also be growing your own grain and therefore your own hops… you should have your own lab to culture your own yeast.  Where does it end?

However, the steeped grain process offers a great opportunity to experiment with the flavours from various (unmalted) specialty grains.  All this process is doing is freeing the brewer from the “burden” of mashing their own grains.  And mashing isn’t terribly difficult; while it’s possible to “get it wrong” or do it well/badly, it’s actually a simple process.  So, at the risk of being extremely controversial, it’s not the be all and end all of home brewing.

Even with extract brewing, the brewer has the opportunity to add their own hops for extra flavours.  Either the brewer is inexperienced and still experimenting, wants something simple for whatever (completely valid) reason, or that’s simply the brew they want to do.

So I guess the real question is: is extract brewing cheating?  Is the idea of a kit and kilo a little too easy?  The process is extremely simple: dump some pre-made stuff in a bucket, add water, and you’re done.  Ignoring the fact that this is a great way for people to learn the basics and realise the importance of sanitising, it is a bit like ready to eat cake mix.  If you just add water and stick it in the over, can you still say you baked a cake?

Well… ultimately who cares?  For a hobbyist, it really just matters that you’re enjoying yourself.  Home brewing is a great hobby not only because it’s excessively fun, but you also get a great product at the end that you can share with your friends.  And friends always enjoy sharing beer with each other.

I was at a mate’s party a few weeks back and he asked me to bring some home brew.  He didn’t give me enough time to make a batch just for the party so I just brought what I had on hand: and extract brew.  Everyone loved it!  Of course I said it was an extract brew – I wasn’t going to take credit for a brilliant all grain – but people were still interested in it and interested in the process.  I enjoyed making that beer and I enjoyed drinking it with friends.

So really, it’s never cheating.  Do what you enjoy!

-Chas

Tagged , , , , , , , ,

Return of an old kit, now colder

Sunday was brew day at my place again. Yay! I’m enjoying the small batches and this was another one.

First up was bottling the Australian Wattle Pale Ale. Got pretty carried away and nearly forgot to take a sample for the final gravity. Was happy with the final reading of 1.014 which means it will be 4.2% ABV after conditioning in the bottles. The sample for gravity was also our sample. Have to say it was very rough and bitter. Might need more than the regular two weeks conditioning.

Worth nothing that this was the first beer that I’ve had proper temperature control. The sensor was attached and set at 22°C. There is one degree buffer range on the sensor. This meant brewing temperature was kept between 21.0°C and 22.5°C. That top range estimate as I wasn’t constantly checking. I wasn’t even checking that often. Anyway, point is that there was some control on this fermentation.

After all the bottling was done it was time for the next brew. This time it was a return to the BrewSmith Hoppy Heart IPA. I quite liked the last batch and wanted another lighter flavoured beer before trying the Baltic Porter again.

Hoppy Heart and Aussie Wattle

Hoppy Heart IPA in carboy in blanket and Aussie Wattle Pale Ale in bottles.

Had fun with this brew. Read the instructions before starting, after the mess that was the Pale Ale. The kit was straight forward and everything went to plan.

Did a couple extra things. For the steeped grains did a sparge to rinse out more flavour, colour and sugars. Thus gave a slightly darker beer but should be more flavour.

Also played around with the cold break. Used two 1.25L bottles with frozen water as ice blocks to cool the original water. This worked well. Also added about a litre of chilled water direct to the wort. After ten minutes changed over the water. As part of this I poured the near-frozen water into the sink for the bath, and topping up the bottles with tap water to continue the chilling effect. The wort wasn’t chilled enough enough after another 10 minutes. So a third bath was required. It was only now that I realised there were two trays if ice specifically prepared. They were thrown in. As a result the temperature dropped too much and there was too much wort.

The wort only just fit into the carboy. A lot of shaking later, for oxygenation, we took a sample for gravity. It came in at 1.064 which is quite alright. Yeast was pitched and put away with temperature set at 21°C. So, should ferment at 20° to 21.5°.

The day went well. Bottling and brewing on the smaller scale if things is nice. Plus return to a nice beer that was chilled, and will be fermented, cooler than before.

– Mikey

Tagged , , , , , , , , , ,

Same-same, but different

Brewing day. Ah, nice to have one that doesn’t involve having to fill 80+ bottles. Due to craziness, ie doing other stuff, brew day was moved to Saturday. Plus there was no need to do a supply run which always saves a fair bit of time.

Australian Pale Ale #1

Australian Pale Ale #1 in carboy with separation after 2 weeks.

In the last brew we made the Australian Pale Ale #1. This was an experiment to see what could be done with just a can of liquid malt and hops. It was an attempt to make a very simple but still tasty home brew beer. Last time it was a can of light malt, this time amber malt. Rest of the recipe was the same. Same hops, same boil time, same yeast. Well, the yeast was slight different combination and I’ll explain a bit further down.

So, bottling the Australian Pale Ale #1 was quick. Only 12 bottles used, and the last one wasn’t a full one. There was a huge amount of sediment on the bottom and the brew looked like it had separated at the half way point. Not sure what that was about. There’s the pic to the side here. Anyway, we did a quick stir to mix the two half’s together before bottling. Due to the massive amount of yeast the bottles were very cloudy. I’m not sure how much sugar wasn’t fermented and this is the first time I’m a bit concerned about exploding bottles. Very interesting that the final gravity reading came in at 1.040. That’s high, very high. I’m thinking it’s mainly to do with the huge amounts of yeast. Anyway it means the beer will be 8.6% after bottled. Yay, finally a strong beer.

After that was all done it was onto making the Australian Amber Ale #1. Yes, I know the names are basic and Chas comes up with some great ones. I just can’t be bothered until I get one that I’m happy to continually remake. Plus, the name says what it is.

Started with three litre boil and threw in the can of liquid amber malt. Start of boil added 3 grams of Warrior hops. Twenty mins latter added 2 grams of Galaxy hops. Then 15 mins later another 2 grams of Galaxy hops. Five more mins then flame out and into the sink for a cool bath. Once temperature was close to what was needed it was pored into the carboy and topped up with cold water. Chas got shaking with the carboy and gravity readying was done, 1.097. That’s less then the Australian Pale Ale #1 and I think it’s because a bit more water went into this at the end.

Australian Amber Ale #1

Australian Amber Ale #1 in carboy.

Yeast for the last beer was an issue. There was too much left and the SN9 wine yeast was only put in after 10 days which didn’t do much. So, for the Australian Amber Ale #1 there was a change in what was done. Only half of a kit yeast pack was put in, and the SN9 wine yeast was put in at the same time.

  • Black Rock Amber Liquid Malt Extract – 1.5kg
  • Warrior hops – 3g
  • Galaxy – 4g (split)
  • Kit ‘Premium Brewing Yeast’ – 2.5g
  • ‘Premium Wine Yeast’ SN9 – 1g-ish

A good brew day was had. We busted out the Newcastle Brown and had a couple. Chas put up the review yesterday. Had a couple of the lagers, but one bottle was flat (no sugars in the bottle?). And opened a stout, but it’s not ready yet.

-Mikey

Tagged , , , , , , , , , , , , , ,

Bottle day now with 20% more bottles, and a brew

Sunday was another brew day, of sorts. Really it was more of a bottling day with a brew at the end.

Australian Pale Ale 1

Australian Pale Ale 1 in the carboy

First order of business was to pick up some new supplies and equipment. My hydrometer broke last brew day and needed another. Needed some more no-rinse sanitizer. Plus picked up some liquid malt, hops (Warrior & Galaxy) and carbonation drops. Decided to go for more carbonation drops as I didn’t want to prime by measuring sugar, and was too lazy to work out how to do bulk priming.

Once back, it was onwards to the bottling. First up was the last 5 odd litres of the Newcastle brown. That was okay. Got 15 bottles in.

Next was the Stout. Gravity reading came in at 1.020 which means after bottling it will only be 4.0% ABV. That’s pretty low for a Stout. Might even need to call it a dark porter. Anyway, we needed to bottle all of it. ALL 23 litres! That’s 68 stubbies! Needless to say, this took most of the day.

Had a couple of breaks along the way. Got to try Chas’s coffee porter. Cracked open a bottle off the Newcastle brown, but it wasn’t ready yet.

Finally after bottling was done we moved onto brewing. For the past couple if weeks I’ve been thinking about how to get a very strong beer and still keep it easy. There’s a couple ways you can go about doing that, and hopefully over the next few months we’ll try as many of those options as we can. To make sure nothing too crazy is done I’m using a home brewing spreadsheet that let’s you put in ingredients and it tells you what characteristics of the beer will be. It’s amazing and I highly recommend getting your hands on it. You will need to sign up to Aussie Home Brewer if you haven’t already.

Anyway, this time around the brew was going to be a 4.5 litres batch for the carboy. Was using liquid malt extract that hadn’t been hopped and doing a 40 min boil with three hop additions.There was a whole 1.5kg can of liquid malt that went in. For a brew this small that’s right on the edge of madness, but I was keen to do this as a real test if a few things.

For lack of a better name, this is getting called Australian Pale Ale #1.

A big pot was filled with 3 litres of water, set to heat and LME was added. After the hot break added 3g of the Warrior hops. Twenty mins later added 2g of Galaxy hops, then last 2g of Galaxy was added 5 mins to the end. When the liquid malt went in the can was washed out with some boiled water. Not sure how much, but originally I was concerned we had to much liquid. In the end a lot boiled off leaving something just over four litres left. Given there was so much heat it took quite some time for the wort to cool down. The pot went through two long cold baths to get down to 22C. As there was a lot more liquid boiled off, I needed to top up the carboy with some extra water. Then I took a sample for a gravity reading.

Yeast was pitched. Used a whole pack of kit yeast as I had some spare lying around. Then give the whole thing a good shake, BrewSmith style.

Then, I checked my gravity reading and it was much lower than expected. Ahhh! I didn’t mix my wort properly. So, get rid of the sample and took another, which took out some of the yeast. But, that’s okay ‘cos there was a huge amount of yeast. Anyway the gravity came in a whopping 1.102!!

  • Black Light Liquid Malt Extract – 1.5kg
  • Warrior hops – 3g
  • Galaxy – 4g (split)
  • Kit ‘Premium Brewing Yeast’ – 5g

So, a few days in and the brew its going well. Huge amount of activity, but no blow out (lucky). From what’s coming out of the airlock, it smells great. Thanks to Chas in about 4-5 days I’m going to throw in some SN9 ‘Premium Wine Yeast’. This will eat up the last of the sugars, and have something to carbonate the bottles.

-Mikey

Tagged , , , , , , , , , , , , , , ,

New Brew for New Financial Year, Happy Brew Financial Year!

Yeah, I know that’s a bit of a crap name for a post. I did want to do something witty, didn’t quite get there. Plus, the other options were pretty bad.

Black Rock Miners Stout

Black Rock Miners Stout can and fermenter

As Chas mentioned yesterday it was a busy weekend. Last if the lager was bottled. Then 5 litres of the Newcastle Brown Ale went into storage while the other 17 litres went into bottles.

There were tastings of a whole range of brews. Cider, dark ale, lager and porter. Reviews will be slowly going up over the next week out so. And then there was a brew.

I wanted to make something simple and easy. And I wanted another dark beer. When I picked up the kit for Newcastle Brown Ale I also grabbed a can of Black Rock Miners Stout. Picked up some “stout booster” as well. On some good advice I also grabbed a pack of Windsor Ale Yeast to replace the kit yeast.

Yep, some would say it’s a step backwards in home brew. But when you are running low on time, or just can’t be stuffed, a can kit does fine.

First there was the can as the base. The “stout booster” was a kilo mix of dry dark malt extract, light malt extract, and maybe dextrose. And lastly threw in the 900 grams of Dextrose, which was left over from the original Heritage Lager kit.

  • Black Rock Miners Stout – 1.7kg
  • Brew Blend Stout Booster #25 – 1kg
  • Dextrose – 900g
  • Danstar Windsor Ale Yeast – 11g

Had a lot of trouble with heat on this one. Didn’t really pay attention to how much boiling water went in at the start. As a result, even after for trays of ice, we had to leave the wort cool for half an hour before pitching the yeast. The lid, with airlock, was put on to prevent infection. Overall it was a real pain in the arse. There is a good lesson in there about temperature control.

Final gravity was 1.045. I was hoping for more. That’s three brews in a row where final gravity was less than what I wanted. If I had thought about it, I would of thrown in all the rest if the sugar in the house into the wort. Probably for the best I didn’t think of that at the time. Next brew will have a lot more dry and/or liquid malt extract. Or, maybe just a lot of grain. Hrmm, there’s a thought…

The wort was more bitter than expected. But I’m pretty sure this one will be a nice, somewhat basic and somewhat light, stout.

-Mikey

Tagged , , , , , , , , , , , ,

Blondes and Browns, big brew day

Sunday was another brew day at my place and it was big, in many ways.

Newcastle Brown Ale

Newcastle Brown Ale ingredient list and instructions

First up was a trip for supplies from Australian Home Brewing, aka Liquorcraft, aka Brewcraft, aka something-something. We have done a fair few porters lately. They are pretty awesome and good over the colder months, but time for something else for the cold. An English brown ale was what I wanted. Ended up with a Newcastle Brown Ale kit, plus a basic stout kit for another day.

Then back in the Mikey mobile (aka ‘car’) and back to brew headquarters (aka ‘home’) for brew day.

First order of business. Bottle the lager. Final gravity was 1.012 which means the beer will only be 3.8% alcohol, after bottle conditioning. That’s a fair bit lower than what I was going for. Rather than just a cup of dextrose we should if put in half a kilo. That aside, the sample we took was quite promising. Should be a good session beer.

We have been having some over carbonation in a couple of my beers. Nothing horrid, but the IPA and coffee porter (only a couple sample bottles) have overflowed when opened if shaken even slightly. I’ve been using caster sugar for priming and a few people have suggested this might be the reason. That said there’s not a lot of info on the internet about different types of cane sugar. To test this I primed some bottles of the lager with caster sugar and others with carbonation drops. Had a mix of different bottle sizes as well.

After bottling the lager it was time to start brewing. Cracked open one of the Summer Citrus Blonde Ales and got stuck into it. Chas is going to get a review up soon, so I’ll leave it to him.

The brown ale was a mixed kit. There was chocolate malt (200g), a can of light liquid malt, a can of Nut Brown Ale, some Fuggles Hops, and Safale S-04 yeast.
The malt was left to steep for about 45 mins rather than the 20-30 recommended. Mainly because we were trying to do to much at once.

Chas got the liquid light malt in a pot and brought it to the hot break. And I cleaned the fermenter. Hops were added with the steeped grains. The recipe said an optional 400 grams of brown sugar could be added. Only had 300, but it went in. I finally finished cleaning the fermenter just in time for the fresh wort to go in. Last was the can of Nut Brown Ale. Like the lager, we found the liquid a bit to hot. Was a lot more manageable this time round. Finally, yeast went on and airlock.

  • Black Rock Nut Brown Ale – 1.7kg
  • Black Rock Light Liquid Malt – 1.5kg
  • Crushed Chocolate Malt – 200g
  • Soft Brown Sugar – 300g
  • Fuggles Hops pellets – 15g
  • Safale S-04 yest – 11.5g

Have to say that this was a bit of a hectic brew day. Started late and had a huge amount to do. Tried to do too many things at once. Even spilt some of the strained hops back into the fermenter. Luckily it wasn’t much.

The wort smelt great. Gravity reading was only 1.045 which is a bit below what I would expect for the style. Hopefully this yeast brings the final reading right down. Anything less than 4.5% and I’m going to be disappointed. So, a final gravity from about 1.012 or lower will be good.

-Mikey

Tagged , , , , , , , , , , , , , ,

Moving, from small to big

Back when I started looking into home brewing I didn’t know where to start. In my first post I talked about the two types of beer kits I got. I started with the smaller, and slightly more complex kit from Brew Smith. The beer was good, really good. So I stuck with it and made a few more.

Finally time came to do the other kit. The bigger kit. The simpler kit. And I’m worried about the quality. Chas picked up exactly the same kit and the lager turned out rougher than I would have liked.

To try and make sure my version turns out a bit better I decided to replace the dextrose with some liquid malt. Got some advice at Aussie Home Brewers and picked up some Light Pilsner Malt Extract.

The brew was done on Sunday the 2nd and went pretty smoothly. A little too much heat, which wasn’t a huge problem as I really wanted a good original gravity and had to play around a bit. The gravity reading wasn’t exactly where I wanted it, so a cup (75 grams) of dextrose was thrown in at the end.

First few days the beer has been fermenting away as expected. Has slowed down the last 4-5 days and plan to bottle this weekend.

-Mikey

Tagged , , , , , , , , ,