Tag Archives: Mikey

The Friedlieb, Coffee Porter II – Review

What an amazing beer. Best beer we’ve ever made? Pay attention and you’ll find out.

The Friedlieb II is the second coffee porter from Chas. The first one was done back in June and turned out pretty good. I had some issues with the sweetness and Chas wanted more smoky-ness. This version didn’t address the smoke but sorted out a few things.

The Friedlieb coffee porter II

The Friedlieb coffee porter II ready for drinking

Now, I’m giving away a bit here, normally I will have a glass of this beer with me when I type up the review. But for this one no such luck. I wasn’t around when Chas bottled the beer and he only brought around one beer when we tasted it back on Sunday 15th. So, I’ll go by my notes and memory.

First up there’s a huge coffee aroma. There’s some hints of chocolate and sweetness as well. This beer smells like exactly what you would expect from a coffee porter. That’s a big plus. Flavour. A dark creamy hit on the palate is the first thing you notice. Plenty of coffee the whole way through this beer from start to end. Lots of full body and big dark malt flavours. So smooth across all the flavour. There’s a chocolate builds up from about the mid point which works well with the coffee and dark malt. And there’s just enough bitterness to hold it together without any noticeable hop flavours.

The beer came in at 7.3% alcohol. Quite a respectable amount. With the coffee in there and so much grain flavours it could of gone any way. Lucky for Chas it worked out a treat.

Matching this beer to food is really hard. Not because it’s a dark beer with lots of coffee and hints of sweetness. It’s because it’s so amazingly good. You really want to drink it by itself. It could work with any rich or roasted food. Dark meats or big robust vegetables. Something with a dark sauce like red wine or gravy. Other option is to have this as a dessert beer. Possibly the perfect dessert beer.

So, is this the best beer we’ve ever made? I think the answer is a resounding YES! (Chas, bring me some more!)

-Mikey

Tagged , , , , ,

Wait, what hops was that?

Last Sunday was a brew day. Yay! Fun times with Chas. Let’s plan this, and then make lots of mistakes. Um, that’s not so great.

This brew day was a continuation from Australian Pale Ale 2 and my search for an easy to brew tasty Pale Ale. After bottling on Friday, and having a sample taste, I knew that the next attempt needed to be a multi hop brew. And that meant different hops at the same times.

As well as trying a new recipe, I wanted to use the brewing caps again. That meant upping the volume of the brew. That caused some issues I didn’t realise until Chas pointed out. I’ll get to that later.

Australian Pale Ale 3

Australian Pale Ale 3 in Carboy and bottles with brewing caps

The brew was based on the Australian Pale Ale 2 and was a 30 min boil with light dry malt extract. Given the bigger volume of water there was more ingredients. Measured out 800 grams of the dry malt for the base. As most of my Galaxy hops went in the last brew I picked up some new hops. Warrior hops for bittering. Crystal hops for flavour and aroma, to be topped up with the last of the Galaxy. All three hop additions were measured out and ready to go.

First up get water to a boil and add the malt. Then after the hot break in went the first hops. Then… Um, what hops was that? A quick review of the bowls with the hops… Yep, that was the aroma hops. Crap. Okay, now what?

After a bit of running around like a crazy person I did some recalculations. New schedule with a new set of aroma hops, being just Crystal. Back to the brew. Added the original bittering hops. Flavour hops went in. Then at flameout in went the aroma hops.

Moved the pot to the ice bath for chilling. Have got a lot better with the chilling of theses small batches. Four trays of ice cubes and about one litre of near-frozen water. Works pretty well.

Then realised the volume issue(s). Given this was a three hop brew I wanted to make just a little more. So, four litres fot the carboy, then 2.5 split into two 1.25 litres plastic soft drink bottles. And that’s where the problem started, there was too much for the carboy. Solution was to use the 30 litres fermenter. Poured all in and topped up with cold water to required 6.5 litres. Oops, forgot to strain the hops out. Poured back into pot. Added yeast. Oh no, forgot to take gravity reading. Do that.

Finally ready to transfer into the bottles. Filled both, not quite to the top. Then filled carboy, and there was too much! Because the bottles weren’t filled to the full 1.25 litres there was well over 4 litres for the carboy. In the end we filled up the carboy to a few centimetres from the top and only threw out a tiny amount of the wort. Thank goodness for blow off tubes.

  • 4 litre boil
  • 800 grams Light Dry Malt Extract
  • 1 gram Galalxy & 2 grams Crystal hops @ 30 mins
  • 4 grams Warrior hops @ 25 mins
  • 2 grams Galaxy hops & 6 grams Crystal @ 5 mins
  • 2 grams Crystal @ flame out
  • Teaspoon of re-hydrated US-05 yeast

The Australian Pale Ale #3 ended up tasting quite grassy with some really well rounded spice. A fair amount of hops left after even after filtering. I’m happy with this. The gravity came in at 1.046 which is exactly what was calculated. Mind you, that did include the yeast, so we’ll wait and see.

-Mikey

Tagged , , , , , , , , , ,

Quick, get it bottled

No posts for 10 days! That’s not so good. Well time to end all that and talk about bottling the Australian Pale Ale #2.

This beer really should have been bottled last weekend. But, was away in Tassie having a nice long weekend. Now I’m back the beer needed to go in bottles. Given the last attempt at bulk priming I thought I would give it another crack on a smaller scale. It worked well.

Australian Pale Ale 2 & sugar

Australian Pale Ale 2 ready for bottling and dissolved sugar ready for bulk priming.

There was only four litres of the beer so I could rack it all in one go. Plus I dissolved the sugar in some water first. How about that for planning? Dissolved sugar into pot, beer racked over the top, nice. With the beer in the pot it was just a matter of syphoning into the bottles. All up it took longer than if I just used carbonation drops. That said I’m more likely to be happy with the carbonation, if it’s even across all the bottles.

I’ve talked about how I want beers for festivals where normal beer bottles aren’t allowed. So, for this batch I’ve filled a 450 ml plastic bottle to see how the beer turns out compared to glass bottles. Will let you know what the verdict is.

The beer came in at 1.014 for the final gravity. I’m pretty happy with that as the last couple brews haven’t been that low. Beer should end up at about 4.4% alcohol after bottle conditioning, that’s pretty much what I was going for. Double win.

Having sampled the beer, it’s clear it needs time to settle. Lots of big bitterness. There’s plenty of sweet peach aroma and the flavour comes out as well. There’s way too much bitterness at the end, which I really hope drops away significantly. Looking forward to trying this in two, or maybe three. weeks.

-Mikey

Tagged , , ,

New and old, recipe and brewer mix up

Saturday brew day was a long one, nearly 5 hours. I wanted to have another crack at the Baltic Porter. Chas wasn’t available so my mate Kilan came over to give me a hand.

Kilan has done a bit of home brewing over the last few years. Most of his equipment is in storage. He’s still been able to make some cider and brought over a bottle to share. Will talk about that later.

Was fun to have Kilan over for the arvo. We worked on a few things that neither of us had done before. Had a couple near misses and a whole heap of improvisation. By the end of the day we had bottled the Hoppy Heart IPA and brewed what we felt would be a really good beer.

The last time I did the Baltic Porter it was a 10 litre batch. The beer came out nice enough but lacked some body. The beer had a little too much sweetness. There was room to adds more complexity. In short, there was a lot that could be tweaked.

Baltic Porter #2 Mash

Baltic Porter #2
Grains in bag, in pot and mashing

Given the relative ease of the full grain mash at Chas’s last week I thought of trying a mini mash. The recipe was upping to a 17 litre batch and ingredients to match. That meant a lot more grain. Last time the recipe only had Crystal grains, which can’t mass by themselves. With advice from Chas I decided to include some Chocolate malt, which I believe can mash. So all 2kg of the grain went in to mash.

Kilian was a champ and crushed the chocolate malt grain. The only thing I had was a mortar and pestal which meant some grain got crushed. Hope that doesn’t make much difference.

The Crystal grain went into a grain bag and into the pot. The Chocolate grain got thrown into the bag then all was stirred in. Mash was done at 68°C and had 5 litres of water. Wow, that grain soaked it all up and expanded like a balloon! Mash went for a full sixty mins.

While waiting for the mash to finish we bottled the Hoppy Heart IPA. The final gravity came in at 1.019. With the carbonation drops it will be 6.4% alcohol. And before you ask, yes I will move to bulk priming soon.

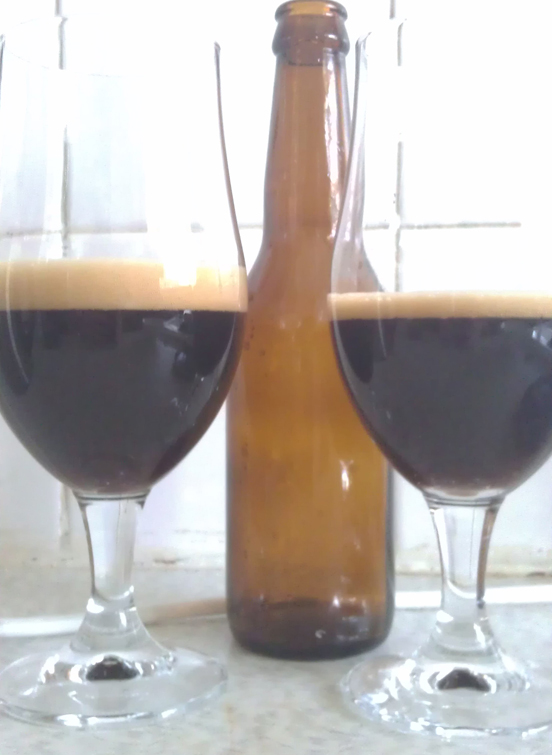
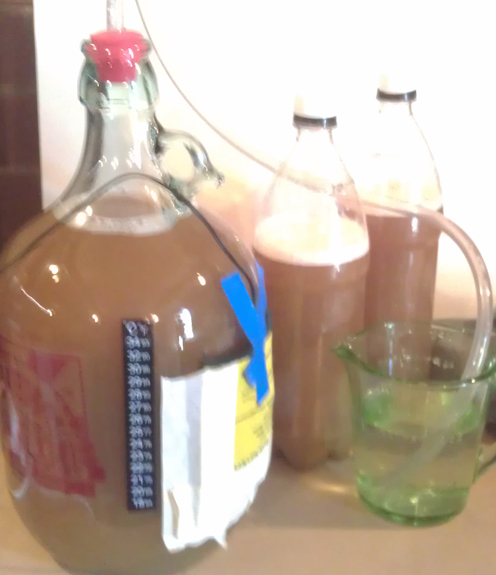
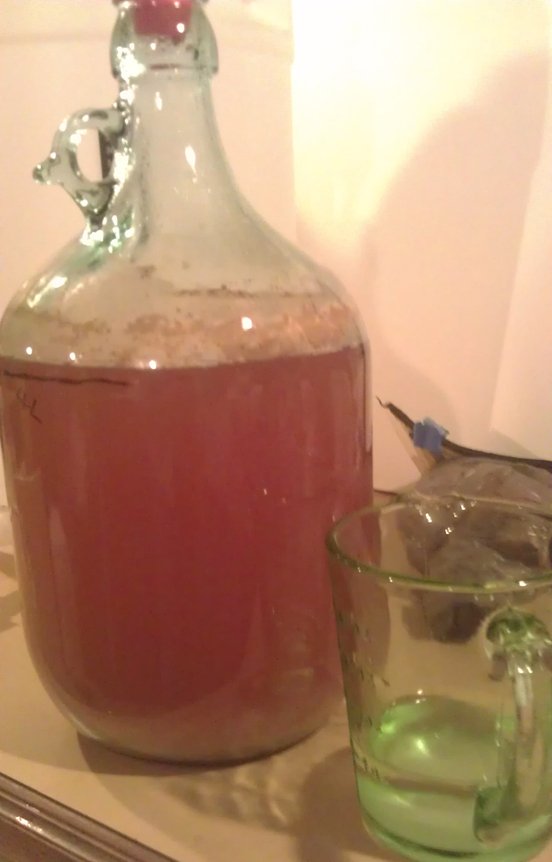
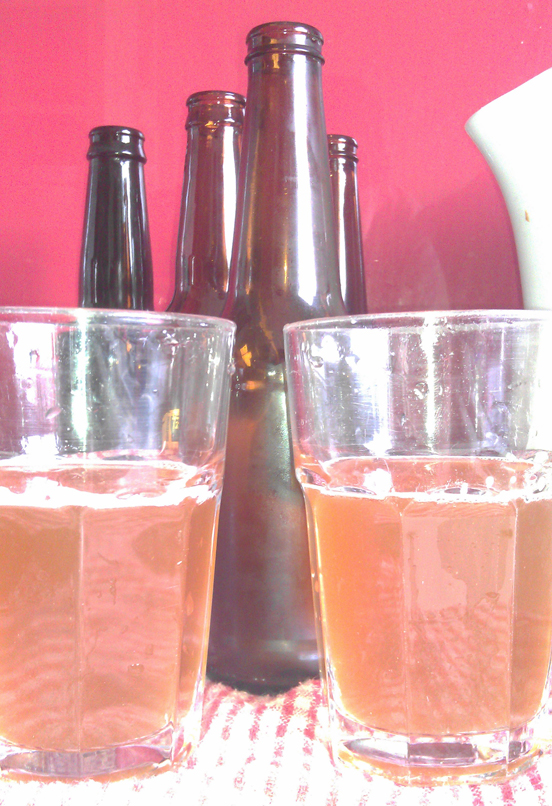
We opened the apple cider that Kilan brought. That was an interesting drink, and I mean that in all ways. We chilled it right down and was cold most of the time. First up it tasted like alcoholic orange juice, not like apple. Sort of super sweet and slightly tart. The smell was pretty bad, almost like something off. As it warmed up the cider became more like apple and more dry. Much better cold. I think something might have gone wrong with the yeast and / or fermentation. Let’s see euchre same thing happens to my cider.

Back to the brew, and mash was done. Only problem now was how to sparge the grain. And there was a huge amount. Was fortunate that the kettle we have at home has different temperature settings with the lowest being 75°C. So we used that and poured the water over the bag of grains. Each time we tried to press out as much liquid as possible, but we didn’t really have the right set up. After a few kettle’s worth of water at said temperature there was a lot of volume for the boil. I would have liked to do more sparging, but the boil pot just wouldn’t hold it all.

Baltic Porter #2 Grains

Baltic Porter #2
Grains ready for more sparging

So onto the boil. Earlier I realised that I didn’t have the exact amount of hops to do what I wanted. There wasn’t as much Warrior and that was suppose to be the bittering. As a compromise I moved some of the Fuggles from aroma stage to taste. By moving them earlier it should add a bit more bitterness, and hopefully balance. Will have to wait and see.

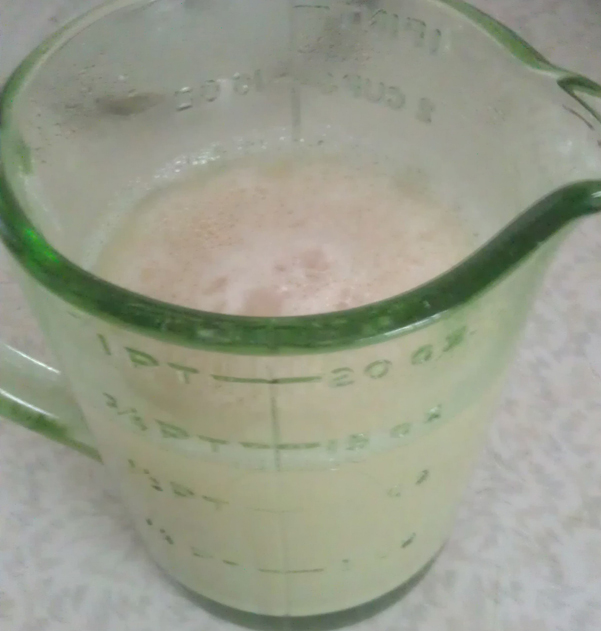
Once the boil started we re-hydrated the yeast. It’s the first time I’ve done this. It was pretty easy. The only problem is the water that was boiled so early on it cooled down too much. A quick zap in the microwave brought it back up to temperature. The yeast sat in the water while we dissolved the tea spoon of dry malt in half a glass of boiled water. Then waited half an hour before adding that in and gave it a mix.

I held off on adding the dry malt for a bit. Have been getting advice not to add all malt at the start of boils and wanted to try it out. As a result we didn’t get a hot break, it just came to a boil. Bittering hops went in at start, then taste hops at thirty minutes with the first 800 grams of dry malt a five minutes later. Another fifteen minutes later added in the last 400 grams of dry malt. Five mins after that the aroma hops. Then only five more mins before flame out.

Pot was transferred to an ice bath. Some ice cubes went directly into the wort, water previously boiled before frozen. A second bath for the pot. Then into the fermenter. Added a little more sparged grain liquid, that might not have been the best idea as I’m not sure if that could have lead to contamination. Too late now! The liquid malt only went in at this stage, note that it wasn’t part of the boil. Not sure if that will make much difference. Let me know what you think with a comment below.

The wort was still quite hot. That was even after adding about four litres of very cold water. Will need more ice if I’m going to do something this large and this method again. After a couple hours the temperature was down to something close to what I wanted. Yeast was pitched at about 25°C. I forgot to put the yeast nutrient in at the same time. So, went back an hour later and put in four heaped teaspoons and sealed back up.


Baltic Porter #2 Yeast

Baltic Porter #2
Re-hydrated Yeast in the jug

60 min mash at 68°C

– 1.5 kg of Crystal 120
– 500 grams of Chocolate Malt 600

Boil wort from mash
60 min
add 8 grams of Warrior hops
30 min
add 14 grams of Fuggels hops
25 min
add 800 grams of light malt extract
10 min
add 400 grams of light malt extract
5 mins
add 5 grams of Fuggels hops

Into ferment:
– wort
– 1.7 kg of Amber liquid malt extract (Black Rock)
– water & ice to bring to 17 litres

Once at 25°C
add 7 grams of yeast, 5g Windsor & 2g kit yeast (previously re-hydrated)
add 4 heaped teaspoons of yeast nutrient

A bit of a strange brew. Some new techniques and processes. Some corrections from previous brews. Some ingredients just thrown together, like hops and yeast. The final gravity came in at 1.071 which is pretty good given the calculated was only 0.002 higher than that. If fermentation can take it down to 1.025 that will mean about 6.5% alcohol before bottling. And this one will be bulk primed.

-Mikey

Tagged , , , , , , , , , , , , , , ,

Honey Bomb Wheat – Review

Honey Bomb Wheat #1

Honey Bomb Wheat #1 ready for tasting

On Sunday we did a brew at Chas’s place. It was fun and you can read all about it. As well as having another attempt at The Friedlieb Coffee Porter we also got to taste the Honey Bomb Wheat that we bottled a couple weeks ago.

When we brewed this about a month ago we were surprised that there wasn’t any speciality grain. Normally the BrewSmith kits include some. But it doesn’t seam to have been an issue here.

After pouring the first thing you notice is a sweet light aroma. Hints of apricot and peach smells coming out. Overall it is soft.

First taste, sweet up front and light. A bit of citrus is there. Then the sweetness, which is clearly from the honey, builds. This is slightly creamy, maybe due to the honey used. Around mid way the apricot flavour comes in. This works pretty well with the honey sweetness. At the end there it’s a dryness that creeps in. It is strange as the sweetness doesn’t drop away. Overall it leaves an odd dry sweet finish.

Food matching, maybe some fruit or cheese. Great for a beer at a picnic or to kick off a party where there’s sweet snacks.

I was never going to make this kit, as I’m not a fan of wheat beers. But I’m glad Chas decided to do this. While there is no clear wheat beer flavours in this, and it being a nice light beer, I’m not likely to want to get one of these kits myself. Tasty beer.

-Mikey

Tagged , , , , , , ,

Cap off, Cup day crazyness

Tuesday was Melbourne Cup day. The race that stops a nation. Well, nearly. I forgot to turn on the TV and only got to see the winning jockey and trainer being interviewed. Whoops.

But that’s not what Tuesday was about. Tuesday was a very special day. I went a little crazy and made some cider.

Yep, the guy who normally doesn’t drink the stuff has made some. It came around due to a couple points. First, summer is coming up and need some more ‘lighter’ drinks. Second, with summer comes festivals and outdoor events. They don’t normally like you bringing in glass bottles which means using plastic bottles.

I’ll be getting around to brewing some pale ales. And I’ll get around to trying plastic bottles for beer, actually it will be this weekend. This cider crazyness is all about me experimenting. I didn’t even have Chas helping out!

Those who know us or have been reading our posts for a while will know that we’re fans of Craig Tube. For those who don’t know him, he’s a Canadian home brewer who has been posting videos up on home brewing for years. There’s a lot if great instructional videos on kit and extract brewing. If you’re starting off go check out the Easy Home Brewing – Beer series.

Anyway, Craig did a mini review of some Pat Mack’s Home Brewing Caps. They allow you to ferment in a bottle! It looked really easy, like a lot more than what you do for a kit. So, I ordered some online and waited a few weeks for them to make their way from London to Melbourne.

The caps come with “Champaign” yeast, which is high alcohol producing yeast. The pack also comes with a couple recipes and a whole lot more online.

The promotion of these caps has been about producing cider. So, I thought that would be appropriate to try that. The recipe only needs apple juice and sugar, easy! There were two caps in the kit I bought and wanted to try two variations with different amounts of sugar.

Apple Cider 1+2

Apple Cider #1 and #2 in bottles with gravity reading

Bottle 1.
1.2 liters of apple juice
150 grams of sugar.
1/8 th (ish) teaspoon of yeast.
1/4 th (ish) teaspoon of yeast nutrient.

Bottle 2.
1.2 liters of apple juice
250 grams of (caster) sugar.
1/8 th (ish) teaspoon of yeast.
1/4 th (ish) teaspoon of yeast nutrient.

Process is exceptionally easy. Put juice in blender. Add sugar. Blend. Pour into bottle. Add yeast (and nutrient). Put lid on. Shake. Done.

The yeast nutrient was probably not required. But after the low fermentation I’d a few beers at my place I didn’t want to take any risks.

A you can see the only difference is the amount of sugar. I deliberately wanted to see how the difference in sugar levels would work. Of course the gravity readings were going to be high. I sort of expected something like the 1.089 original gravity for bottle 1. But was still a little shocked when it came in as 1.111 for bottle 2.

The idea is to only let it ferment for a week. Then they will go in the fridge for a week to settle out. In theory this should prevent full fermentation. That means it should still be sweet and should not be too high in alcohol. Will wait and see.

-Mikey

Tagged , , , , ,

Mangrove Jack’s IPA – Review

As you might remember, when Chas returned from his trip overseas we had a brew day at his place. Not sure what to brew he picked up a kit of the Mangrove Jack’s IPA, new yeast and a booster.

Mangrove Jacks IPA 1

Mangrove Jack’s IPA #1 ready for tasting

After two weeks in the bottle we tried a bottle. The beer was okay but still quite rough, even in the middle. The flavours were there but it wasn’t working all together. We decided to give it another week and try again. Over the weekend we did exactly that.

First up is the soft spice hop aroma. Very slight sweetness at the end. A fair amount of fruit aroma which is what you would hope and want from the style.

Taste up front is refreshing and light. Bit of stone fruit and grassy flavors are there. The bitterness picks up slowly and builds most of the way through. Around the middle the body drops away a bit. The beer gets dry and slightly tart. There’s a slight metallic flavour that comes in. This last part is the least enjoyable bit of the beer.

As the beer warms a little it becomes more balanced. The fruit flavors become more pronounced. The metallic flavour drops away to just be at the end. This makes the beer a lot eater to drink and enjoy.

Overall this is quite good for an off the shelf kit. Taste is good, body is alright and the finish is okay.

The booster really helped this beer. Extra dry malt was really needed here.The replacement yeast and extra Cascade hops also helped. Interestingly this beer only came in at 4% alcohol. That’s below what you would expect for the style, this should be 5.5% or higher. That said, it doesn’t really make much difference to the beer flavour or feel.

Food wise, this could work with a few things. Would work with anything with meat and sauce/marinated. That can including seafood all the way through to stake. The fruit side of the beer would play nicely. The meat should help sideline the slight dry tart metallic elements of the beer.

This is a good beer. It’s hard to work out what caused the elements I don’t like. Maybe it’s the base kit, maybe the fermentation or yeast. Really anything. That said, would be happy to return to this and brew again.

-Mikey

Tagged , , , , ,

Return of an old kit, now colder

Sunday was brew day at my place again. Yay! I’m enjoying the small batches and this was another one.

First up was bottling the Australian Wattle Pale Ale. Got pretty carried away and nearly forgot to take a sample for the final gravity. Was happy with the final reading of 1.014 which means it will be 4.2% ABV after conditioning in the bottles. The sample for gravity was also our sample. Have to say it was very rough and bitter. Might need more than the regular two weeks conditioning.

Worth nothing that this was the first beer that I’ve had proper temperature control. The sensor was attached and set at 22°C. There is one degree buffer range on the sensor. This meant brewing temperature was kept between 21.0°C and 22.5°C. That top range estimate as I wasn’t constantly checking. I wasn’t even checking that often. Anyway, point is that there was some control on this fermentation.

After all the bottling was done it was time for the next brew. This time it was a return to the BrewSmith Hoppy Heart IPA. I quite liked the last batch and wanted another lighter flavoured beer before trying the Baltic Porter again.

Hoppy Heart and Aussie Wattle

Hoppy Heart IPA in carboy in blanket and Aussie Wattle Pale Ale in bottles.

Had fun with this brew. Read the instructions before starting, after the mess that was the Pale Ale. The kit was straight forward and everything went to plan.

Did a couple extra things. For the steeped grains did a sparge to rinse out more flavour, colour and sugars. Thus gave a slightly darker beer but should be more flavour.

Also played around with the cold break. Used two 1.25L bottles with frozen water as ice blocks to cool the original water. This worked well. Also added about a litre of chilled water direct to the wort. After ten minutes changed over the water. As part of this I poured the near-frozen water into the sink for the bath, and topping up the bottles with tap water to continue the chilling effect. The wort wasn’t chilled enough enough after another 10 minutes. So a third bath was required. It was only now that I realised there were two trays if ice specifically prepared. They were thrown in. As a result the temperature dropped too much and there was too much wort.

The wort only just fit into the carboy. A lot of shaking later, for oxygenation, we took a sample for gravity. It came in at 1.064 which is quite alright. Yeast was pitched and put away with temperature set at 21°C. So, should ferment at 20° to 21.5°.

The day went well. Bottling and brewing on the smaller scale if things is nice. Plus return to a nice beer that was chilled, and will be fermented, cooler than before.

– Mikey

Tagged , , , , , , , , , ,

Cross promotion, check it out!

A while ago I had a  series of posts about my Journey to Home Brew. In the second post I mentioned about how I did 366 Days Of Home Brew. I also mentioned about how my mate Ian has his website.

Well now I can finally reveal that I’ve got all 366 beers up. Check out my site Beer With Mikey. The site will have a lot of my beer reviews on there. I recommend reading the introduction. And for those who don’t have the time to go though all the beers, or the monthly summaries, you can jump straight to the final summary which includes the top beers.

The 366 Days Of Beer is just the start. There’s another 61 beers that were had, as there were more beers than days.  Next up I’ll be putting up the beers from the Singapore Craft Beer Week 2012. Then there will be beers from the Ballarat Beer Festival 2013. There’s a lot from that one day. Also from this year is Good Beer Week 2013 and, if I have all the info, I’ll put up the reviews for the Great Australian Beer SpecTAPular 2013.

It will keep me busy. I hope you enjoy it. And, don’t worry, I’ll still be brewing beer and posting stuff here with Chas.

-Mikey

Tagged , , ,

Making beer at home, again.

It’s been too long. Way too long. Last brew day for me was on 1 September!  Over a month between brews. Just over six weeks!

In my defence there were a lot of things going on. The bottling day that was meant to include a brew was just bottling as I couldn’t sort out a time with Ian. Plus the only brew I was set up to do would of been another 23L batch and that wasn’t smart as I had just run out of bottles.

Then a whole lot of important-life-things happened. This isn’t really the place for that stuff, so I’ll just say home brewing had to take a back seat.

Aussie Wattle Pale Ale

Aussie Wattle Pale Ale on the stove.

Anyway, I finally got back to brewing and there’s nothing like something relatively easy to get you back into it. I ordered a couple kits from BrewSmith. The was the IPA which have done before, and is good as it has dry hopping. Also picked up the new Aussie Wattle Pale Ale, for this brew.

Kit was simple enough but still managed to make a couple mistakes. We kind of jumped in a little to quick into this. Which is odd because I prepared a whole lot of stuff before Chas turned up. Kit contained:

  • Dry Malt Extract
  • Grain (mixture of stuff) for steeping
  • Wattle Seeds
  • Hops x3
  • Yeast

First mistake was not adding the Wattle Seeds to the grain when we put that into steep. Just clean overlooked that. Only missed a few mins, so hopefully that doesn’t change things much. Used a grain bag and tried to shake in the seeds, not sure if that really did anything.

Next up, the grains steeped longer than the 30 mins. This was two fold. One, it went on early and the boil wasn’t ready as quickly as I though. Second, we didn’t put the steeped liquid into the boil when we were meant to. Again, oversight by not reading the instructions from top to bottom.

So, Wattle Seeds went in late. But steeping was longer, about 50 mins rather than 30 mins. That meant it only had 5 mins in the boil rather than 15 mins. My gut tells me that this will make a difference as the (middle) hops didn’t have as much to be absorbed into . This might mean a lighter hop flavour and more aroma hops. But that’s just a guess.

Finally there was the cold break. I’ve been reading up a lot on brewing lately. Will be sharing some of that stuff once I get back into the 101 pages. Yes, I know they’re well overdue. I might move to fortnightly rather than weekly as there’s only a few more ‘basics’ to cover before diving into heavy detail.

Where was I? Oh yeah, the cold break. To really get a good break without fancy equipment I decided to step up the work on the cold bath. Yep, still doing that as don’t have any funky equipment. First up was two 1.25L soft drink bottles that were full of frozen water. These acted as giant ice cubes in the ‘bath’ water to cool it down. Then also dropped in a tray of ice direct into the wort, it’s okay the water was filtered. Still did the second bath, but no extra ice into the wort. After that transferred the wort into the carboy, while straining out the hops.

The temperature was still up a bit so put the carboy in the big boil pot and filled with ice cold water, from those bottles that were used as ice cubes earlier. After about 10 mins half the carboy was cold and the rest warm. Pitched the yeast and shaken up, for airation.

The OG came in at 1.042 which was a little lower than I expected for a BrewSmith kit. That might be due to the stuff up with the steeped grains going in late. Or maybe too much water added. But it could just as easily be the right OG.

The day was a pretty short with no bottling to do. And that was really nice for a change. Final thing for the day was getting the temperature control set up, but I’ll cover that in another post.

-Mikey

Tagged , , , , , , , ,