Tag Archives: Mikey

Gift of the Dad, the brew

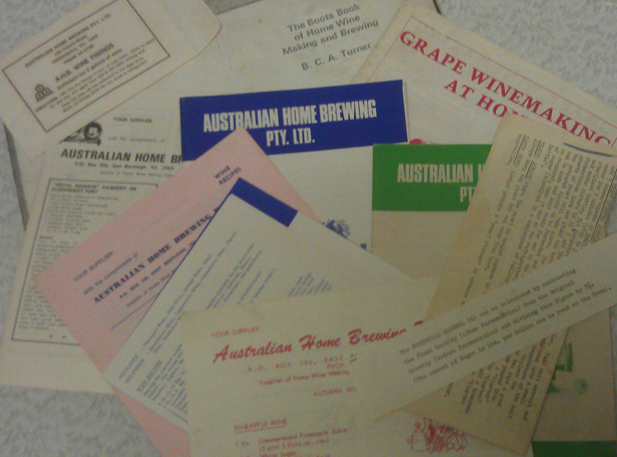
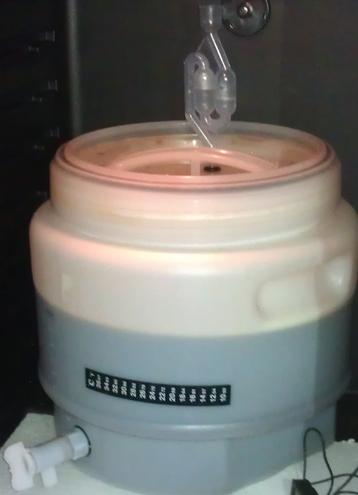
A few weeks ago I got some old home brew equipment from my dad. Then I cleaned it. Now it’s time to brew with it.

I realised the first brew had to use some of the ingredients from the find. This means trying to sanitising with Sodium metabisulfite. That’s going to be interesting as I’ve never used the stuff before. Nutrient salts I already use and will be straight forward. Using a Campden tablet looks like that should be easy. I can see that tannic acid will be helpful in stabilising the beer and clearing it up at the end. But, there’s a fair bit of info saying I need to filter afterward which I’m not set up for. Will have to skip that. One thing I can’t see any use for is Pectinase . That’s more for cider and wine where you need to breaking down plant material.

Plenty of options. Plus, I’ve got eight carboys. Maybe I could test some with and without stuff. One could be a control with a beer I’ve made before (or as close as can be). Then make a second with Sodium metabisulfiteas the sanitiser. Then a third with Sodium metabisulfite, plus a campden tablet… you can see where I’m going with this. To summarise I’m thinking the following.

  1. Control – using the existing yeast nutrient normally use
  2. Same with a Campden tablet and sterilised with Sodium metabisulfite (and all the others after this)
  3. Just the found nutrient salts
  4. Just a Campden tablet
  5. With the found nutrient salts and a Campden tablet
Pale Trial Ein cooling down

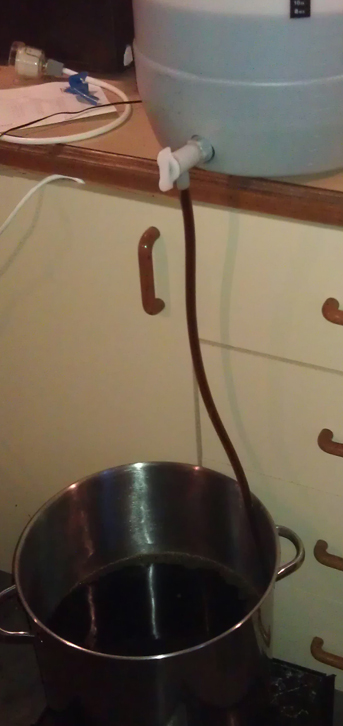
Pale Trial Ein cooling down in the sink

Now, what to brew? Should it be the second attempt in the not-beers? Maybe another attempt at an IPA? Or should it be something completely new? What I needed to brew was something simple that worked out. The Pale Ale with just Vic Secret hops was ideal.

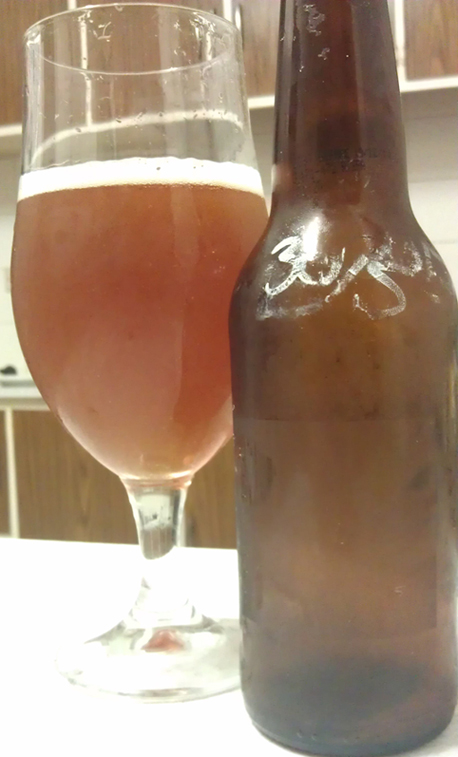
As there was going to be a large volume of beer I decided to swap out the dry malt extract with liquid malt extract. It’s cheaper that way. Have decided to call this Pale Trial Ein, ‘cos it’s a pale ale and a trial. Ein is German for one as this will be the first of probably a few goes, and German is the language my Dad grew up with.

  • 14 litre boil
  • 1.5kg Golden LME @ 40 mins
  • 15 grams Vic Secret hops @ 30 mins
  • 10 grams Vic Secret hops @ 15 mins
  • 1.5kg Golden LME @ 5 mins
  • 15 grams Vic Secret hops @ 0 mins
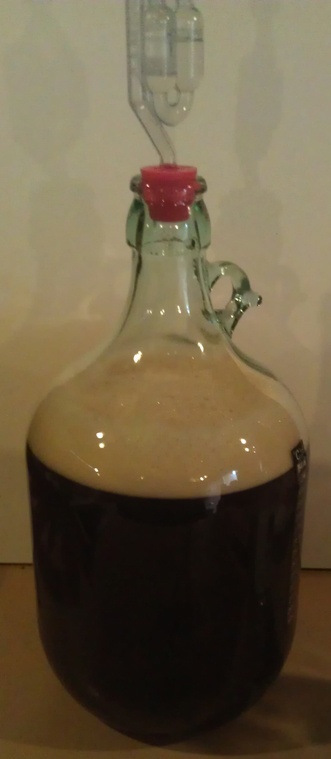
  • 1 flat teaspoon of US-05 yeast in each carboy
Pale Trial Ein done

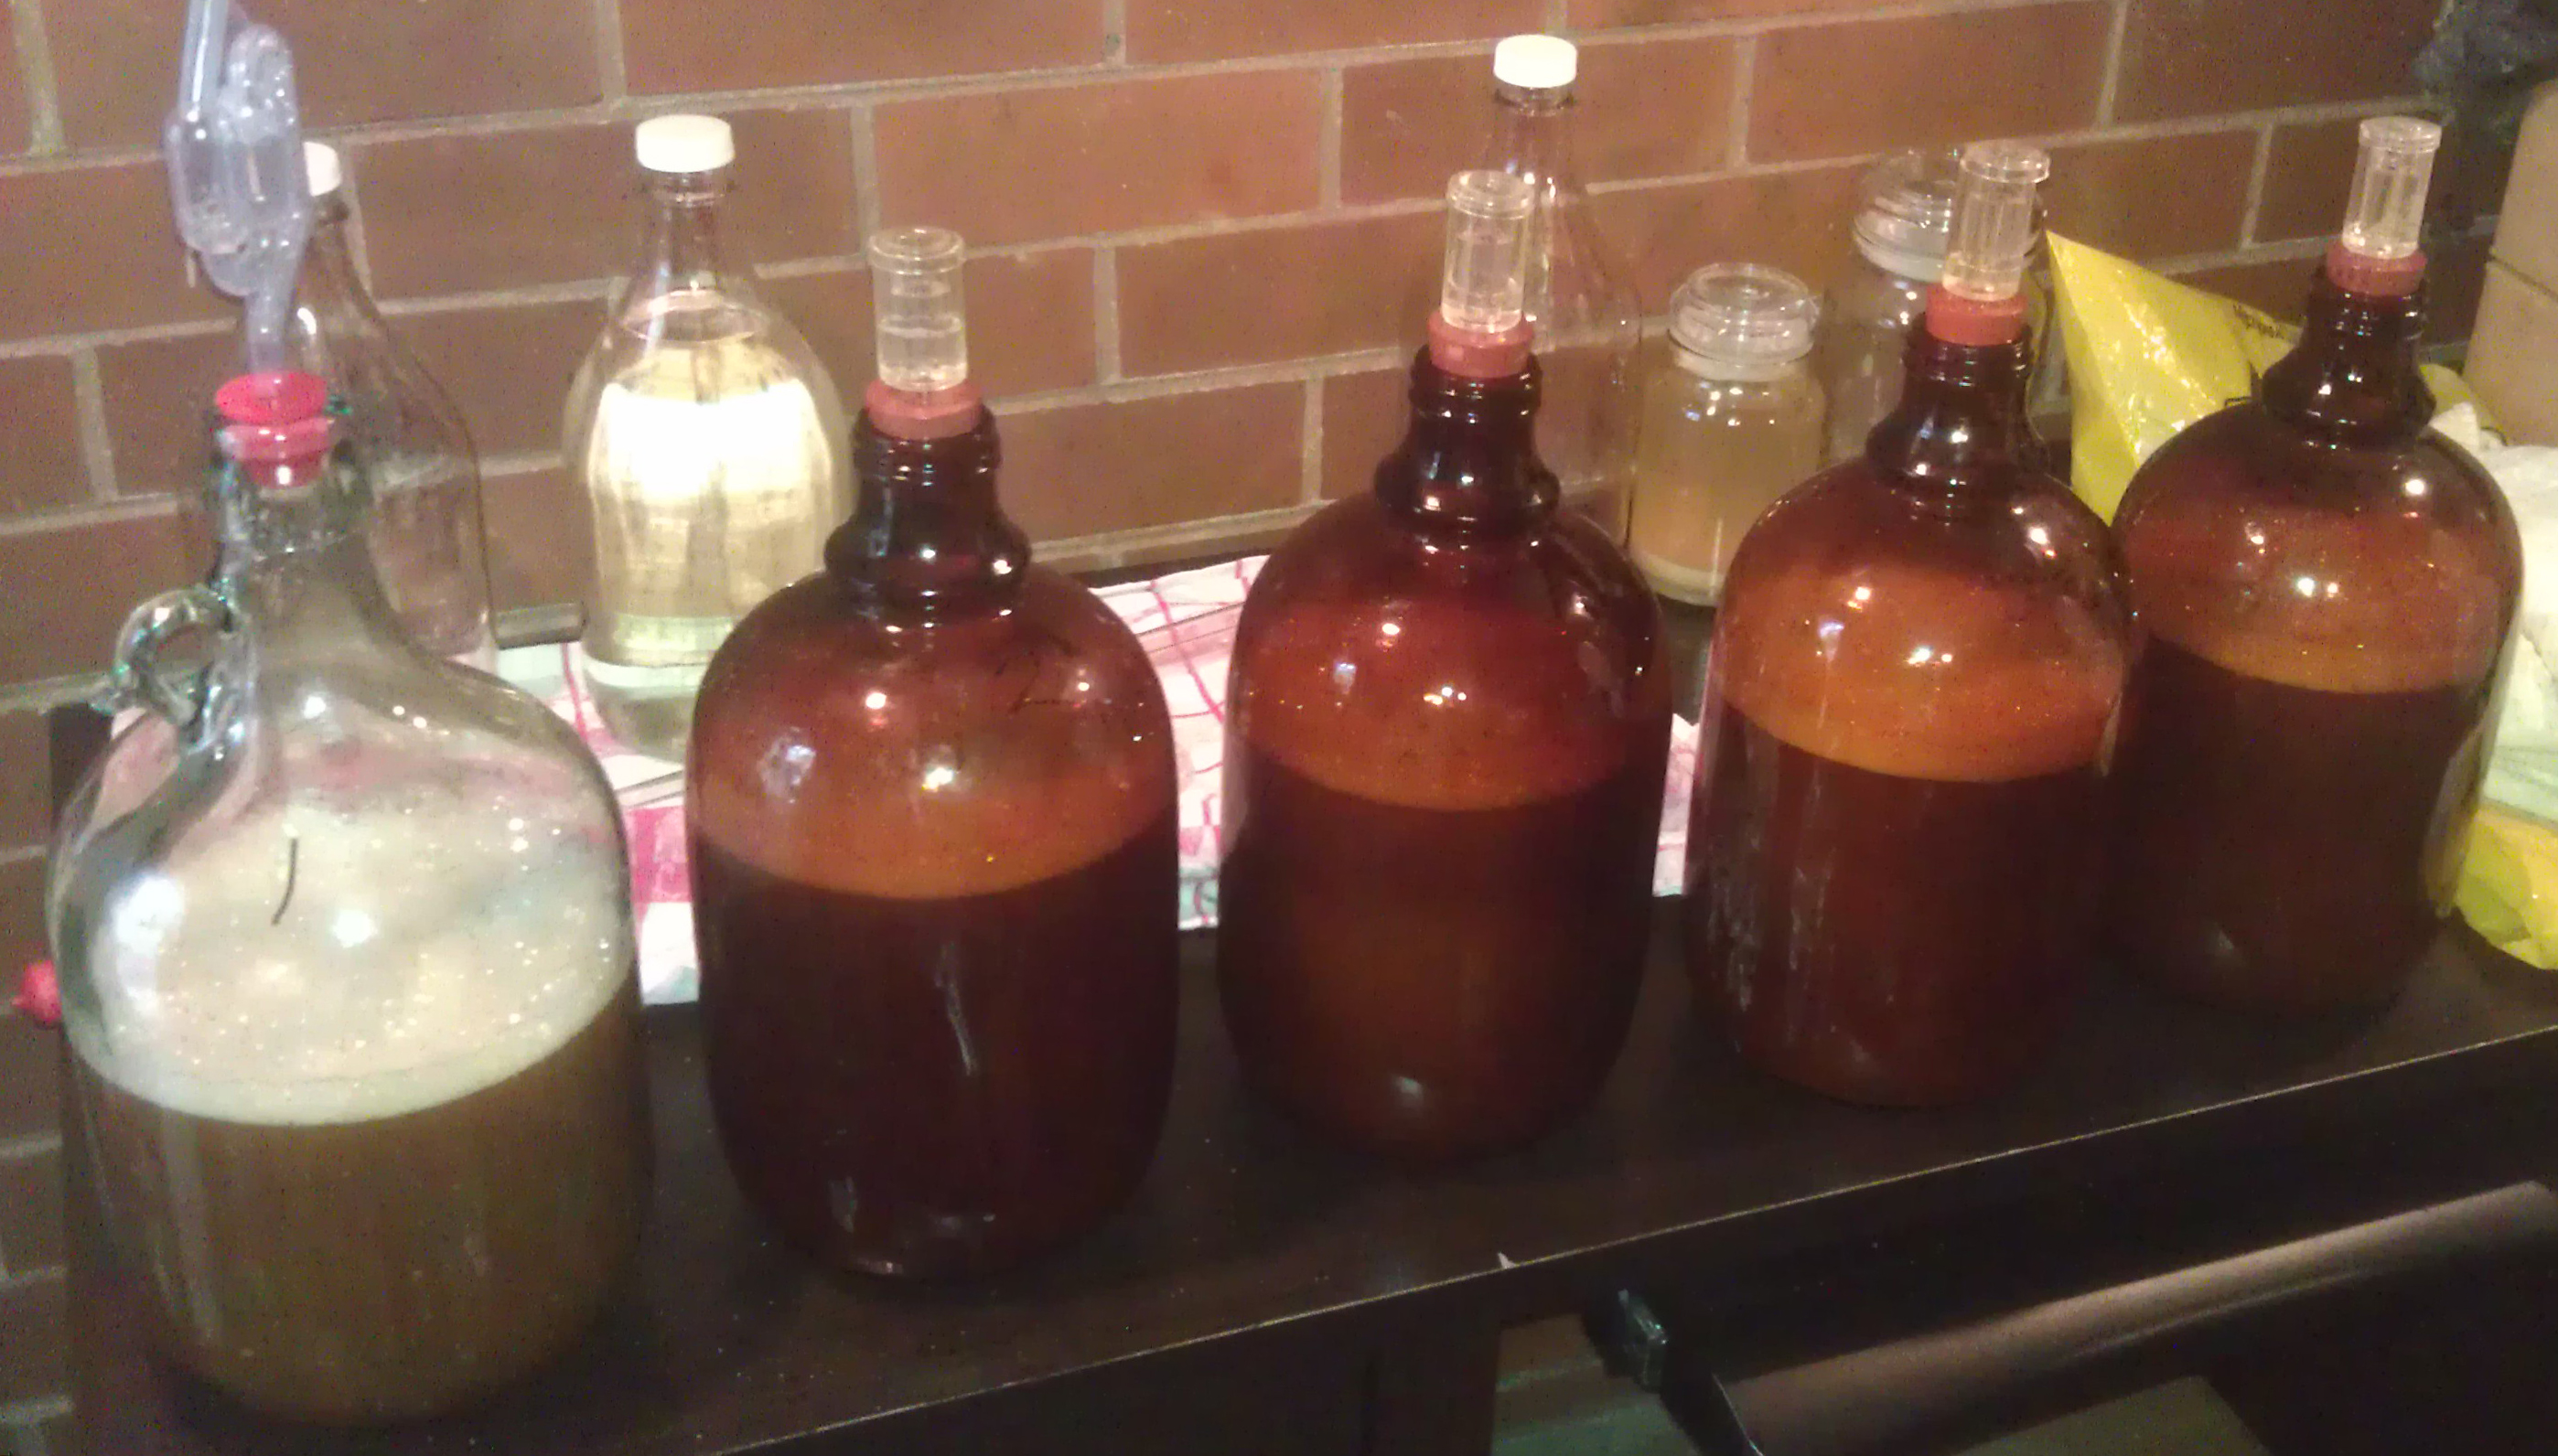
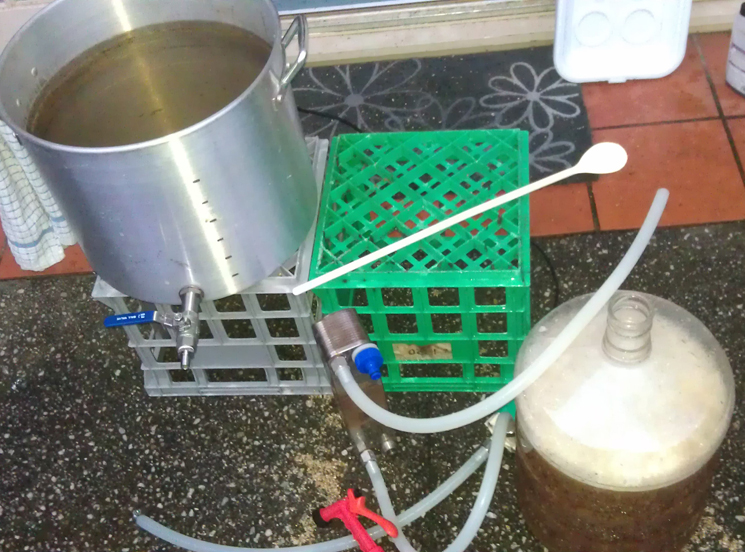
Pale Trial Ein done and in the carboys

Simple but long day. It took 30 mins to heat up water. And chilling took over an hour even after dumping in four trays of ice and a whole two litre ice block. Might be time to invest in a wort chiller if I continue these big batches.

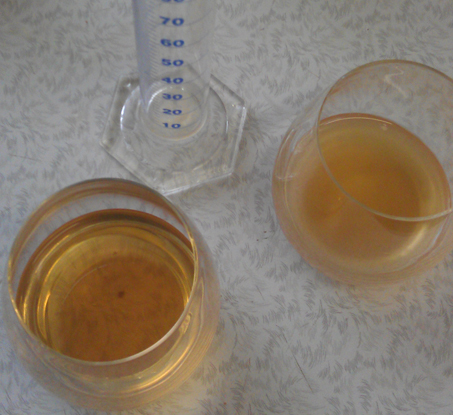
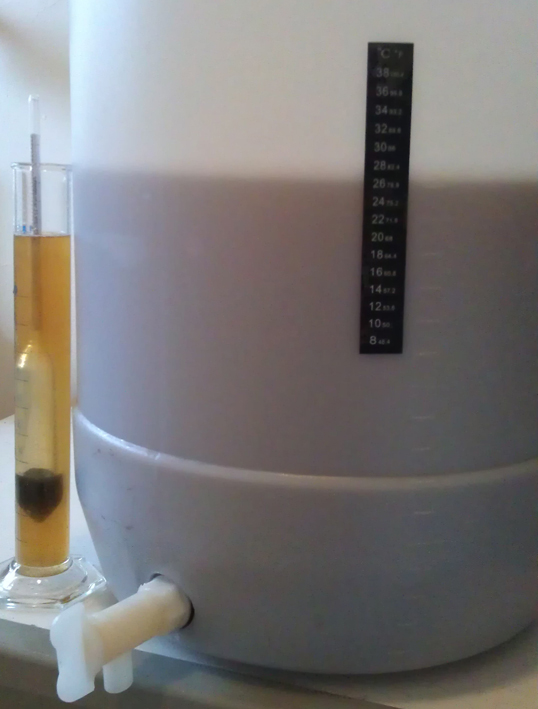
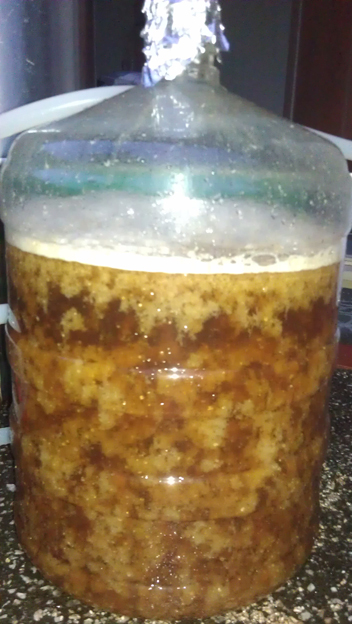
Worked out that there was about 17 litres of wort at the end. Didn’t top up the carboys. The original gravity reading came in at 1.055 which is pretty good. If the yeast brings that down to 1.014 then I’ll have 5.6% beers. But that’s all dependent on what happens in each carboy.

-Mikey

Tagged , , , , , , , ,

Gift of the Dad, the clean

I mentioned last week about some home brew equipment I got from my dad. A pretty good hall of equipment, some ingredients and some print stuff. The equipment was filthy.

The whole lot had been stored in the cellar. It’s really dusty down there. Over the years dust had built up, and caked on. Plus, it looked like there was sediment from the last wine made. And that was many years ago. This was going to be a tough cleaning job.

Lucky a few weeks ago I picked up some Oxyper. It’s a strong cleaning agent. My mate Michael had recommended it to me as an alternative to PBW, a more well known powerful cleaning agent. Both are good for removing gunk and stuff from your brew equipment even when you let stuff dry on, everyone does it at some point.

Clean equipment

Clean carboys, tubes and airlocks with rubber bungs.

Given the size of the carboys and amount of build up I wanted to soak as much as possible. That meant filling the laundry trough with 20 litres of water and 14 teaspoons of Oxyper. This wasn’t done one, or twice, but three times! The new bottling brushes came in quite handy. I was surprised with how much crud came out of the equipment. And, I was just as impressed on how clean I could get this stuff. There’s no proper ‘before’ shot to compare to the clean carboys.

The airlocks only had build-up on the rubber bung. Didn’t try to get the airlocks out of the bungs as I’m not sure how old it all really is. Plus I don’t want to break anything.

The tubing was tricky. Tried a mixture of soaking and running water through. The two wider tubes were by far the dirtier ones. It all appears to have come up well. One exception is a dark mark in one tube which I can’t seam to be able to remove. I’m going to assume it’s fine. If it hasn’t come out yet it shouldn’t when I brew.

And that’s a nice lead into the brewing I’ll be doing. But, that’s for another day.

-Mikey

Tagged , , , , ,

Gift of the Dad, the find

A couple Sundays ago went to visited my dad and step Mum. They’re going to moving out of their place and are slowly cleaning out things. Was looking through some old stuff and found was some old wine making equipment.

I knew my dad had made wine in the past. I didn’t realise how much equipment he had. And until then I hadn’t joined the dots to realise that I could use this stuff for making beer. As I lifted each piece out of the cellar it dawned on me that this was going to be really helpful.

Jars of ingredients stuff

Jars of some Some really old ingredients stuff

All up the equipment totalled:

  • Eight x 1 gallon (UK) glass carboy/bottles
  • Four x 2 litre glass bottles
  • Ten ‘Senior’ airlocks with rubber bungs
  • Two spare rubber bungs
  • Three different lengths and size of tubing
  • Test jar/flask
  • Hydrometer
  • Hand Corker
  • Bunch of corks
  • Wine filters
  • Three different sized bottle brushes
Ingredients stuff

Some really old ingredients stuff, some known and some not

On top of the equipment there was some ingredients and stuff:

  • Jar of nutrient salts
  • Jar of sodium metabisulphite
  • Jar of Pectinase (No.5)
  • Jar of white stuff, no idea
  • 30+ Campden tablets
  • Tannic acid
  • Small bag of something without a label. Looks like sand.
  • Bag of more nutrient salts
  • Bad of more Pectinase.

Not sure how much use I’ll get out if the ingredient stuff. The sodium metabisulphite [edit: this is a non-rinse sterilising and only part of Campden tablets]. Campden tablets are help control fermentation and a few other things. Might give it a go. The nutrient salts might be ok. Will have to test them. Pectinase is for getting more flavour and cleaning wine, unlikely that I’ll need that. Tannic acid is for clearing and flavour enhancement. Might need to try that. Rest, got no idea what they are and will probably go in the bin.

Range of print stuff

Range of print stuff, plenty of wine and brewing things

The last part of the stash is a whole bunch of print. Some of it is home brewing catalogs. Some of it is single sheets of instructions on something about brewing. Some of it is recipes for home brew wine. And the one big piece is a book on home brewing wine, photocopied and bound.

What will come of all this? Firstly a whole lot of cleaning! The carboys and bottles have a whole bunch of caked on dirt. The tubes have stuff through them. The airlocks have sediment and dust. Plenty to clean.

Once all cleaned I’ll give an update.

If you’ve got any advice on this stuff it would be great if you want to comment below.

-Mikey

Tagged , , , , ,

Bottling day, plus surprise bottling

Saturday was a bottling day at my place. No brewing, just bottling. Was meant to be a quick one so we could get onto other things for the day.

Home Brewers R+D Vic Secret bottled

Home Brewers R+D Victoria Secret bottled and ready for conditioning

Chas came over and, unlike the last few days at my place, there wasn’t anything major getting in the way of starting. So we quickly got stuck into bottling the 13 odd litres of the Home Brewers R&D Vic Secret. Sannitising bottles is pretty easy with the tub and bottling tree. Went  with a mix of a few bigger 500 ml bottles and a fair few 330 ml bottles.

Bulk primed the beer was a simple affair. Did it in the big stock pot just like the Super Stout. But unlike the Super Stout we didn’t pour the thing into something else to bottle. We simply siphoned the beer into bottles. Done.

Pseudo Lager 1 bottled

Pseudo Lager 1 bottled and ready for conditioning

Before priming and bottling we did a gravity sample. Final gravity came in at 1.010 which means after conditioning it will be 3.4% alcohol. Not surprised as there was such a low original gravity. From tasting the gravity sample it was very hoppy and very bitter. Not sure how it will finish. I’m hoping this becomes a session beer and, if I can keep myself from drinking it all, something for the warmer months later in the year.

Before calling it a day I decided to take a gravity sample of the Pseudo Lager. Was very surprised to see it down to 1.006! I’ve been hoping it would get down to 1.005 but expected it to finish around 1.020-1.010. That’s a good result and means the beer will be 6.0% after bottling. It tasted pretty alright as well, quite dry and not a lot of hops. Should be good once it is carbonated.

Home Brewers R+D Vic Secret and Pseudo Lager 1

Home Brewers R+D Vic Secret and Pseudo Lager 1 samples ready for tasting

Chas wasn’t that excited about bottling another 16 litres of beer. But after a bit of negotiation, and a break for a bit, we got into it. Rather than bulk prime into the pot, we used the recently emptied fermentation vessel with the tap and a brew wand. Saved a lot of time and finished quickly.

A day of bottling. Normally nothing special, but a pleasant surprise with the Pseudo Lager. Looking forward to tasting and letting you know how it all worked out.

-Mikey

Tagged , , , , ,

Journey continues, onto all grain

Yesterday I finally did my first all grain brew. It’s been a long time coming and Chas has already done a couple all grain brews. I’ve been putting it off for a while. That’s partly because I was trying to knock out a few batches I’ve been thinking about. The other part was because I didn’t have a pot big enough to do a proper batch. Now that’s all sorted it was time to go all grain.

American Brown Ale done

American Brown Ale done in the carboy

Before I get into that, we also bottled the American Brown Ale. Didn’t bother with bulk priming due to the small batch size. Carbonation drops into bottles liquid in an capped. The final gravity came in at 1.022 which was a bit higher than the 1.014 expected. Final alcohol will be 4.6% and I’m happy with that.

So, my first all grain brew was a brew-in-a-bag (BIAB) style. The recipe is part of a Research and Development brew, an American Pale Ale, with a few home brewers from work. The idea is that we all brew with the same grain ratios and IBU target but with different hops. Due to my ‘small’ 19 litre pot I did an eight litre batch, rather than the 16 litre version the others did. Given my fascination in Vic Secret hops, that was the hop selection for me. The recipe is below.

  • 1.8 kg Joe White Traditional Ale grina
  • 0.15 kg Joe White Cara grain
  • 4 g Victoria’s Secret hops (for 60 min)
  • 11 g Victoria’s Secret hops (for 20 min)
  • 13 g Victoria’s Secret hops (for 5 mins)
  • 1/2 pack of Safale US-05 yeast
  • 14 g Victoria’s Secret hops (for dry hopping at day 7)
R+D Vic Secret mash

Home Brewers R+D Vic Secret mash in the pot

The brew was a very long one. Longer than I expected. Main reason is it took an hour to get the 14.4 litres of water for the mash. Reason for that was I want to filter all my water before I use it and I didn’t get any prepared before hand. Once water was ready we brought it up to about 69-70 degrees Celsius. Grain bag went over the pot and grain in. This sat in the pot for about 60-65 mins at 67 degrees Celsius. It was meant to be at that for 75 mins but there was too much head added and the last 10-15 mins it got up to about 72+ Celsius. Mash out was meant to be 75 Celsius, so we called it done at that point.

There was a lot of liquid that was at the start of the boil. The recipe said it should be about 13 litres. After the boil it was meant to be 10 litres, then batch size of 8 litres. Not sure where the last two litres were meant to go. If anyone has some info on this please post below.

Due to the excess water we let the boil go for about 30 or so minuets before first hops. This was to try and reduce liquid, which was a good idea. The hop additions went pretty smoothly. My alarm wasn’t loud and missed a couple additions by a couple minuets here and there. Shouldn’t make much difference. Also used some Brewbrite to clear it out. Added a teaspoon to a cup of water and dissolved it. Then into the boil with about 5 mins to go.

Chilled the wort down by putting the pot in an ice bath. This was pretty good. Also added some big blocks of ice to the wort directly which worked a treat. It was only later that I realised this was a problem. Once down in temperature the wort was poured into the fermenter and I realised that I had way too much liquid. It came in at 13 litres! No surprise that the gravity reading came in a lot lower than expected. It was 1.033 and should have been 1.049. That’s a big difference.

The re-hydrated yeast went in along with the yeast nutrient. I’m expecting, or rather hoping for, a good conversion from the yeast. If things go well it should reduce down to 1.008 and that means after bottle conditioning It should be about 3.5% alcohol. Will wait and see.

-Mikey


Tagged , , , , , , , ,

Long time coming, long time to wait

Since very early on home brewing I’ve wanted to make a good lager. After a bit of looking about, reading up on it and asking a few other brewers I decided to dive in.

The first attempt was as part of basic home brew kit. It was more of a very pale ale rather than a lager. The yeast was from a kit can and then it was fermented with out any temperature control. It turned out a bit rough and didn’t get much better with age.

Since that brew I wasn’t  in a rush to do another lager. Reading up on the process others use, strict temperature control and long term storage, really tuned me off. Then a fellow home brewer, Carnie Brewing, posted on his blog about his attempt and quick turn around. That got me interested again.

Pseudo Lager boil

Pseudo Lager boiling away on the stove

Yeast was the main sticking point. I didn’t want to do a big batch in case I stuffed it. So, I decided to do a trial run with US-05 at a low temperature. Due to using ale yeast, instead of lager yeast, I’ve decided to call this Pseudo Lager. If it turns out well I’ll look at doing a bigger batch with proper lager yeast.

  • Amber Dry Malt – 600 grams (60 mins)
  • Light Dry Malt – 300 grams (10 mins)
  • White Sugar – 1.1 kilograms (10 mins)
  • Victoria’s Secret hops – 5 grams (60 mins)
  • Crystal hops – 10 grams (flame out)
  • US-05 yeast – about 3-4 grams

This was a pretty basic brew. For a quite some time I played around with the idea of splitting out the hop additions into three, but stuck with two as I wanted to highlight the Crystal hops at the end. The 5 litre boil was for 60 minutes so was able to get enough bitterness (IBUs) from the little Victoria Secret hops at the start. All the amber malt went in at the start. The malt selection was based on what was in the house. Originally I thought there was more light malt, but that wasn’t to be. Light malt was added at the end with the sugar, which was there to keep the finish dry and alcohol up.

Pseudo Lager fermenter

Pseudo Lager done and in the fermenter

Before the boil started I re-hydrated the yeast. I added in a little bit of light malt to try and get some yeast starter going. As this was only for about one and a half hours I’m not expecting much.

Cooling went very well. The process I’ve got to dump a lot of ice directly into the wort seams to work well. Got a bit excited and poured the whole wort in without sieving out the hops. Whoops. Then I realised as I was filling up the fermenter that I forgot the Crystal hops! Uh Oh! So, I just dumped the hops into the fermenter and continued filling it up to 16 litres. I suppose it will be something like flame out/dry hopping. Hopefully.

The gravity reading came in at 1.049 which is exactly what the recipe said it would be. Due to all the sugar in there it should ferment out to finish with a gravity of 1.005. That would be about 6% alcohol after bottling. That’s exciting for a lager.

I deliberately left this in the shed with no heating. The temperature out there drops down a fair bit. Down to maybe 10 degrees Celsius, or less, overnight. Then during the day up to a maximum of 18 degrees Celsius. I’ve left this on purpose to help keep the yeast working at a larger-like temperatures. Not sure if this will do anything other than drag out the fermentation.

After two days the beer is bubbling away. It’s very slowly doing that, but it is happening.

-Mikey

Tagged , , , , , , , , ,

Something easy for winter, brown ale

A few days ago I made a mistake with bottling the Super Stout. There’s a chance that it won’t taste good. I want to have something darkish to enjoy over the rest of winter. So it was time to do a back up brew, something a bit basic and small. Enter the idea of doing a brown ale.

I spent a while playing around with a recipe ideas. In the end I decided to go with a really quick 30 minute boil and only two hop additions. Plus to keep the length of time down I wanted to do just four litres. Another factor keeping it simple and quick is to only use malt extract, in this case it was dry malt extract (DME).

American Brown Ale

American Brown Ale in the carboy

With the ingredients I had at home I couldn’t do an English style brown ale. Therefore I went with creating an American Brown Ale. Ingredients listed below.

  • 600 grams of Dark DME
  • 3 grams Warrior hops (30 mins in boil)
  • 2 grams Crystal hops (flame out)
  • 1 teaspoon of kit yeast
  • 1 teaspoon of yeast nutrient

Some people really don’t like using kit yeast. For me it was easy because (1) I had some at home and (2) it’s a very basic darker beer. The darkness of the malt will help hide some of the less desirable flavours of the yeast, I hope.

This was a three litre boil. First in went 400 grams of the DME. After the hot break went in the Warrior hops. Twenty minutes later the rest of the DME went in. Ten minutes after that flame out. Crystal hops went in. The pot was moved to sink to chill in cold water. About three trays of ice dropped directly into the wort. Only had to replace the water once for chilling. I was happy that it got down to about 22 degrees Celsius quite quickly. Then poured the wort through a sieve into the glass carboy which was then topped up to four litres.

While all that was happening the yeast and nutrient was re-hydrated in some water on the side. Before pitching in the yeast took a hydrometer reading which came in at 1.054. This should come in around 5.8% after bottling. That’s going to be stronger than the Super Stout!

This was a very quick brew and only took about two hours to do. Was done by myself and I like that it was so quick. The wort tasted basic as expected. There’s not a lot of hops in there and plan was to keep bitterness down. Fingers crossed that this one turns out well. Will know in about a month.

Keep an eye out as I’m going to be doing a lager style ale in the next few days.

-Mikey

Tagged , , , , ,

Bottling Super Stout, with a mistake

I finally got around to bottling the Super Stout. I’ve been waiting for some extra fermentation which hasn’t really happened. I was by myself and made a mistake. I knew at the time that maybe it wasn’t a great idea and did it anyway.

Super Stout bulk prime

Bulk priming the Super Stout from fermenter to pot

The gravity reading on the stout hadn’t really dropped from the reading I took three weeks ago. Back then it was 1.031 and it finally ended at 1.028. That’s not a lot of movement over three weeks. The extra temperature may have helped ferment a bit more, but not sure if it was really worth the extra wait.

Bottling 18 litres of beer by myself was never going to be fun. That’s one of the reasons I had put it off for so long. I wanted to put most of the beer in 330 ml bottles as well which was going to drag it out longer. My bottles are washed and clean before I put them in storage. All I needed to do was sanitise them and put them on the bottling tree to dry a bit. Pretty straight forward once I put the rest of the bottling tree together.

I’m use to bulk priming I didn’t want to go back to individual priming. That meant I needed to measure the take sugar and dissolve it in a little bit of water. That was simple. I had the dissolved sugar in my new(ish) 19 L pot and racked off the beer from the fermenter to the pot. That went really well.

Now I had all my beer primed and ready to bottle. And in a huge pot. How to bottle from here? I could syphon it out one bottle at a time. That would take forever and I didn’t have the time. I could transfer to one of the fermenters with a tap and use a bottling wand. Not the big one as I don’t have time to clean. Little one is good to go, but a bit small. Split it into two lots would work. What’s the easiest way to move it from the pot to the small fermenter? A siphon us a smart choice. But what did I choose? Pour it in. What was I thinking?!

Super Stout bad idea

Pouring the pot to fermenter? That’s a bad idea

There was a but of a mess when I poured the beer out if the pot. Most went into the fermenter. Lost about 500 ml to the floor and side of the fermenter. Second lot was less messy. The real problem is that by pouring the beer it got aerated. And according to John Palmer’s book How To Brew that it’s likely going to produce diacetyl flavours. Not good.

The rest of the bottling went pretty well. I did under estimate how many bottles I would need. Total count was 35 stubbies and eleven 500 ml bottles, a total of just over 17 litres.

After bottle conditioning the alcohol should be 5.2% which is below what I would like for something called a Super Stout. Would expect something close to 8%, but I knew from the original gravity that want going to be possible.

I didn’t taste the beer when bottling. I had tried it a few times with the gravity samples over the past few weeks. Quite dark and the liquorice flavour changed enough for me to notice between sample one and the last one. There was a good hint of apple aroma from the beer once primed and in the open pot. I really hope that doesn’t come through in the beer.

I’ve included what temperature settings were used. You can see that I raised the heat a fair bit in a futile attempt to ferment more sugar. I’m fearful that it might have caused a negatively effected the beer.

  • OG 1.064 (3/5/14)
  • ferment at @ 16 C = 1.031 (to 28/5/14)
  • then @20 C = 1.030 (to 1/6/14)
  • then @ 24 C = 1.029 (to 9/6/14)
  • still @ 24 C = 10.28 (to 14/6/14)

If you’ve got any feedback on the above is love to hear it. Both the temperature changes and the pouring/aeration of the beer.

-Mikey

Tagged , , , , , , , , ,

Another APA – Review

Another APA ready to drink

Another APA in the glass and ready to drink

As promised, I’ve tried Another APA from my good mate Ian.

Plenty of stone fruit aroma. Mix of peach and nectarine that’s been stewed for a few hours. That big, but not sweet, fruit hit on the nose. Plus this is a smell that doesn’t drop away.

Flavour wise the first thing to note is the exact tastes you would expect from the aroma. Stewed fruit from start to end. Some sort of spice/earth flavour in there. It kind of builds but then doesn’t come out fully. There’s a bitterness towards the back which is welcome. The beer is slightly tart at the very end which isn’t what I expected. Not a huge amount of body, about what you would expect from this type of Pale Ale

As the beer warms the stewed flavours settle a fair bit. The bitterness builds and the tart finish becomes more metallic. There’s even a hit of dryness as the body drops away. Not sure of the alcohol percentage in this, mainly because Ian doesn’t measure it. My guess would be around 4.5% to 5% as it’s quite easy to sink it quickly.

Food wise, not sure what to match to this. Initially I thought some roast pork. But the more I have it makes me want to have something both light and spicy. Maybe Thai or Vietnamese food.

This is an easy to drink beer. Except the finish. Not sure why that is but a quick Google later and I think there might be some DMS (Dimethyl Sulfides) issues with this beer. Ian, fix that and you’ve got a very nice beer.

-Mikey

Tagged , , , , , ,

When you don’t brew, go brew

Chas is still overseas having fun and tasting beers. I’m still naively waiting on the Super Stout. So… what to do when not brewing? Help a mate with his brew!

Strong Belgian Golden Ale sparge

Strong Belgian Golden Ale sparging away with hot liqueur pot, mash tun, pump and boiling pot

Last weekend here in Melbourne was a long weekend thanks to Queen’s Birthday public holiday. No, it’s not her Birthday, the holiday is about something else. Anyway.

On Saturday I went around to my mate Michael‘s place. He’s been doing all grain for a while. Last time I was there I had to leave early and missed a few things. This time I was there from start to (nearly) the very end. This was a very long day. Started at 10:30 am and at 5:15 pm both the airing of the wort and pitching of the yeast were still left to do. That’s one very long brew day for a home brew.

Like last time Michael was doing a Belgian quad, which didn’t work out that well. This time a Strong Belgian Golden Ale, which hopefully turns out well. The process was mainly the same. Fist heat the water for the mash and then put that in the mash tun. Grain goes in, stir and wait. Recirculate the liquid to settle the grain bed. Next was a bit different. Fly sparge rather than batch sparge. What you do is slowly drip water over the top while letting the liquid drain out the bottom. Apparently, if done right you get a better conversion (getting sugars from the grains) than batch sparing.

Hop leaf

Hop leaf in a hop bag

Boil was next. A long boil as Michael needed to reduce volume. After that was done a hop bag with loose leaf hop flowers went in. I’ve never seen loose leaf hops before. Most people I know use pellets. Had a taste and wasn’t sure what to think about them. Interesting, but not sure if it’s for me.

The chilling was very cool (pun fully intended). Michael has a counter flow plate chiller. Brew goes in one end and out the other, while cold tap water goes in the reverse direction in a different channel. Long story short, lots of liquid moves really quickly and your brew gets chilled a lot.

Strong Belgian Golden Ale chilled

Strong Belgian Golden Ale chilled with pot and plate chiller

Like I said, had to leave before the brew was aerated or the yeast pitched. But, you can get an idea from the photos how much goes on. Lots of steps and lots of equipment. I have to say, I’m slightly jealous of all the equipment. But that’s offset by the idea of having to (a) take so long to make a beer and (b) that thought of cleaning all that equipment.

Then Monday went around to my good mate Ian‘s place. He wanted to do An American Brown Ale. Something nice to have over the cooler months. And, to be completely different to the all grain brew, it was an all extract brew.

Strong Belgian Golden Ale done

Strong Belgian Golden Ale done, except aeration and yeast

For this brew I was there from the very start to the very end. Plus it was a lot quicker. Dry malt extract and hop pellets measured out. Boil the water, first addition of dry malt, hot break, add hops 1, add hops 2, add hops 3 and the last of the dry malt. Then onto chilling, which went a lot quicker than expected. We chilled it so well that it was almost too cool to pitch the yeats. But before the yeast went in I made Ian take a gravity reading. Hopefully this means we’ll known the alcohol percentage on his beer.

An American Brown done

An American Brown done and ready to start fermenting

Thinking back on the long weekend, I’m not sure which brew day I enjoyed more. They were both laid back in their own way. Ian’s was pretty easy, but a fair few things on one after the other. And once it was all done we hung out for a while which was fun. The brew day at Michael’s was a lot longer. And as a lot of steps took a chunk of time there was plenty of down time. That said it was also a lot more complex and a few things were nearly missed. One thing I know for sure, brew days are fun.

-Mikey

Tagged , , , , , , , , ,