Tag Archives: 23 litre batch

Another brew day – Imperial Red Ale

We’ve had a bit of a heat wave lately so I’m not sure why I decided to brew up a kit of Iron Curtain Imperial Red Ale from Brewcraft, but I figured by the time it’s done the weather should have cooled a bit.  It’s a 23 litre batch as well so it will last me into the autumn when it’s a little more appropriate.

Anyway, we started out bottling the Red Dog Pale Ale that we made a couple weeks ago.  For those who remember, we didn’t get the sugars out of the mash that we were hoping for, but things turned out OK.  A lot of fermentation happened and we got quite a low FSG, so the beer should be of a decent strength and quite sessionable.  It did taste a little thin and a little over hopped – simply not enough malt in there I suppose.  The previous batch tasted a little thin though so hopefully it will beef up with some conditioning.

So, back to the Imperial Red Ale brew…

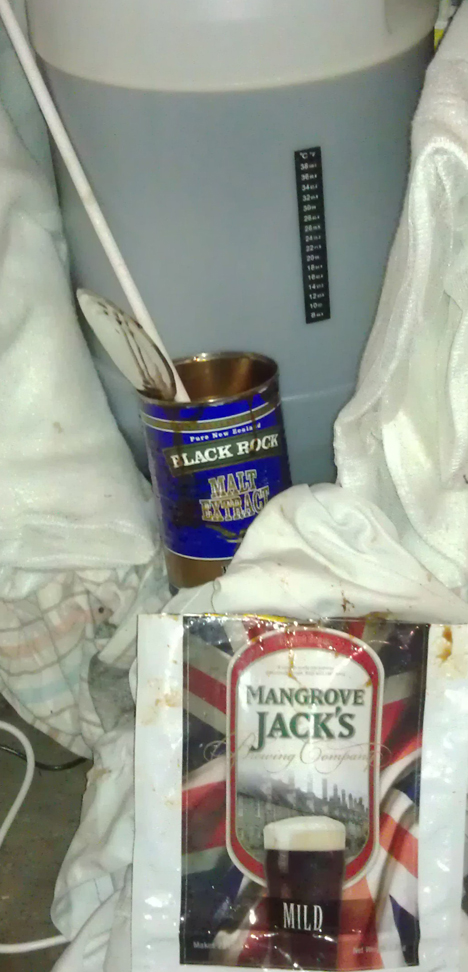
This was a pretty good extract brew.  Not too simple but fairly cruisy which amounted to a good brew day over all.  The kit contained:

  • Mangrove Jack’s British Series IPA
  • Can of liquid malt extract
  • Light dry malt extract
  • Crystal grain
  • Fuggles hops
  • US 05 ale yeast – the Mangrove Jack’s kit came with yeast but I don’t usually use kit yeast

We kind of jumped right into it so I forgot to take measurements of everything… oops!  I guess I was excited about this brew.

As I mentioned, this one was pretty simple.  The crystal was steeped for 30 minutes then a quick boil was started.  With the boil going the hops were added for five minutes.  After the cold break we threw it in the fermenter, added the Mangrove Jack’s, the LME and DME, topped it up to 23 litres and we were done!

I like kits like this.  While a partial or a full mash is a little more in depth, these are easy enough to spend a couple hours on over the weekend, but a little bit more than just pouring a can of concentrated wort into a fermenter, adding water, and then being done.

The wort tasted great.  There were lots of hops in there and, with an OSG of 1.057, I think this is going to be a really robust beer.  Mikey thinks I should dry hop it but I haven’t decided yet…  I need to decide soon though!

We’ll report back in a few weeks to tell you how it is!

-Chas

Tagged , , , , , ,

Back to brewing after a holiday

I’m finally getting around to writing up last week’s brew!  It’s been a busy one for me…

After taking inventory last week, I’ve been spending all my down time trying to get through my collection; I need bottles for the batch that I made last week!

Anyway, as mentioned by Mikey, the Beagle Double IPA turned out to be a big beer.  It was great, but big.  Like most beer drinkers, I’m a big IPA fan, so although I like something like the Beagle, having a lighter and easier IPA on hand (especially for the upcoming summer) seemed appealing.  Since I hadn’t been brewing for awhile, I also wanted to get back into it with a really simple kit.

So Mikey and I went down to Brewcraft in Richmond to see what was available.  We picked up a bag of Mangrove Jack’s IPA wort and a kit converter.  Of course you put Mikey and me in a home brew store and we also both end up walking out with a bunch of other stuff that we “need just in case.”  This is why I have so much sanitiser.  But hey, we all know the Rules of Home Brew.

Anyway, it was a pretty simple brew containing:

  • Mangrove Jacks India Pale Ale
  • Blend of light and dark DME
  • Cascade hops
  • American West Coast Ale Yeast – BRY 97

Pretty simple stuff here.  Note that the Mangrove Jacks wort came with yeast included, but I generally prefer to buy yeast separately because you never know the quality of the included yeast.  The wort was also on sale because it was near its use by date, so once again, you just don’t know…

All we had to do was boil two litres of water, add the malt, and let that dissolve.  After that, we threw in the hops and let that steep for about 15 minutes.

This was then strained into a 30 litre fermenter with the Mangrove Jacks wort added as the fermenter was topped up to 23 litres.

Done and dusted!

The Cascade hops is a pretty middle of the road all rounder.  Plenty of spice in the smell with a bit of grass (at least for me).  I can sometimes find a little bit of chilly in there as well.  Of course there are also the typical florals found in a lot of hops as well.

I considered dry hopping, but then couldn’t really decide what to dry hop with.  Plus I want this to remain pretty light…

In the end, the wort smelled and tasted great.  It should turn out to be exactly what I want through the summer.

We’ll bottle next weekend and then see how it turns out a couple weeks after that!

-Chas

Tagged , , , , , , , ,

Bottling day, and not much more

Mildly Dark #1

Mildly Dark #1 in bottles

Saturday was going to be a full brew day. Due to a few different reasons the brew didn’t go ahead. Ended up being just a bottling day.

Ian was going to join, but was heading out of town. Chas got back, but still has a lot of things to sort out. And I was sick last week, so didn’t have much energy to do a brew by myself. That’s also why there wasn’t a new 101 last week. This week we should be back on track.

Ended up taking me three hours. Was a slow sort of arvo, sanitising bottles in two batches. Two slabs of stubbies and an extra 12 mixed. Total of 60. Lucky ‘cos those were my last bottles. Every single one now full of beer. Probably a good thing I didn’t do a 23L brew like planned.

Final gravity reading came in at 1.024. That means after bottling it should sit at 4.7% ABV. Not as high as I was pushing for the last few beers. That said I’m happy with this as the Mild style isn’t meant to be that strong. Flavour wise it was a mix. I was hoping that it could be enjoyed as a young beer, as the style is suppose to be. My gut feeling is that this would take more than two weeks. That’s likely due to the dark malt that was added.

On a side note, tried out a bottle of the Baltic Porter #1 last week. Given it was less than two weeks in the bottle I was impressed. Should be quite a good drop.

-Mikey

Tagged , , , , ,

Brewing alone, and making a mess

Chas is still overseas, and will be for a couple more weeks. So this week’s brew, and next one in two weeks time, will be sans Chas. Next brew I hope to be joined by Ian, but this week it was just by my lonesome.

Like any normal brew day first thing is to bottle the last batch. So, most if the 10 litres of Baltic Porter #1 made it’s way into bottles. I say most because, (1) there was a gravity reading sample to be taken, and (2) there was an accident. The little thing that regulates the flow of beer (aka the bottling valve) fell off into one if the bottles as I was filling it. I freaked out a bit, thinking to get as much as possible into bottles before remembering there was a tap! Once things were under control again I reattached the bottling valve and had no more problems. Needless to say I’ve got some bottles that I’m not sure how they’ll condition, and they all marked with a question mark.

Final gravity came in at 1.021. That means after bottle fermentation it will sit at 7.2%. I’m very happy with that.

Mildly Dark #1

The Mildly Dark #1 sitting in the fermenter.

As this was a solo affair, had a sizeable break before brewing.
Back a few weeks ago when I picked up the ingredients for the Baltic Porter #1 there were a couple other things I picked up as they were on special. The main thing was the Mangrove Jack’s Mild kit. It’s a liquid malt extract and known for having some decent quality.
I also picked up some “factory second” dry malt. It was recommended to boil up the stuff for use. I just threw it into boiled water, and had a little problem getting it to dissolve.
Finally, had a can of dark liquid malt extract that I bought by mistake earlier on.

All up this was a kit with a lot of malt additions, both dry and liquid. Given the mistakes of the Australian Pale Ale #1 and Australian Amber Ale #1, I’m feeling a lot better about this brew. Given the extra dark malt I’ve dubbed this beer Mildly Dark #1.

Ingredients:

  • Mangrove Jack’s Mild kit
  • 500g “factory second” DME
  • 1.5kg Black Rock LME

Gravity ended at 1.056. Happy with that. If it ferments down to around 1.020 then the final ABV will come in around 5%, and that’s something to look forward to.

-Mikey

Tagged , , , , , , , ,

Dead Guy Dark Ale – Review

As the first darker beer that wasn’t a BrewSmith kit and the first 23 litre batch that wasn’t a lager, there was a lot riding on this being a success. I think we can say the Dead Guy Dark Ale met the challenge.

Dead Guy Dark Ale

Dead Guy Dark Ale in glasses

This is a dark ale. Not a brown and not a porter. It’s important to make the distinction because they are trying to do different things. Dark ales are generally the area between Brown Ales and Porters. Not as sweet/nutty/spicy as brown and lighter than a porter.

Up front there’s a dark sweetness aroma. Sort of like a caramelised sugar smell. It’s saying “hey, I’m pretty tasty so come and try”.
Lots of dark malt flavours. Not a huge body or overwhelming. There’s a slight sweetness across the beer which works well. Bit of smoke and darkness up front. The dark malt builds in the middle and then lasts quite a bit. Really enjoy this.

Would be matched with any meal that would be defined as “hearty”. Meat pie, beef casserole, thick spaghetti Bolognese, lamb roast, jacket potato, …you get the idea.

Because this is lighter than a porter it’s easy to drink. Works well as a food beer or to knock back at a party.

-Mikey

Tagged , , , , ,

New Brew for New Financial Year, Happy Brew Financial Year!

Yeah, I know that’s a bit of a crap name for a post. I did want to do something witty, didn’t quite get there. Plus, the other options were pretty bad.

Black Rock Miners Stout

Black Rock Miners Stout can and fermenter

As Chas mentioned yesterday it was a busy weekend. Last if the lager was bottled. Then 5 litres of the Newcastle Brown Ale went into storage while the other 17 litres went into bottles.

There were tastings of a whole range of brews. Cider, dark ale, lager and porter. Reviews will be slowly going up over the next week out so. And then there was a brew.

I wanted to make something simple and easy. And I wanted another dark beer. When I picked up the kit for Newcastle Brown Ale I also grabbed a can of Black Rock Miners Stout. Picked up some “stout booster” as well. On some good advice I also grabbed a pack of Windsor Ale Yeast to replace the kit yeast.

Yep, some would say it’s a step backwards in home brew. But when you are running low on time, or just can’t be stuffed, a can kit does fine.

First there was the can as the base. The “stout booster” was a kilo mix of dry dark malt extract, light malt extract, and maybe dextrose. And lastly threw in the 900 grams of Dextrose, which was left over from the original Heritage Lager kit.

  • Black Rock Miners Stout – 1.7kg
  • Brew Blend Stout Booster #25 – 1kg
  • Dextrose – 900g
  • Danstar Windsor Ale Yeast – 11g

Had a lot of trouble with heat on this one. Didn’t really pay attention to how much boiling water went in at the start. As a result, even after for trays of ice, we had to leave the wort cool for half an hour before pitching the yeast. The lid, with airlock, was put on to prevent infection. Overall it was a real pain in the arse. There is a good lesson in there about temperature control.

Final gravity was 1.045. I was hoping for more. That’s three brews in a row where final gravity was less than what I wanted. If I had thought about it, I would of thrown in all the rest if the sugar in the house into the wort. Probably for the best I didn’t think of that at the time. Next brew will have a lot more dry and/or liquid malt extract. Or, maybe just a lot of grain. Hrmm, there’s a thought…

The wort was more bitter than expected. But I’m pretty sure this one will be a nice, somewhat basic and somewhat light, stout.

-Mikey

Tagged , , , , , , , , , , , ,

Blondes and Browns, big brew day

Sunday was another brew day at my place and it was big, in many ways.

Newcastle Brown Ale

Newcastle Brown Ale ingredient list and instructions

First up was a trip for supplies from Australian Home Brewing, aka Liquorcraft, aka Brewcraft, aka something-something. We have done a fair few porters lately. They are pretty awesome and good over the colder months, but time for something else for the cold. An English brown ale was what I wanted. Ended up with a Newcastle Brown Ale kit, plus a basic stout kit for another day.

Then back in the Mikey mobile (aka ‘car’) and back to brew headquarters (aka ‘home’) for brew day.

First order of business. Bottle the lager. Final gravity was 1.012 which means the beer will only be 3.8% alcohol, after bottle conditioning. That’s a fair bit lower than what I was going for. Rather than just a cup of dextrose we should if put in half a kilo. That aside, the sample we took was quite promising. Should be a good session beer.

We have been having some over carbonation in a couple of my beers. Nothing horrid, but the IPA and coffee porter (only a couple sample bottles) have overflowed when opened if shaken even slightly. I’ve been using caster sugar for priming and a few people have suggested this might be the reason. That said there’s not a lot of info on the internet about different types of cane sugar. To test this I primed some bottles of the lager with caster sugar and others with carbonation drops. Had a mix of different bottle sizes as well.

After bottling the lager it was time to start brewing. Cracked open one of the Summer Citrus Blonde Ales and got stuck into it. Chas is going to get a review up soon, so I’ll leave it to him.

The brown ale was a mixed kit. There was chocolate malt (200g), a can of light liquid malt, a can of Nut Brown Ale, some Fuggles Hops, and Safale S-04 yeast.
The malt was left to steep for about 45 mins rather than the 20-30 recommended. Mainly because we were trying to do to much at once.

Chas got the liquid light malt in a pot and brought it to the hot break. And I cleaned the fermenter. Hops were added with the steeped grains. The recipe said an optional 400 grams of brown sugar could be added. Only had 300, but it went in. I finally finished cleaning the fermenter just in time for the fresh wort to go in. Last was the can of Nut Brown Ale. Like the lager, we found the liquid a bit to hot. Was a lot more manageable this time round. Finally, yeast went on and airlock.

  • Black Rock Nut Brown Ale – 1.7kg
  • Black Rock Light Liquid Malt – 1.5kg
  • Crushed Chocolate Malt – 200g
  • Soft Brown Sugar – 300g
  • Fuggles Hops pellets – 15g
  • Safale S-04 yest – 11.5g

Have to say that this was a bit of a hectic brew day. Started late and had a huge amount to do. Tried to do too many things at once. Even spilt some of the strained hops back into the fermenter. Luckily it wasn’t much.

The wort smelt great. Gravity reading was only 1.045 which is a bit below what I would expect for the style. Hopefully this yeast brings the final reading right down. Anything less than 4.5% and I’m going to be disappointed. So, a final gravity from about 1.012 or lower will be good.

-Mikey

Tagged , , , , , , , , , , , , , ,

Moving, from small to big

Back when I started looking into home brewing I didn’t know where to start. In my first post I talked about the two types of beer kits I got. I started with the smaller, and slightly more complex kit from Brew Smith. The beer was good, really good. So I stuck with it and made a few more.

Finally time came to do the other kit. The bigger kit. The simpler kit. And I’m worried about the quality. Chas picked up exactly the same kit and the lager turned out rougher than I would have liked.

To try and make sure my version turns out a bit better I decided to replace the dextrose with some liquid malt. Got some advice at Aussie Home Brewers and picked up some Light Pilsner Malt Extract.

The brew was done on Sunday the 2nd and went pretty smoothly. A little too much heat, which wasn’t a huge problem as I really wanted a good original gravity and had to play around a bit. The gravity reading wasn’t exactly where I wanted it, so a cup (75 grams) of dextrose was thrown in at the end.

First few days the beer has been fermenting away as expected. Has slowed down the last 4-5 days and plan to bottle this weekend.

-Mikey

Tagged , , , , , , , , ,

Thomas Coopers Heritage Lager – Review

TCS Heritage Lager 1

Thomas Coopers Selection Heritage Lager 1

Just over a month ago we did Chas’s first brew. It was a full 23L batch of Thomas Coopers Selection Heritage Lager.

Fermentation was only eight days, a fair bit quicker than the ones in the carboys. That’s more to do with the ability to be able to take samples easy and do gravity readings. While the brew is in the carboys you just need to wait long enough to be sure.

Original gravity was 1.038 and final gravity was 1.006. So that should be 4.2% which is a bit on the lighter side for a lager. That said I don’t think it made much of a difference.

So how was this first lager? Okay is the short answer. Not necessarily a good lager as it was just the hop malt can and a heap of dextrose.

There’s some alright aroma. But overall it’s a bit rough and ordinary. Some good flavours but no real body. Gets dry at the middle that keeps getting stronger, which isn’t great. Bitterness builds but it’s nothing special. A pretty basic but drinkable beer.

BUT, then we allowed the beer to condition for another week. That made a noticeable improvement. The whole lot started working better. Hop flavour wasn’t as harsh, malt felt more a part of the beer than on the side, and some of that roughness dropped away.

By no means did this go from okay to great, but more from okay to nice. And that’s really all we wanted from the first big batch beer.

Updated 29 May 2013: Added in the photo and the gravity readings.

-Mikey

Tagged , , , ,

First adventures – keeping things warm

Howdy!

So it’s been about five days since we did the brew I talked about in my last post, and I’ve been relatively happy with the progress.

As I mentioned in my previous post, there was some concern about keeping everything warm enough during the fermentation process.  We were also worried about the morning sun hitting the fermenting tub: the UV can harm your yeast and make generally bad flavours.  To solve these two problems, the brew spent the week wrapped in a blanket:

Beer needs to me tucked in nice and tight when it gets sleepy.

Beer needs to be tucked in nice and tight when it gets sleepy.

This worked surprisingly well.  The yeast manages to produce some of its own heat during the fermentation process, so this blanket kept everything in.  Although my house got as low as about 13 degrees C over night, the wort consistently sat at about 22 degrees C when I checked it in the morning.  It could be a little warmer, but this is still a great temperature. And it was relatively constant, so that’s great.

Another alternative I’ve heard being used is to place your fermenter in an old bar fridge (not on). Refrigerators are extremely well insulated, so this method will keep everything warm (or cool), and more importantly constant.

In warmer months, this method can also be used to keep things cool, just don’t leave the refrigerator on constantly, otherwise things will be too cool.  If you get a fancy enough fridge (or a wine fridge), you may even be able to set it to work at a higher temperature.

Generally, the higher the temperature, the faster the fermentation process is – to a point obviously; if things get too hot, you’ll kill your yeast.  According to the packet, the yeast we used has an optimal temperature range of 21-28 degrees C.  So since the we’re running on the lower end of that scale, the fermentation process will probably take about eight or nine days.

So next step: bottling!  But that’s still a few days away…

-Chas

Tagged , , , , , , ,