Category Archives: Experiments

Shopping, bottling, brewing, and not-beers

Was very keen to get this write up done early. And now it’s Thursday. Oh well.

Saturday was a funny sort of brew day. Had the Australia Pale Ale #4 to bottle and another 4 litre batch to produce. Then there were the not-beers, I’ll get to that later. Unfortunately there was no Chas. My good mate Ian stepped in again to help. That’s two brew days in a row, after not getting him over for the whole of last year!

Before any brewing or bottling a supply run was required. I headed around to Ian’s place. Then, after a coffee and breakfast, we headed off to Grain and Grape in Yarraville. I’ve been wanting to go to Grain and Grape for a while. For home brewers in Melbourne it’s a sort of institution, party because they’ve been around for ages, partly because they’re dirt cheap, and partly because it’s a bit odd. The place is small. Really small. And packed to the brim with stuff. Lots of equipment. And quite a few odd characters both in front and behind the counter. My only piece of advice, don’t go on Saturday unless you absolutely have to. It’s packed on Saturdays.

After leaving Grain and Grape we dropped some stuff at Ian’s place. Then I realised I didn’t pick up any speciality grains. So we went to Cellar Plus. It’s just north of the Vic Market. A lot more laid back place than Grain and Grape. Staff don’t know much about home brewing and the range isn’t the best. But you can pick up essential supplied, like the Crystal grain I was after.

Once done with supplies it was back to my place. First order of business was working out what to brew. Yep, left this one a bit late. Brew for the day was going to be one of three options; the next pale ale, an amber ale or an IPA. Ian was a last minute ‘yes’ to help out. If he was coming it would be something a bit more complex. If he wasn’t it was going to be something very basic. So, as Ian was there to help I decided on doing an IPA with Crystal grains. Had a look in the freezer and knew I had a lot of different hops. After playing around Kit & Extract Beer Designer spreadsheet I came up with an IPA recipe. Decided on a mixture with Warrior for bitterness then Aramilo, Citra and Simco. I’ve never used the last three and looking forward to tasting these. So, here we have the Australian IPA #1.

The steeping grains was the first order of business. Into a grain bag. Then Ian crushed them by rolling them with a rolling pin. Brought two litres of water to a bit over 70°C and chucked in the grain bag. Then we left it to go bottle.


Australian Pale Ale #4

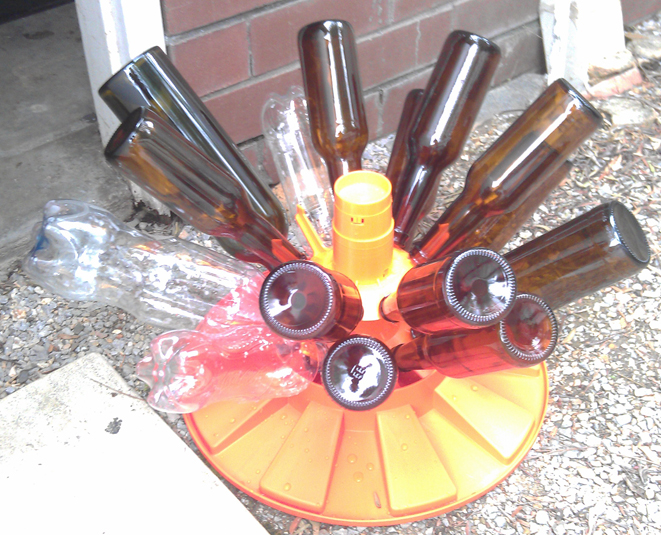
Australian Pale Ale #4 all bottled.

Bottling the pale ale was straight forward. Another bulk priming job from carboy to the small fermenter with sugar then using the tap to bottle. Nearly got this process down pat.

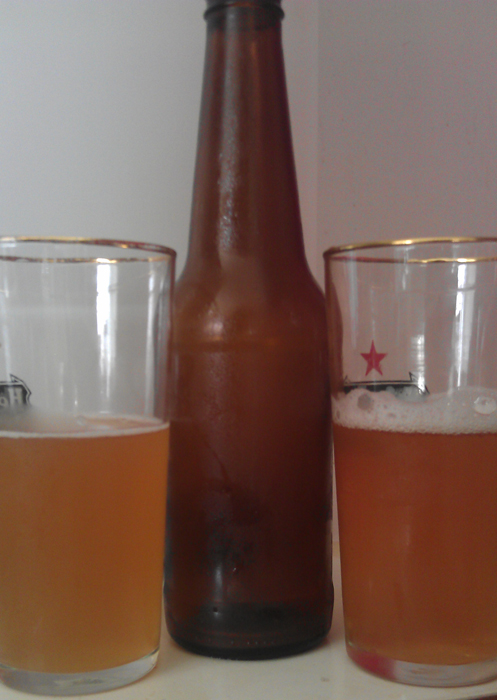
The gravity for the Australia Pale Ale #4 came in at 1.011. I was expecting a low reading if the original reading was right. But it came in a bit too high. I’m even more convinced that the original reading was wrong. Anyway, from the readings I have this should be 4.0% after bottling. It had a very pronounced grapefruit bitterness and dryness. Going to be interesting to see how this one turns out.

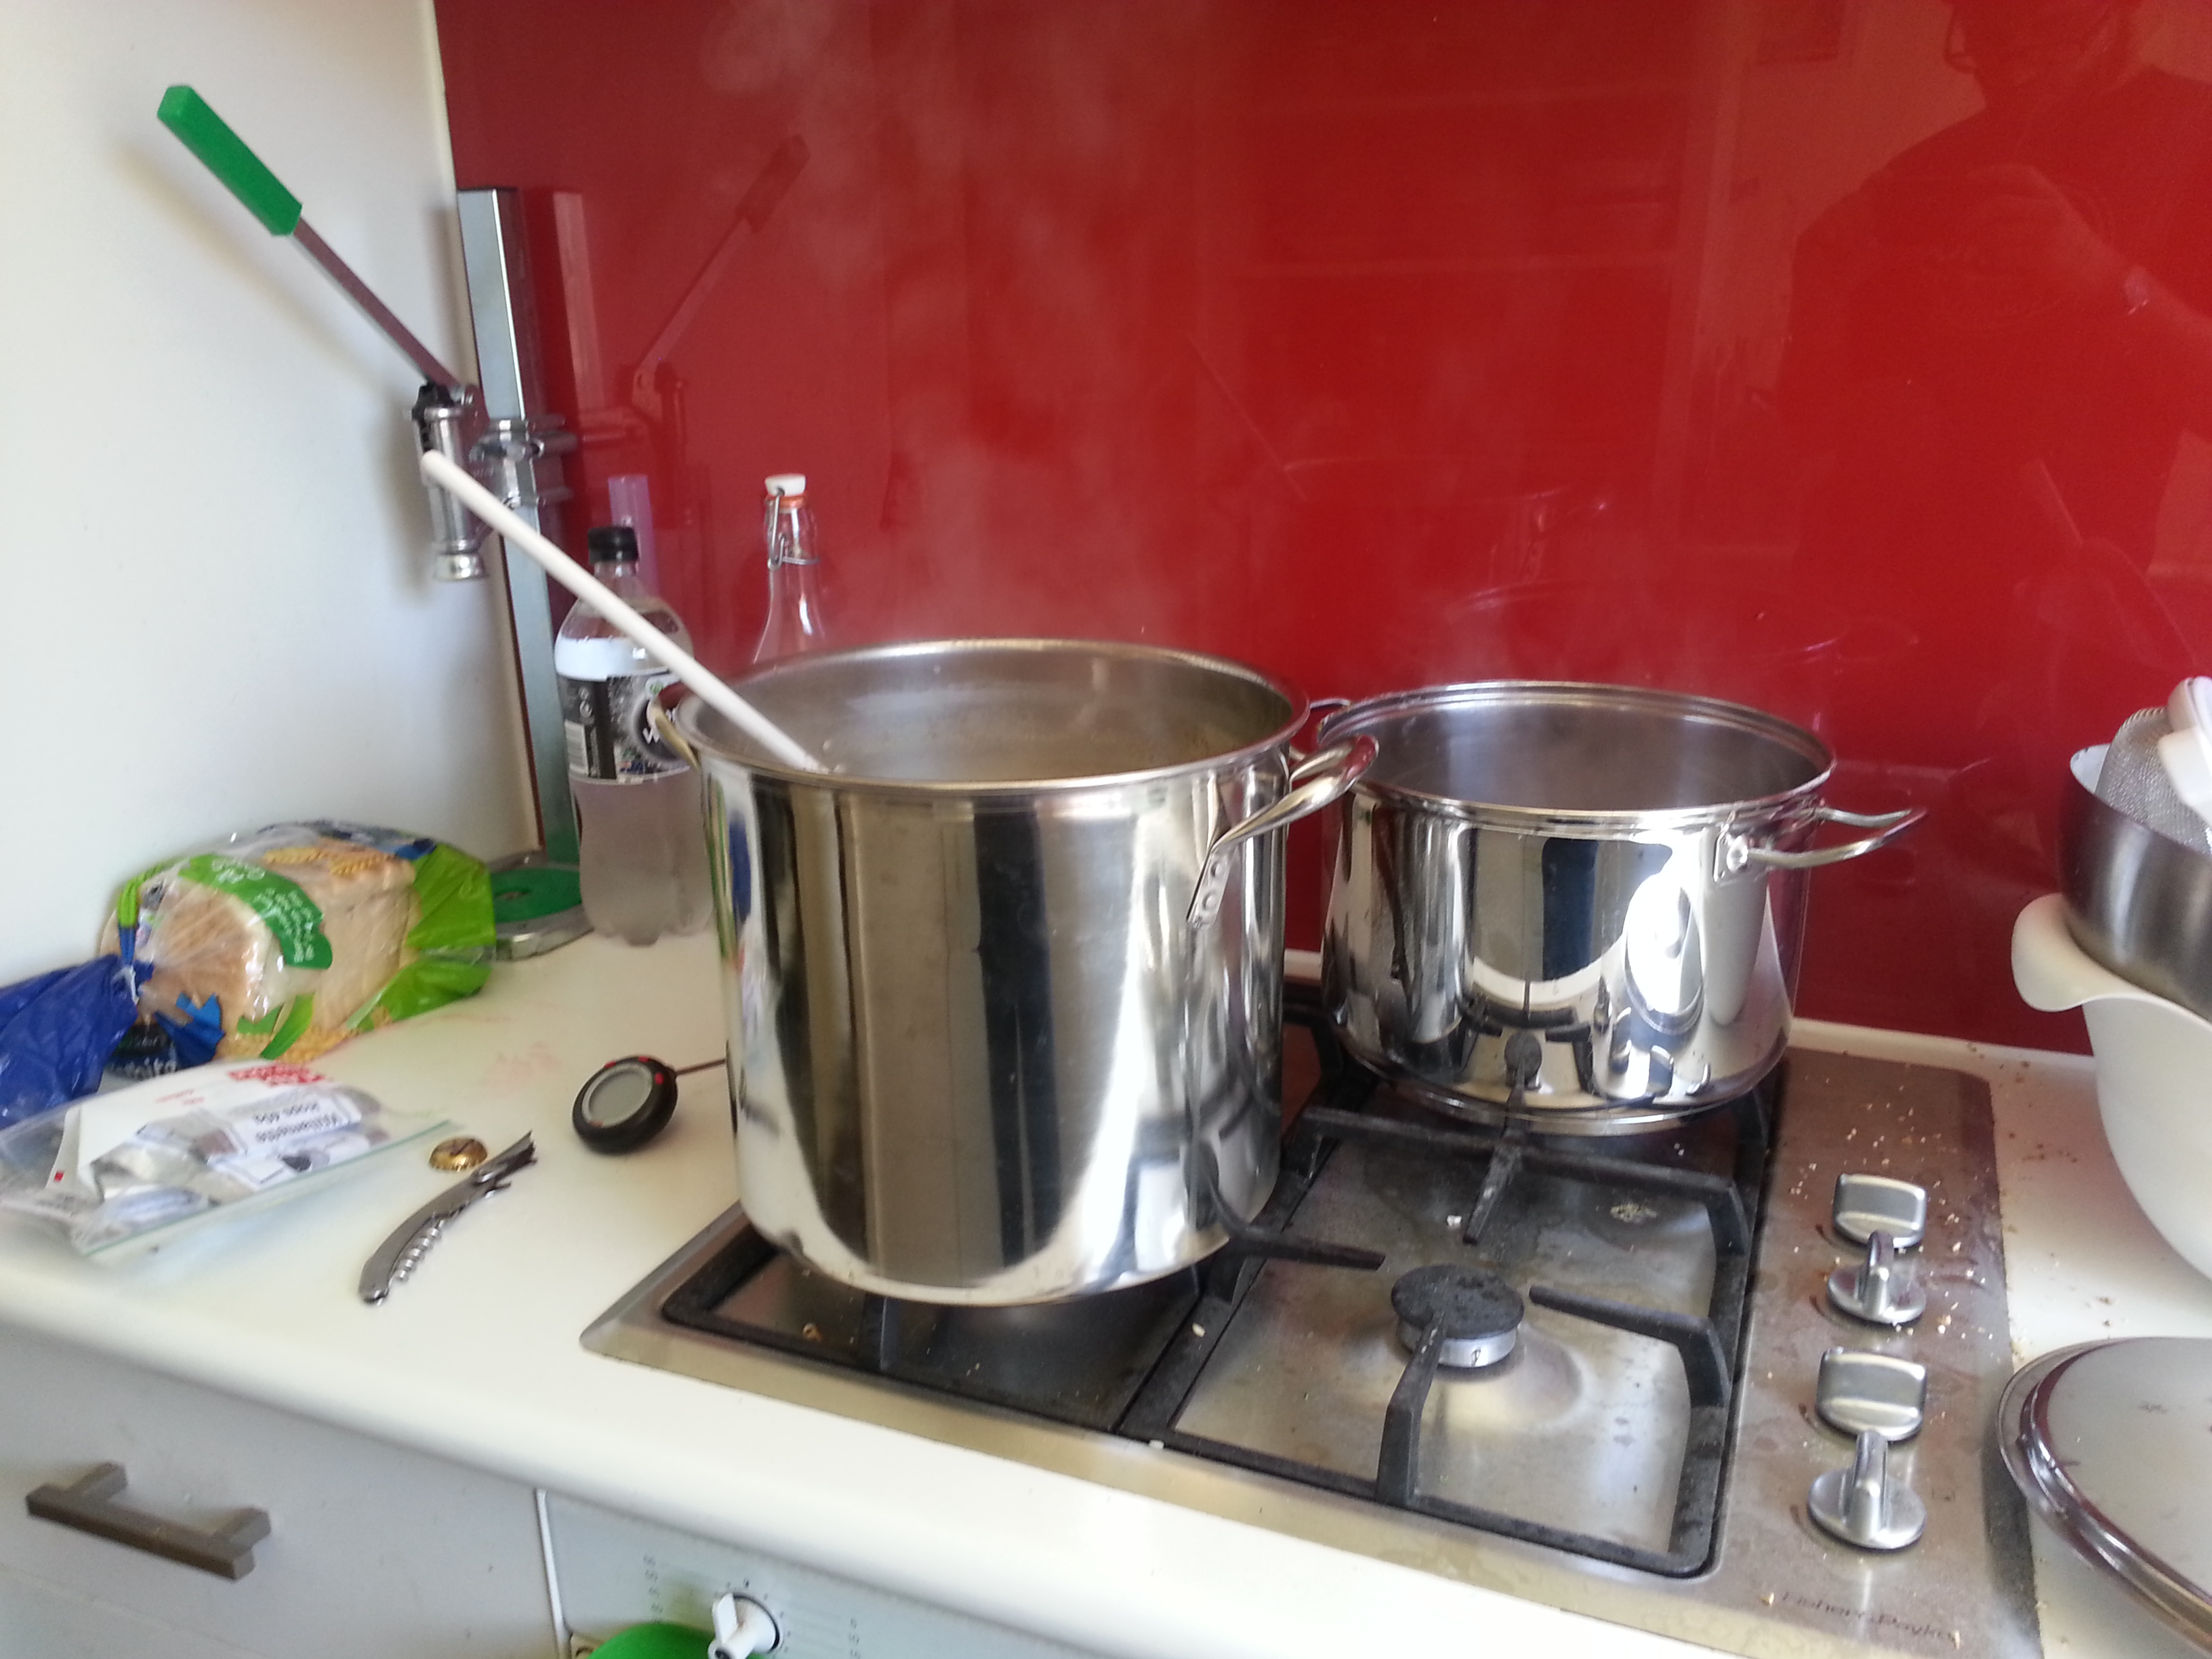
Once bottling was done it was back to the brew kitchen. The grains had sat for more than the thirty minutes, but that didn’t matter. An extra litre if water went in and we brought it up to a boil. About a third of the dry malt went in. After the hot break the fist hops. Next hops 15 mins later. Rest of malt went in with 5 mins to go. Then final hops at flame out. Not trying the “no flavour hops” method, yet.

  • 3 litre boil, topped up to 4 litre batch
  • 700 grams Light Dry Malt Extract (275g at the start, 425g with 3 mins to go)
  • 4 grams Warrior hops @ 30 mins
  • 3 grams Amarillo hops @ 15 mins
  • 3 grams Citra hops @ 15 mins
  • 2 grams Amarillo hops @ 0 mins
  • 2 grams Citra hops @ 0 mins
  • 3 grams Simcoe hops @ o mins
  • 1 Teaspoon of re-hydrated US-05 yeast
  • 1 Teaspoon of yeast nutrients

Dry hopping

  • 4 grams Amarillo hops @ 3 days
  • 3 grams Citra hops @ 3 day
Australian IPA #1 & not-beers

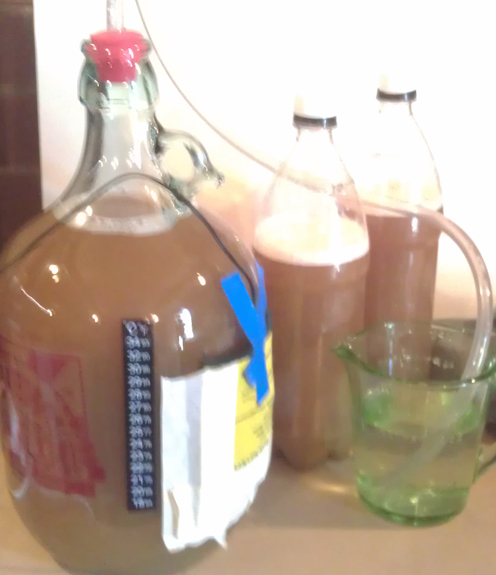
Australian IPA #1 and the two not-beers ready to ferment

Chilling went very well. The two litres of half frozen ice and just over half a tray of ice cubes went straight into the pot. The pot also sat in the ice bath to help further. When it came to getting the wort into the carboy I tried something extra. Used a muslin bag for extra filtering. Put this at the bottom of the funnel. So, pot into sieve on funnel in muslin bag in carboy. Should have got a photo.

Shook up the carboy before taking a gravity reading. Was a respectable 1.058, just shy of target. Yeast was pitched, yeast nutrient put in, carboy given another shake, and airlock put on. First brew done.

Onto the non-beers! Let me give you some context. My wife loves malty beers and doesn’t like hoppy beers. The question was raised “could you make a beer without hops?” Well, you could technically make a brew without hops. Not sure if you would still call it a beer. Not sure if it would taste any good. Anyway, I decided to make two very small batches of no hop beer.

Australian IPA #1 with hop bag

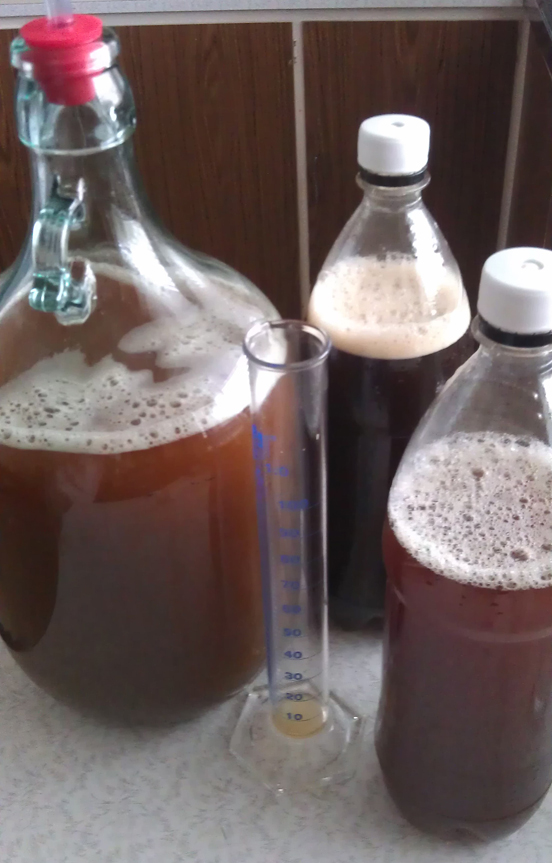
Australian IPA #1 after three days with the hop bag

The first batch was with dry amber malt extract. Very easy. Boil water. Chuck in malt. Bring it to a hot break. Heat off. Cool in an ice bath. Put in fermentation vessel. Pitch yeast. Add yeast nutrient. Shake. Seal with airlock. Done.

Second batch was done with dry dark malt extract. Both were about 1.2 litres. Both went into soft drink bottles with Pat Mack’s Home Brewing Caps. Perfect set up for these super small experiments. After fermentation I’ll put these in glass bottles to condition.

After three days I went back to the Australian IPA. Time to dry hop. Was planning a 4 grams addition of Amarillo and Citra with a 50/50 split . Worked out a lot closer to 4 grams Amarillo and 3 grams Citra. Whoops. Hope that’s not too much. Ah well, I can just leave it a month to settle before drinking a bottle.

Was quite a good day. Great to have Ian around again. Glad to do a brew with some grains again. And happy to get the not-beers fermenting, even if I’m dreading what they’ll taste like. Talking of taste, the wort for the IPA was very hoppy and undrinkable. Good a sign. Will let you know how that one develops.

-Mikey

Tagged , , , , , , , , , ,

Back with more everything, and the Secret

Enough feeling sorry for myself, time to brew. Back on Saturday 9th we had a brew day at my place. It was a huge fun day, even if the brew we made was only four litres.

I finally managed to get my good mate Ian around for a brew day. Chas made it and my friend Michael was able to join us as well, which made four on the day. More than needed to bottle the cider and the new brew. So, plenty of mucking around was had.

First order of business was bottling the Sneaky Cider. Was another bulk priming job, I don’t think I’ll go back to individual bottle priming. Cider from carboy into the small fermenter with the sugar. Then bottled straight from there. I decided to continue my experiments with soft drink bottles. We filled two 1.25L bottles and the rest filled six stubbies.

Gravity came in at 1.004 which I’m really happy about. Was trying to keep the sweetness low on this. Bulk priming was done with possibly a bit too much sugar, will see. End result should be a cider of 7.8-7.9%. That’s a big kick for such little effort. Nice.

Onto the beer. Due to the mess that is Melbourne weather, I wanted to make sure this brew could be kept cool like the cider. That meant another small batch in the carboy. So, picking up from where I left off it was time for another Australian Pale Ale experiment.

A bit of a side note, I’ve been a little obsessed the last six months or longer with a new Australian hop variety. It’s called Vic Secret (or Victoria Secret, depending on who you ask) and first time I had it in a beer I was blown away. This popped up back in 2012 in a collaboration beer simple called Victoria’s Secret by Beer Here and Northdown (now Edge). A single hop beer. I only had one bottle and really liked it. The beer has just been re-released under the Edge name, with a slight tweak to the recipe. Since then there have been a few other breweries bring out beers with this new hop type. Anyway, I have been trying to get my hands on this stuff so I can make a single hop beer. It’s been very hard to find with a lot of home brew shops not even aware it exists. Then finally a friend found a place that has some. And now I have some.

Australian Pale Ale 4

Australian Pale Ale 4 in the carboy (with ice packs) after 3 days

Australian Pale Ale #4 is a single hop beer. That hop is Vic Secret. The hop is quite high on alpha acid, the bitterness. I was using the same base, light dry malt extract, as I did for the last two Australian Pale Ales. Hop additions were done at 30 mins, 15 mins and 1 min. Nice and simple.

  • 3 litre boil, topped up to 4 litre batch
  • 500 grams Light Dry Malt Extract
  • 3 grams Victoria’s Secret hops @ 30 mins
  • 2 grams Victoria’s Secret hops @ 15 mins
  • 2 grams Victoria’s Secret hops @ 1 mins
  • 1 Teaspoon of re-hydrated US-05 yeast

Michael suggested that the middle hop addition isn’t needed. He’s been doing a fair bit of research into brewing, does a bit of home brewing and has been helping out at some breweries. The idea behind not doing the mid point hop addition is that you’re not really adding any flavour. You can get this from the last hop addition. And you get more bitterness from the first addition. Or that’s the theory. Might give it a go. Expect a post dedicated to this, at some point in the next few months.

Chilling was a quick one. Having these small batches makes it a lot easier. This time there was a lot going on. Two trays of ice and an ice cream container of half frozen water went straight in. The pot sat in it’s bath to chill with ice packs.

Gravity came out at 1.038. Was originally disappointed. There’s a good chance that the sample taken for the reading wasn’t the best. After pouring the wort liquid into the carboy I top it off with water. You’re suppose to shake it before taking a sample so you get something mixed. This wasn’t done. Comparing it to both Australian Pale Ale #2 (1.044) and #3 (1.046), this was low. To put that in a bit if context, the difference of 0.008 in gravity is approximately equal to 1% alcohol. That alcohol helps give the beer a better body. Hope #4 turns out fine.

Like the last few brews the yeast was rehydrated. Somewhere around 1-2 cups of boiled water was put in a glass jug, covered and left to cool. Not sure what it got down to, maybe as low as 25°C. Then a teaspoon of yeast was put in. And to speed things up a teaspoon of the dry malt was also put in. That’s a very small yeast starter. By the time it went into the carboy there was already a bit of a krausen, yeast head.

Yeast in, airlock on, carboy into the big pot of water. Done.

This was a really fun day. Great company, lots of drinks (review of the Iron Curtain Imperial Red Ale within the week), BBQ chicken for lunch, some really dodgy music, and not a tricky brew. Hoping there’s a lot more days like this in the future.

And I’ll be bottling tomorrow. Exciting.

-Mikey

Tagged , , , , , , ,

Red Dog Pale Ale 2 – review

It seams like only yesterday in put up the review for the Red Dog Pale Ale 1. And now here a we are with the second version.

Red Dog Pale Ale 2

Red Dog Pale Ale 2 ready for drinking

As Chas mentioned in the write up of the brew day, not everything went to plan. The main issue being that there wasn’t as much conversion of the grain to sugar as expected. The result was an original gravity lower than planned. I expected this to result in a beer that was thinner than first version, and also dryer. I was right about about one.

There’s a nice passionfruit aroma. Has hints of grapefruit and light malt as well. But that Doesn’t stay with you long. Taste wise it’s light and fruity at the front. Both grapefruit and passionfruit comes out across the length of the beer and lingers for a bit. Both drop away a bit too early. Next there the light body sitting  behind this all which helps give a slight creaminess at the back. The problem I have is that the body doesn’t hold up. As it drops out so does the flavour.

The bite and bitterness of the grapefruit is the main character here. Overall this is a really nice beer. It’s just the light body that drops off which lets the beer down. This is probably due to the issues with the grain.

For matching with food there’s a lot of options. As there isn’t a big profile here so the beer can work with a lot of foods that don’t have a really strong flavour. Chicken, fish & chips, Mexican food, most pub meals, salads and veggies, you get the idea. The beer would get overpowered quiet easily by any rich or dark food.

Despite the issues with the brew, this turned out well. Not a complex beer. This is one you can enjoy any day of the week, or have a few in a row.

– Mikey

Update: Corrected some spelling and gramma. Whoops.

Tagged , , , ,

Wired for fun, and heat

First up; wow, sorry, um… and ta-da! This post has been sitting as a draft for months! I’ve finally sat down tidied it up, added in the photos and sent it out to the wide world. So with that, onto the post…

Temp Control - unit on

Working Temperature Control unit turned on

Back in April last year I bit the bullet and bought a temperature controller. I picked it up on eBay for around $10 and a few weeks later it came in the post. It’s quite a small unit with a simple interface. The instructions are basic and just a single A4 sheet covers everything. And that’s where things stop being fun.

Temp control unit back top

The top back end of the Temperature Control unit

The wiring diagram is only a slight step up from incomprehensible with everything in Chinese as well as on the unit itself. Google searches for wiring diagrams on the exact same unit name/number were no use. Trying to find similar units was the first real starting point. Comparing what others had done with similar-ish units gave me an overview if what the wiring structure should be. Then it was a mater of throwing in words like “positive”, “negative”, “current”, “live” and the like into Google translate to work out the right way to wire the unit. Ended up Googling terms like “Chinese character for Positive” to confirm. After all that the unit finally got wired.

Temp control unit wire up

Back of the Temperature Control unit all wired up and ready to work.

Plugged it on and turned on the mains. Let’s just say that it wasn’t wired right the first time, and move on. An not one word about who wire it… A bit more time on Google and everything was sussed. Turned on and worked fine. There is a sensor on a wire which measures the temperature. My original idea was that this would be dropped directly into the wort. Then after a few discussions with fellow home brewers I decided to take their advice and put it on the side.

One noble, and rarely used, stubby holder gave up its life to be used. The ex-stubby holder was placed on the side of a fermenter and stuck down with a whole lot of masking tape. Then the sensor was placed between the fermenter and ex-stubby holder . Overall effect is that the sensor can read the temperature and insulated from everything else. Plus, its nice padding to prevent it from being damaged.

Temp control unit in action

Temperature Control unit set up with carboy and heating blanket.

The unit works by having a set temperature. Then there is a range, or threshold, above and below. Once the actual temperature is beyond that temperature range it turns on the power to the “thing”. This can be for heating or cooling depending on what device is attached. If you plug in a heater and have the unit set to heat then once it’s below the set temperature the heater turns on. Neat. This can be done for cooling as well. The temperature control has a minimum plus/minus range of one degrees Celsius. What that means is when I set the temperature at 21°C it can drop as low as 20.1°C before the heating kicks in. And in theory it could get up to 21.9°C before turning off, but in reality it doesn’t go that high. So, the unit has a bit of flux which isn’t ideal but also isn’t too bad.

This unit only has one switch it means it can heat or cool. It can’t do both at the same time. There are a few units out there that do both and you can find them pretty easily. I was just a bit lazy, and cheap. Plus I’m not sure when I’de need both working. But if I ever do then I might just pick up another unit.

Temp Control sensor on carboy

Temperature Control unit sensor on carboy. It’s under the sliced up stubby holder, which is tapped to the carboy.

Am I happy with the unit? Yes. Was it easy to get set up? No, but proper units with English instructions exits. And for those of you who are not, can’t not find, and still need to find a certified electrician… there’s units out there that don’t require wiring which do the job well and safe.

I recommend any and all home brewers who are after good flavour beer to get some kind of temperature control. It doesn’t need to be a unit like above, it might just be a cool and stable room in the house/shed. Big changes in temperature and high temperatures makes a (negative) difference to the taste of your beer.

-Mikey

Tagged , ,

Sneaky cider, keeping it cool

Exactly two weeks ago I made another cider. Yeah, I know I’ve been complaining that I haven’t done a beer for a while and then I go make a cider! This was a little experiment in keeping something cool enough over summer months. While it hasn’t really been that hot, or even warm, things have gone well.

The cider itself is a real basic one. One litre of apple juice and 1.4 litres of apple & pear juice. Added in sugar, yeast and yeast nutrient. Whole thing done in about 10-15 mins. To speed up the process I used the blender to mix sugar into juice, one litre at a time. As there’s no boil everything has to be sanitised, including the blender.

What’s in Sneaky Cider #1?

  • 2.4-2.5 litres of apple and pear juice (Berri)
  • 1-1.1 litres of apple juice (Golden Circle)
  • 180 grams of white table sugar
  • 1 teaspoon of Premium Brewer’s Yeast (Pat Mack’s)
  • 1 teaspoon of yeast nutrient

Learning from the mistakes of the last cider attempt, I kept sugar levels low. Worked out being only 20 grams per litre rather than the 120 grams per litre or 200 grams per litre of the last attempts. This should help in two ways. First it will keep the alcohol levels down to something considered normal. Second there shouldn’t be anywhere near as much left over sugar which will keep the sweetness down. It’s the second if theses that I’m really interested in. Last time it was undrinkable when first sampled. Then only just drinkable when it was done, but not for everyone.

Sneaky Cider #1

Sneaky Cider #1, in the carboy, in the water, in the pot

The really exciting part of the cider isn’t the recipe or how it might turn out. No, the real thing is the makeshift cooling set up. I’ve got my new big pot with water then put the carboy into it. The water goes up to about the same hight as the liquid in the carboy which means it works as insulation. That’s pretty sweet. But the best part is that I can drop ice packs into the water to chill the water back down, like during the day. And that’s what I did. For about a week and a bit I dropped 2-4 ice packs into the water every day. Well, nearly every day. The result was that the temperature ranged from about 17 degrees Celsius up to about 19 degrees Celsius. Not great control but, still good.

Now just gone two weeks I’m leaving the whole thing to do it’s thing before bottling this weekend. I’m half hoping as it gets warmer it encourages the last of the yeast to kick in or drop out. Not really sure how that stuff works, even after over a year of mucking around with the stuff. Then I’ll give it two weeks before we try and let you know how it turns out.

-Mikey

Tagged , , , , , , ,

Return of the Red Dog Pale Ale

Back in October we made a small batch of the Red Dog Pale Ale and enjoyed it so much thought we might up it to 12 litres.  It was a good brew day and a great way to get back into it for the new year, but I think we bit off a bit more than we could chew.  The main lesson: we need bigger pots if we’re going to try an all grain above about six litres…

The recipe we did is the same as what was posted the first time, so I’m not going to both to re-post the recipe.  The first time we did it we only did four litres, this time it was twelve litres, so we just did three times as much of everything…

This resulted in a total grain bill of about 2.4 kilos, so we wanted plenty of water to mash in.  Unfortunately the biggest pot I have is about nine litres so we were only able to mash with 7.8 litres of water without filling the pot too much.  As with the previous recipe we mashed for 90 minutes at 65 degrees, which seemed to work well last time.

After an hour long boil with hop additions, we were left with an OSG of only 1.034, which was much lower than last time’s 1.042 (which had been watered down by mistake!).  I think that due to the pot size we were unable to get adequate water to all the grain; we were still attempting the brew in a bag technique which was probably inappropriate for this sized grain bill.

Red Dog IIShould we try this again I think we’ll need two things: at least one bigger pot to do the boil in and probably a proper mash tun.  This would really make things a whole lot easier and we’ll be able to use much more water for mashing.

The other problem we ran into was during the cold break.  By the end of everything we had about eight litres of boiling water, and we wanted to get it cold fast.  Our usual method of giving it a bath in the sink – even with some ice added – failed to get the temperature down in a reasonable amount of time.  We’ve had trouble with this before, even with smaller batches.  I think I have an excuse to buy a wort chiller now though!

All in all it was a great brew day, and as mentioned a great one to get back into it for the year – with no bottling, a long mash, and a bit of time between hop additions, there was plenty of down time!

We’ll report back in a couple weeks to see how the beer turned out, but I’m not too optimistic!

– Chas


Tagged , , , , ,

New equipment is fun, and some bottling

Christmas was good for me. Got a couple vouchers for home brew shops. Yay. Oh, and the Australian Pale Ale #3 needed to be bottled. Was a bit distracted, and a bit lazy, so only got around to bottling on Thursday.

Bottling Tree

Bottling Tree with just the first two levels and full of bottles.

As I had some hot vouchers in my hand I went down to Australian Home Brewing to pick up some new equipment. First thing was a bottling tree. I’ve been wanting one of these for a while. Will be using it for both bottling days, and cleaning bottles. So, this is something I’ll be using a lot. As you can see from the photo I’ve only put the first to parts on, it’s all I need.

Also picked up some hops, bigger capper with caps for big bottles and a small 15 litre fermenter. I’ll keep the hops under wraps until start brewing with them. Tried the capper on a wine bottle I had saved, didn’t quite work. Will be looking for the right bottles in the future. The small fermenter is really useful as I can use it for bulk priming, like for this brew, or other brews between the carboy and 30 litre fermenter.

Bottling took a fair bit longer. Partly because I was trying new equipment and partly because I kept getting distracted. The carboy was poured directly into the small fermenter which had the dissolved sugar. Hopefully I didn’t get too much air into it, I think I might. Hopefully I didn’t get too much trub transferred, I’m pretty sure I did. Again, I split the bottling up into some stubbies, a bigger 500 ml bottle and some plastic bottles.

There were also two 1.25 litre bottles with the brewing caps. Just to see what happens I’ve decided to leave one bottle as it for condition. The other bottle I transferred into a new bottle and left the yeast/trub behind. That second bottle is sealed and without any extra sugar for carbonation. Strange, the beer from the bottle that was transferred wasn’t that carbonated. So, this could go either way.

Australian Pale Ale 3

Australian Pale Ale 3 in original bottle, gravity reading and re-bottled.

Gravity reading was really good, 1.012 for both the carboy and 1.25 L bottle. That means the beer from the carboy will end up about 5.0% with the bulk priming, while the 1.25 L bottles will remain at 4.5%. That’s pretty good. Plus the flavour was good. Quite a bit of orange flavour with some other citrus and other fruit. Hints of some floral and grassy notes. Will be interesting to see how it all settles down.

Given the heat in Melbourne is finally starting to kick in there’s not going to be another brew at my place for a bit. That might change if I get my act into gear and sort out a brew fridge. Will keep you all posted.

-Mikey

Tagged , , , , , , ,

Red Dog Pale Ale – review

Moving from kit & kilo brewing to extract brewing was pretty easy. Moving from extract brewing to partial mash was a little bit of a jump. Moving from partial mash to full mash (all grain) was another jump. The Red Dog pale ale was the first full mash beer, and done by Chas.

Red Dog Pale Ale

Red Dog Pale Ale in glasses and ready for drinking.

I’ve had a few bottles of this lying around the house. But it wasn’t until Chas came over to help with the last brew at my place that we finally sat down for a proper taste test.

Was really impressed with the aroma. There was plenty of stone fruit aroma from the Chinook hops. Very good smelling beer.

Then onto the flavour, smooth creamy body and flavour. This is a really easy drinking pale ale. The fruit and malt flavours blend quite well without being wishy-washy. There’s a slight bitterness at the back. And, a hint of spice. Both of those don’t take anything away form the smooth creamy feel of the beer. Rather, they add some sharpness in places. Alcohol content came in at 6.9%. That’s a lot more than the beer gives away. It works to help keep the body big without punching you with that harsh alcohol taste.

Overall this is a very well built beer. There’s a mixture of clean and complex going on without being all over the shop.

Really nice beer to have with most foods. It would work great with seafood or fried food. Fish and chips would go great. Also good with fruit or salad, really anything that’s clean.

This beer was the first all grain brew we’ve done. And it turned out great. Expect a lot more all grain brews, especially from Chas.

-Mikey

Tagged , , , ,

The Friedlieb, Coffee Porter II – Review

What an amazing beer. Best beer we’ve ever made? Pay attention and you’ll find out.

The Friedlieb II is the second coffee porter from Chas. The first one was done back in June and turned out pretty good. I had some issues with the sweetness and Chas wanted more smoky-ness. This version didn’t address the smoke but sorted out a few things.

The Friedlieb coffee porter II

The Friedlieb coffee porter II ready for drinking

Now, I’m giving away a bit here, normally I will have a glass of this beer with me when I type up the review. But for this one no such luck. I wasn’t around when Chas bottled the beer and he only brought around one beer when we tasted it back on Sunday 15th. So, I’ll go by my notes and memory.

First up there’s a huge coffee aroma. There’s some hints of chocolate and sweetness as well. This beer smells like exactly what you would expect from a coffee porter. That’s a big plus. Flavour. A dark creamy hit on the palate is the first thing you notice. Plenty of coffee the whole way through this beer from start to end. Lots of full body and big dark malt flavours. So smooth across all the flavour. There’s a chocolate builds up from about the mid point which works well with the coffee and dark malt. And there’s just enough bitterness to hold it together without any noticeable hop flavours.

The beer came in at 7.3% alcohol. Quite a respectable amount. With the coffee in there and so much grain flavours it could of gone any way. Lucky for Chas it worked out a treat.

Matching this beer to food is really hard. Not because it’s a dark beer with lots of coffee and hints of sweetness. It’s because it’s so amazingly good. You really want to drink it by itself. It could work with any rich or roasted food. Dark meats or big robust vegetables. Something with a dark sauce like red wine or gravy. Other option is to have this as a dessert beer. Possibly the perfect dessert beer.

So, is this the best beer we’ve ever made? I think the answer is a resounding YES! (Chas, bring me some more!)

-Mikey

Tagged , , , , ,

Wait, what hops was that?

Last Sunday was a brew day. Yay! Fun times with Chas. Let’s plan this, and then make lots of mistakes. Um, that’s not so great.

This brew day was a continuation from Australian Pale Ale 2 and my search for an easy to brew tasty Pale Ale. After bottling on Friday, and having a sample taste, I knew that the next attempt needed to be a multi hop brew. And that meant different hops at the same times.

As well as trying a new recipe, I wanted to use the brewing caps again. That meant upping the volume of the brew. That caused some issues I didn’t realise until Chas pointed out. I’ll get to that later.

Australian Pale Ale 3

Australian Pale Ale 3 in Carboy and bottles with brewing caps

The brew was based on the Australian Pale Ale 2 and was a 30 min boil with light dry malt extract. Given the bigger volume of water there was more ingredients. Measured out 800 grams of the dry malt for the base. As most of my Galaxy hops went in the last brew I picked up some new hops. Warrior hops for bittering. Crystal hops for flavour and aroma, to be topped up with the last of the Galaxy. All three hop additions were measured out and ready to go.

First up get water to a boil and add the malt. Then after the hot break in went the first hops. Then… Um, what hops was that? A quick review of the bowls with the hops… Yep, that was the aroma hops. Crap. Okay, now what?

After a bit of running around like a crazy person I did some recalculations. New schedule with a new set of aroma hops, being just Crystal. Back to the brew. Added the original bittering hops. Flavour hops went in. Then at flameout in went the aroma hops.

Moved the pot to the ice bath for chilling. Have got a lot better with the chilling of theses small batches. Four trays of ice cubes and about one litre of near-frozen water. Works pretty well.

Then realised the volume issue(s). Given this was a three hop brew I wanted to make just a little more. So, four litres fot the carboy, then 2.5 split into two 1.25 litres plastic soft drink bottles. And that’s where the problem started, there was too much for the carboy. Solution was to use the 30 litres fermenter. Poured all in and topped up with cold water to required 6.5 litres. Oops, forgot to strain the hops out. Poured back into pot. Added yeast. Oh no, forgot to take gravity reading. Do that.

Finally ready to transfer into the bottles. Filled both, not quite to the top. Then filled carboy, and there was too much! Because the bottles weren’t filled to the full 1.25 litres there was well over 4 litres for the carboy. In the end we filled up the carboy to a few centimetres from the top and only threw out a tiny amount of the wort. Thank goodness for blow off tubes.

  • 4 litre boil
  • 800 grams Light Dry Malt Extract
  • 1 gram Galalxy & 2 grams Crystal hops @ 30 mins
  • 4 grams Warrior hops @ 25 mins
  • 2 grams Galaxy hops & 6 grams Crystal @ 5 mins
  • 2 grams Crystal @ flame out
  • Teaspoon of re-hydrated US-05 yeast

The Australian Pale Ale #3 ended up tasting quite grassy with some really well rounded spice. A fair amount of hops left after even after filtering. I’m happy with this. The gravity came in at 1.046 which is exactly what was calculated. Mind you, that did include the yeast, so we’ll wait and see.

-Mikey

Tagged , , , , , , , , , ,